ModBlossom QAL-Week 5: Putting It All Together!

Welcome back to the last week of our ModBlossom QuiltAlong! This week is all about putting it together so whether you’ve just made a few blocks or all (12) blocks – I’ve got some different layouts to share with you.

There’s no companion video to share with you this week as the pictures below kinda say it all! So let’s get started!

Now that you’ve made Flower & Leaf Blocks it’s time to put them together. You’ll note that the pattern does not call for any sashing strips in between blocks but if you’d like to add one – absolutely, it’s your quilt and you can do what you want 🙂 – it will make the blocks “float”.

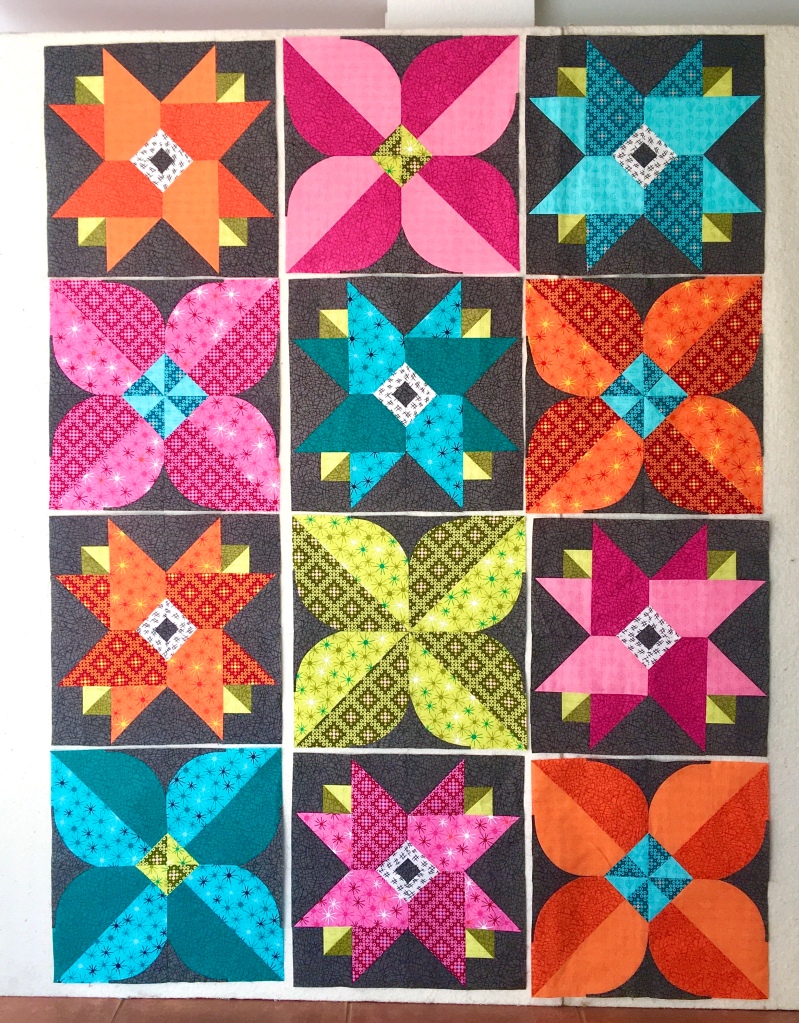
If you’ve made (6) of each block or a total of (12) – you’ll of course have way more layout options, but I’ve given you some ideas below if you’ve only made two or three of each so let’s take a look! Please note that these pictures DO NOT have the outer border – of course once you decide your layout add 3″-4″ outer border strips on all four sides of your quilt top which will again make the blocks appear to ‘float’ in the background.

Layout #1 – A Small Baby Quilt (6 blocks) – this will measure 36″ x 54″ without borders

Not pictured – you could also just place (4) blocks together in a four patch and have a nice sized baby quilt as well measuring 36″ x 36″ without borders.

Layout #2 – A Small Lap Quilt (9 blocks) – this will measure 54″ x 54″ without a border

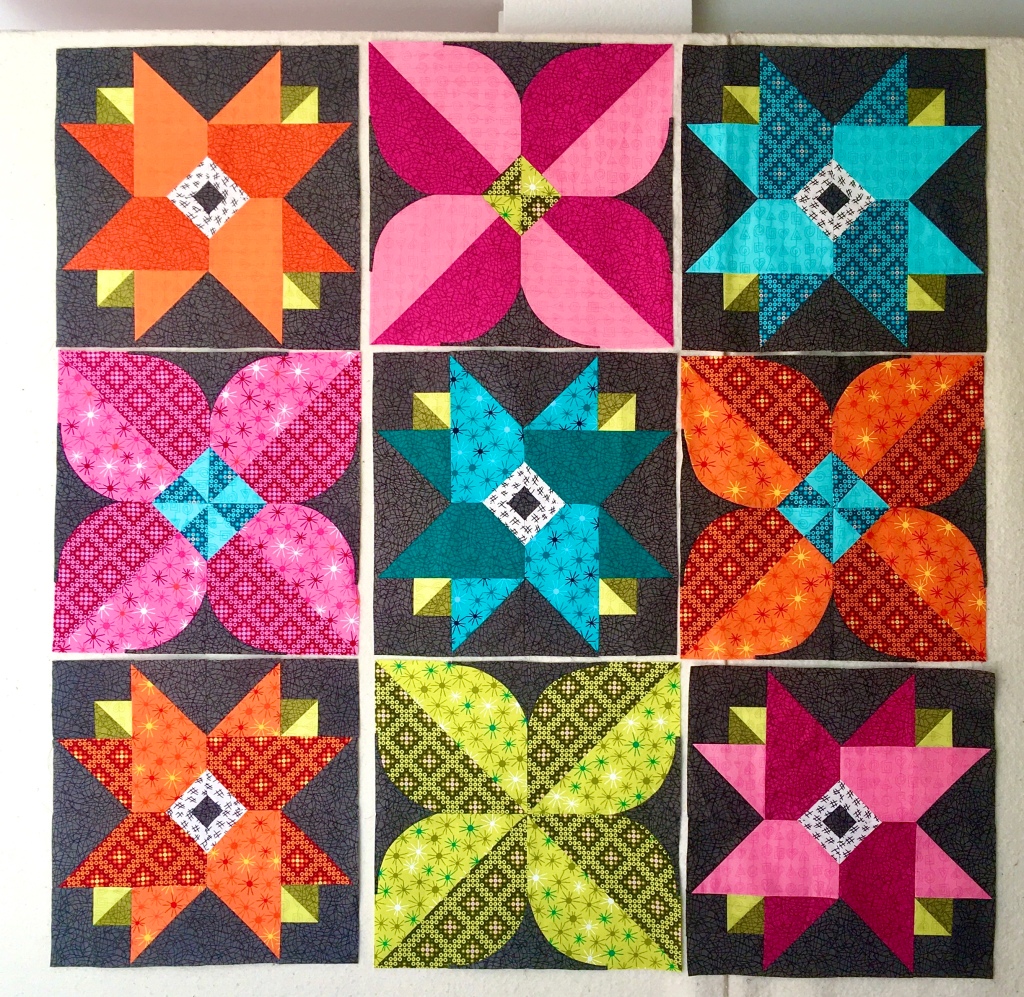
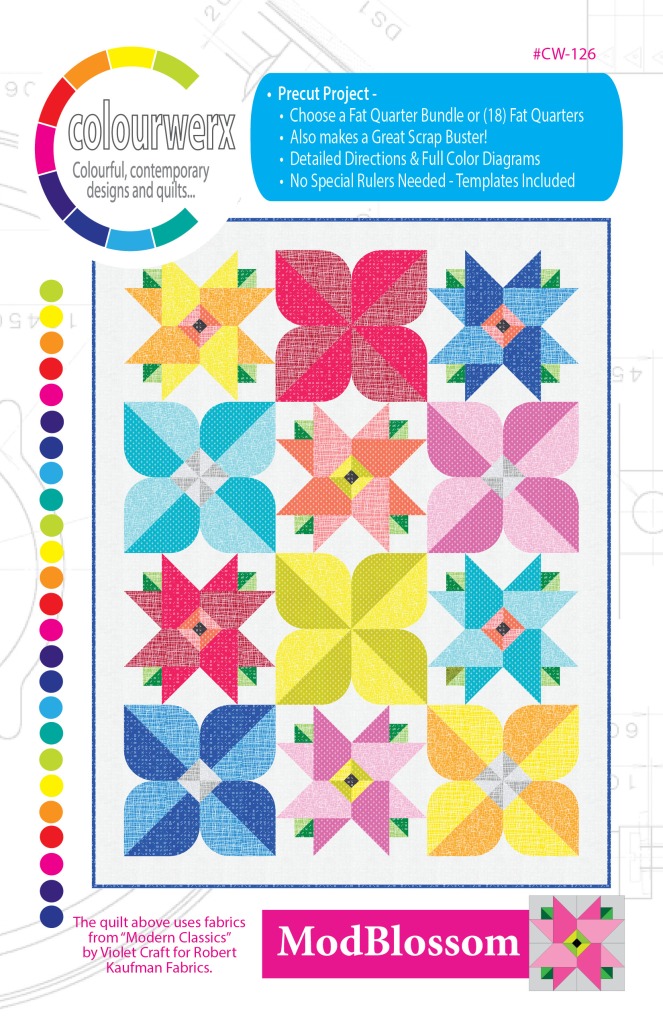
Layout #3 – Large Lap Quilt (12 blocks) – this is the pattern cover quilt and will measure 54″ x 72″ without borders

Layout #4 – Large Lap Quilt “On Point”

Lay out the blocks “on point” – I love this version and just wished I had planned this out more to make additional blocks in other color ways – To fill in the side triangles, from your background fabrics, cut 19″ x 19″ squares – cut each background square in half diagonally to create 2 triangles; and then stitch the triangles on to the beginning and end of each diagonal row! Looks complicated but it’s not!

You could use this “on point” layout even if you made fewer blocks!

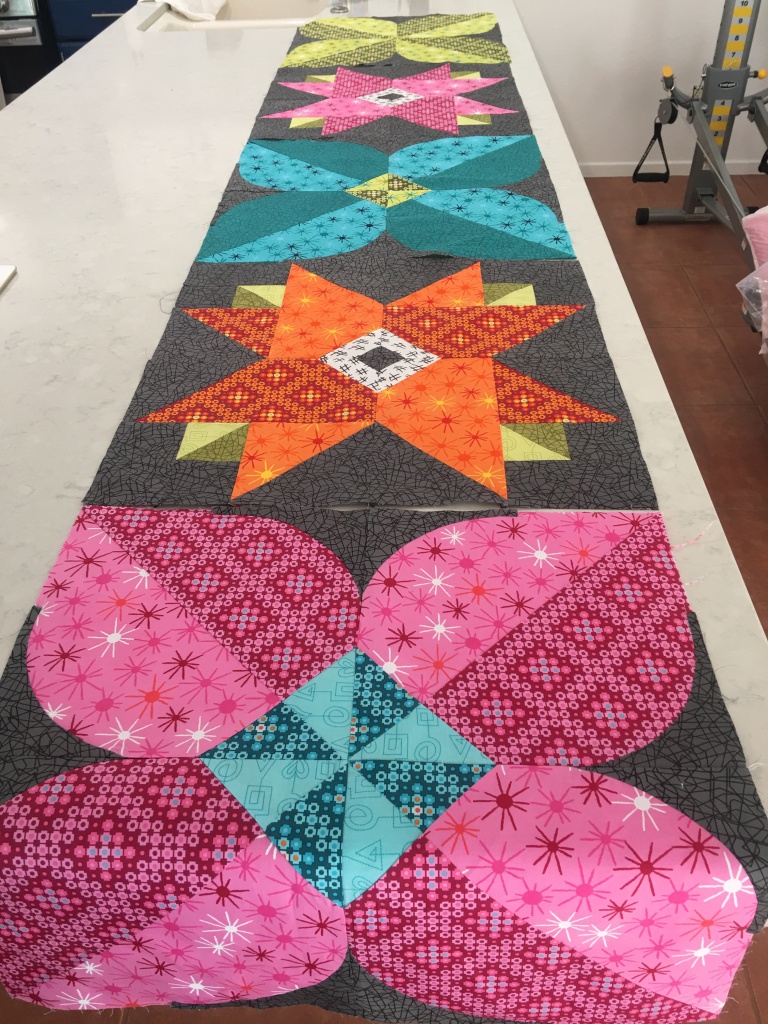
Layout #5 – Table Runner (5-8 blocks)

This will measure 18″ x (x)” without a border pending how long you want your table runner.

Of course you can also make large throw pillows from each block. I would plan on adding a small outer border and use a 24″ pillow form so the actual block is showing on the front of the pillow and is not being wrapped around the edges of the pillow form.

So whatever way you choose to layout your completed ModBlossom blocks – I hope you’ll share a few pictures with Carl and I of your finished creations! Thanks so much for stitching along with me!

This concludes out ModBlossom QuiltAlong – I hope you enjoyed it!

mouth21

Look for more Colourwerx QuiltAlongs on our Colourwerx Facebook page or on our website under QuiltAlongs!

Until your next colour fix – happy quilting!  Linda & Carl xxoo

ModBox QAL Week #4 – Put It All Together

Welcome back! It’s the last week of our ModBox QAL and it’s time to put it all together and finish your quilt top! Hurray! There will be no companion video this week as this week is simply about piecing your quilt top all together – pretty easy !

By now you should have laid out your blocks from Week #3 in color order according to your fabric color key and also placed the background fabrics #1 & #2 sashing strips in place in between the colored blocks (refer to Fig 8 & 9 in the pattern). Remember to alternate your background sashing strips from block to block following the layout diagrams in the pattern. See my first vertical row laid out in the photo on the right.

START TO PIECE THE FIRST VERTICAL ROW TOGETHER –
Referring to Fig 9/page 5 of the pattern, notice that each vertical row is made up of a left column of blocks and right column of blocks. First things first, starting on the left side, piece the background sashing strips to each of the colored blocks (similar to how we pieced the colored strips to these blocks in last week).

Here’s my first block in the first vertical row on the left side with the sashing strips laid around it and then stitched together.

Make sure to double check the unfinished size of these blocks and trim them down if needed (refer to page 4 of the pattern).

Also be sure to follow the pressing instructions so your seams nest nicely together when you stitch the rows together – remember: when stitching Background Fabric #1 sashing strips on each block, press all seams toward Background #1 (or the white fabric in the diagram), and when stitching Background Fabric #2 strips on each block, press all seams toward the colored blocks!!

Once you have the background sashing strips pieced on your colored blocks, stitch the blocks together in a vertical row or create a column of blocks. Make sure you keep double checking your fabric color key for the order of your blocks. Nest and pin the seams together from block to block.

Then repeat on the right hand side to form a second column of blocks, and finally stitch the the two vertical columns together to form your first vertical row of blocks. Repeat the above on additional rows if you making the Large Lap size or the Baby quilt. Be sure to press all the seams to one side.

IMPORTANT!! PIECE THE RIGHT SIDE VERTICAL SASHING STRIPS –
Before stitching the vertical rows together, don’t forget to piece together and attach to the right hand side of the vertical row the long sashing strip made up of the (7) 2-1/2″ x 12-1/2″ background fabrics 1 & 2 as shown in Fig 12.

I must admit I get so carried away with getting the quilt top complete, I always forget this vital step and then end up seam ripping my vertical rows apart in order to add back in these long thin sashing strips. Argh! And double argh!!

Also note if you are making the Table Runner, this would be your final step and your quilt top is complete!

FINISH THE QUILT TOP –
If you are making the Large Lap or Baby Quilt, once the vertical rows are complete, simply stitch the first row to the second row and second row to the third row, and then your quilt top is complete! Yay! Here’s a sneak peek of my quilt top in that gorgeous Kaffe Fassett! I love it!

This concludes out ModBox QuiltAlong – I hope you enjoyed it!

mouth21

Thank you so much for following along and for your continued support!  Look for more Colourwerx QuiltAlongs on our Colourwerx Facebook page or on our website under QuiltAlongs!

Until your next colour fix – happy quilting!  Linda & Carl xxoo

ModBox QAL – Week #3 – Piece the Block

Hello, hello! Welcome back to Week #3 of the ModBox QuiltAlong! Finally – the week we’ve been working for – this week we start to piece the blocks together and let me tell you, they go together in a breeze!

By now, you should have decided upon the colour order of your fabrics, precut the fabrics and then grouped the colour combinations together. If you are need to refresh or are just joining in, check out Week #2’s blog post right here!

As always there is a short companion video tutorial as well. You can view the video here!

STITCH YOUR FIRST BLOCK –
Grab your first set of Fabric “A” blocks combined with Fabric “B” strips. Remember: All seams are scant 1/4″ (which is a hair less than a full 1/4″ seam). Following the directions on pages 3 of the ModBox pattern, stitch the Fabric “B” short strips to the top and bottom edges of the Fabric “A” block. Press the seams towards Fabric “B” – then stitch the remaining Fabric “B” longer strip to the left edge of the unit. Be sure to measure the block and trim it to match the benchmark measurements included in the pattern on page 3.

That’s it! Super easy! Now continue on piecing blocks in this manner until you have pieced all the blocks and strips together. Make sure you keep the fabric combinations together of blocks and strips you created in Week #2!

LAYOUT FIRST VERTICAL ROW FOR PREPARATION OF WEEK #4 –
In preparation for Week #4 (where we put the whole quilt together), begin to layout the first vertical row of blocks. Follow the diagrams on page 5 of the ModBox pattern.

Once you have the blocks for the first vertical row in place, begin to place the background fabric strips in place between the colored blocks. This can get a bit confusing because if you are like me, I am using (2) purple fabrics for my background and the pattern diagrams show the background fabrics in black and white.

To make it easier to follow the diagram and avoid confusion – I code my background fabrics and label one white and the other black.

Then I can place the correct background fabric around each colored block like so!

ALSO AN IMPORTANT NOTE ON FIGURE 12 IN THE PATTERN –
There is an updated Figure 12 for page 6. Especially for those of you doing the ModBox Large Lap and using half yards, please be sure to download the new Fig 12 (file PDF below for you to print) – this revised Fig 12 gives you the correct color sequence and block layout – again, especially if you are using half yards and making the Large Lap. You can retrieve the updated diagram here.

That’s it – we are ready for Week #4 where we will put it all together! See ya next week and until then, happy colouricious quilting! XX00 L&C