Disco Dazzle Dots!

One of the fun things about being a Benartex Fabric Ambassador, is that I get to preview new fabric collections about 6 months prior to them being released. So when I saw my friend, Christa Watson’s new collection, I just knew I needed to request fabric to make a new sample with it!

Last month I finished that new sample…I made my ‘Disco’ pattern. The collection was designed by my fellow designer and friend, Christa Watson of Christa Quilts, Inc. and the new collection is called ‘Dazzle Dots’ from Benartex Fabrics. Besides polka dots being just super plain fun to stitch with, the range of colors in this new collection is fabulous, modern and super #colouricious.

I chose to make the Small Lap version of’ ‘Disco’ which measures 48″ x 60″. This version is also very fabric efficient as it needs just 14 fat quarters and 1 yard each of two background fabrics.

Even though the ‘Disco’ pattern includes a template for the L Shape and the Quadrant shapes, I chose to take my Color Girl Quilts Classic Curve Ruler out for a test drive. This is great notion for cutting curves and one ruler allows you to cut any curve and the accompanying L-Shape from 4″ up to 8-1/2″. I cut all of the quadrants and L-Shapes in lickety split time and best of all, accurately (watch the video below)!

If you’d like to purchase this nifty ruler you, can do so from Color Girl Quilts!

Then I pieced the curves following my own video tutorial, ‘Stitching Perfect Curves Made Easy’. You can view it right here. Each block went together perfectly with very little effort.

Another unique feature of the ‘Disco’ pattern and a departure from most traditional drunkard’s path block quilts is once pieced, the blocks are trimmed down leaving only a scant 1/4″ of the background fabrics at the outer edges of the block. When the blocks are pieced together, it appears as if they are touching, overlapping and connecting with one another.

After trimming the blocks down, I was ready to lay out my design. Also unique to this pattern and super fun is the changing background. It’s not just one fabric throughout the whole quilt, but two contrasting fabrics, which provide an extra layer of depth and movement behind the spinning colored disco balls.

Once the quilt top was pieced, I sent it off to Teresa Silva of Quilting of my Bliss for her to add some of her infamous magic machine quilting. She always does a beautiful job no matter if it is custom quilting or just an edge to edge pattern. Here, she did some beautiful modern free motion quilting.

All in all, this new Disco sample came out fabulous, fun and modern and showcased Christa’s new Dazzle Dots fabric collection wonderfully!

PaintBox QAL – Week #6 -Machine Quilting Your Top

PaintBox Front Cover copyWelcome back !!  It’s the final week of our PaintBox QuiltAlong and this is the week to finish off your quilt top.

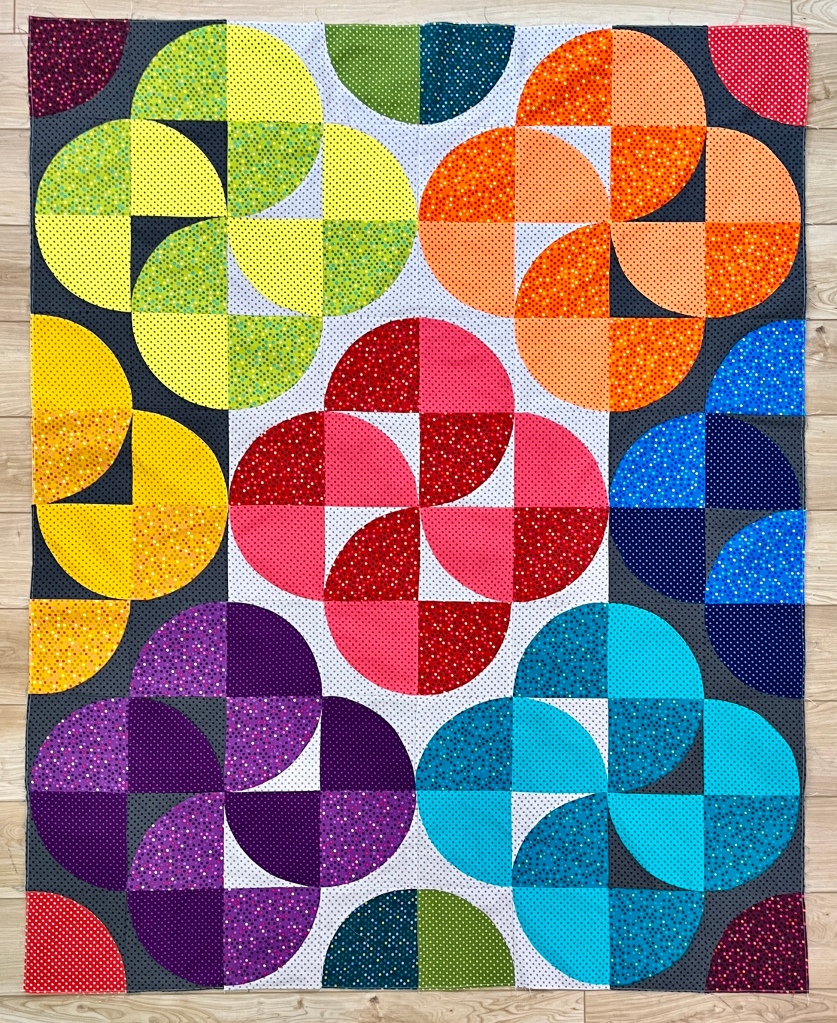
Last week we pieced the triangles and also stitched the rows together to complete your quilt top.  You can review Week 5’s post right here!

This week, I’m going to share some insights, successes and some fails (at least for me) into machine quilting your Paint Box quilt top on your domestic sewing machine.

Full disclosure now! – I am “the world’s worst free motion machine quilter” (at least that’s what I think) and because of that – I own a longarm machine and 100% prefer my quilt tops machine quilted on my longarm with an overall pattern or for something fancier, sent to a professional machine quilter like  Teresa Silva of Quilting is my Bliss for some of her gorgeous free hand long arm machine quilting – however, I know that not everyone can afford long arm services or a long arm machine or may just prefer their tops not to be longarmed, so hence this week’s blog subject about quilting your top on your domestic home machine!

However before moving on and in case you are taking your PaintBox quilt to your favorite longarm machine quilter,  pictured below is the pantograph all over quilt design I use on most of my PaintBox samples – it’s called Monsoon and I love it!

Pattern 1

On the other hand though sometimes a nice straight stitch will do the trick.

One of my favorite books out there for ideas on using your walking foot and  straight stitch machine quilting is Jacquie Gering’s “Walk” – I highly recommend this book as it’s a terrific reference on straight stitch machine quilting and is chocked full of different ideas and designs that you can quilt on your tops using just the walking foot and your straight stitch on your domestic machine.

The designs she offers range from very simple to very complex but all are accomplished with just a straight stitch and your walking foot (or even feed foot), and best of all no lowering of feed dogs or feeling totally out of control (my problem with the process).  Also the sequel to this best selling book, “Walk 2.0”will be released in May, so both books together would be a terrific reference pairing for your quilting library!

When I do choose to quilt my tops on my domestic machine, I prefer the control and regimented pace I feel when using my walking foot/dual feed foot, keeping the feed dogs up and just using my straight stitch across the top.  That doesn’t mean I don’t make a design though.  Here’s some “curvacious” quilting I just completed on this single ModCat wallhanging.  My feed dogs were up, I set my machine to the straight stitch and used my dual feed foot (which is similar to a walking foot).  I then gently moved the quilt top from side to side to create the gentle curves.

Cat Curvy
And some more quilting I did on a ModTiki – again nothing fancy – just straight stitch quilting and making a wonky chevron look.  Beautiful and looks fancier than it really is!
Tiki Chevron
First things first – Get a plan!

You should have an idea of what pattern or stitch you might like to machine quilt on your quilt top before beginning.  I like to have a plan before I begin quilting.  Instead of marking your top and then erasing and marking and erasing, why not take a picture of your quilt top and print out the picture on your printer.??

Now you can draw on the printout your ideas for patterns or lines across the quilt top and see how you might like to quilt your top.  You can do this just once or print more copies and try out a whole bunch of different ideas.  Penciling in your quilting ideas before beginning will give you an idea of what the design will look like on your quilt top and also provide you with at the very least a starting point – a good thing!  Here’s a few examples of the quilting ideas and plans I drew before starting to quilt my PaintBox quilt top.  The first one is just some simple straight up and down gridding…..

….and the second drawing plan had simple diagonal cross hatching plus a squarish design within the blocks…

Basting Your Quilt Top with the Batting & Backing Fabric
Next get ready to make your quilting sandwich – meaning baste your quilt top with the batting and backing.  For this project, I spray basted my batting to my backing fabric and then again, spray basted the top to the batting.  This was my first time spray basting a larger quilt like this and I  used the 505 Temporary Adhesive Spray .  It worked great – no safety pins needed.
Baste 1
It did take quite a bit of patience though and I had to roll the batting (and then the quilt top) accordian style and work on only basting about 1 foot at a time.   I just kept smoothing and smoothing the fabric or batting across the surfaces and then gave it a really good pressing before starting to quilt the top.

If you like using fusible spray to baste your quilt – please check out Christa Watson’s tutorial on basting your top.  She actually spray bastes small to queen size quilts with her method, and machine quilts all of her tops on her domestic machine with no problems!

WATCH CHRISTA’S BASTING YOUR QUILT TOP TUTORIAL HERE!

Marking and the First Stitches to Stabilize
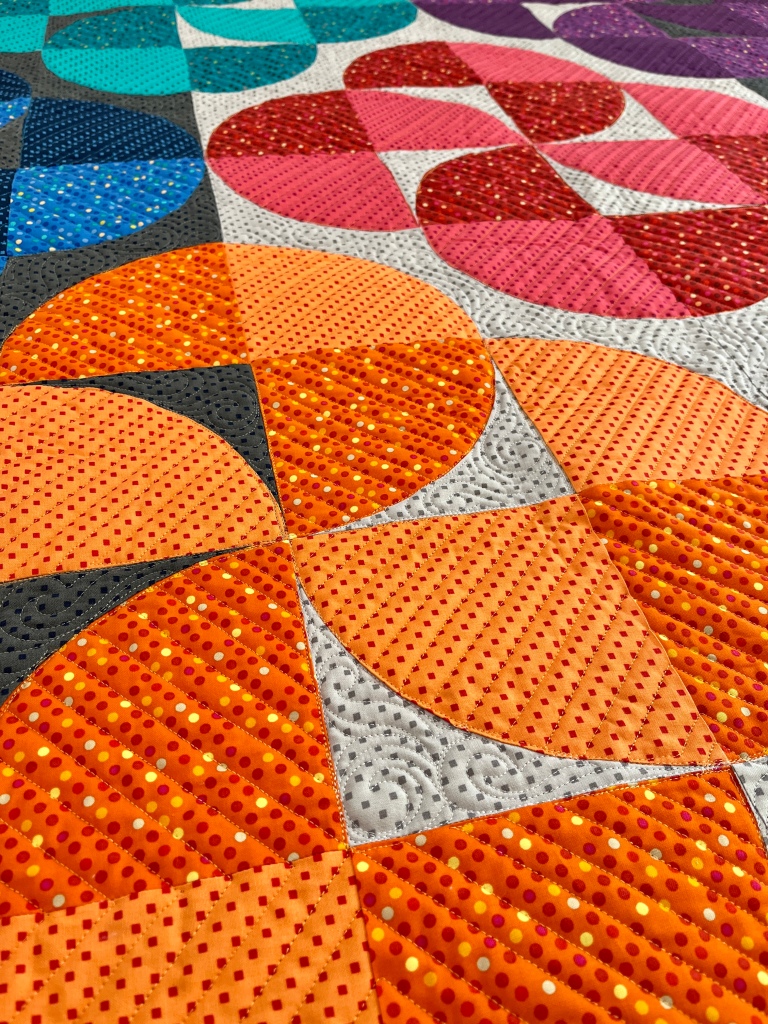
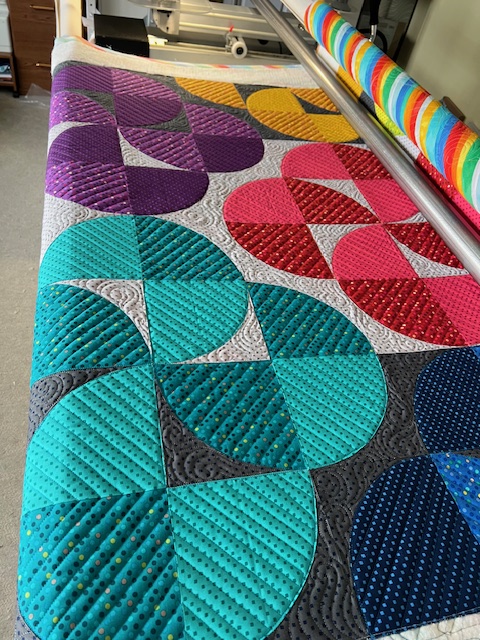
I chose to diagonally cross hatch my quilt top referring to my 2nd plan above.  I wanted to stitch a 1/4″ to either side of the seam lines so that it would be like a double stitch line, but I needed to mark in some of these lines first.  I did use my Frixion pen to make the markings BUT BUT BUT – I am fully aware that my pen markings may reappear sometime in the future  as this is the chance I take when marking my lines with the Frixion pen.  If you are not ok with this, please do use a washable marker or water soluble pen. 

I also threaded my machine with a 90/14 Microtex Needle and King Tut 40 weight thread in the color of Alabaster.  This particular thread color is a wonderful variegated neutral and works marvelous with almost any fabric collection.

Since I don’t like to ‘fight’ with my quilt when I machine quilt I rolled up the sides of the quilt diagonally toward my first center seam lines to be machine stitched.  The first lines I stitched were what I call the “main veins” of the quilt.  Since I was cross hatching on a diagonal, the first seams I stitched were the long diagonal lines from top left to bottom right and vice versa thus stitching what you might call a large “X” across the quilt.

The main “veins” of the quilt have now been stabilized and I can now cross hatch and stitch my diagonal lines working always out from the center “main veins” of the quilt to the outer edges.

Stitch 1
And I kept stitching and stitching……

Stitch 2

…and stitching and stitching……

Stitch 3

…and then I decided to stitch 1/4″ to either side of the vertical and the horizontal seam lines….
Stitch 4

And I kept stitching and stitching……as you can guess, although simple to do, this process can take a long, long, long time.  Just cross hatching 1/4″ to either side of the seam lines on this 48″ square top took me almost 7 hours of straight stitching with just a few short breaks to stretch here and there.

Stitch 6
Next I thought I would try my idea to machine quilt the ‘square within the square design’  I had drawn on my quilt top photo (see below) —

Drawing 2B

I marked a center square in the middle and tried out my idea…..

Well – time again for another full disclosure!  I hated it!  It just didn’t ‘sing’ to me and frankly I was having a hard time keeping the stitched squares even with the sewn squares –  it just looked sloppy!  😦    So out came the seam ripper and time to reconsider what to do next.

Eager to finish the quilting as I was now in hour 8 of machine quilting, I decided to carry on with the diagonal and straight seam quilting and halved the distance between those lines I already stitched.

The results as you see was a nice effect even though some of my stitching was a bit wobbly due to the evening wearing on and I was getting tired!

Stitch 9
Life Lesson 101!  Which reminds me to remind you of one big life lesson – be kind to bekindyouyourself – I have to remind myself of this all the time!  We are our own worst critics!  But let’s face it – we are not perfect and guess what – your machine quilting will likely not be either….its only fabric and it is a handmade item.  Also believe me on this one – your quilt top always looks 200% better after you remove all of your drawn lines (that you may or may not have stitched on when quilting your top) and after the quilt is squared down and trimmed.

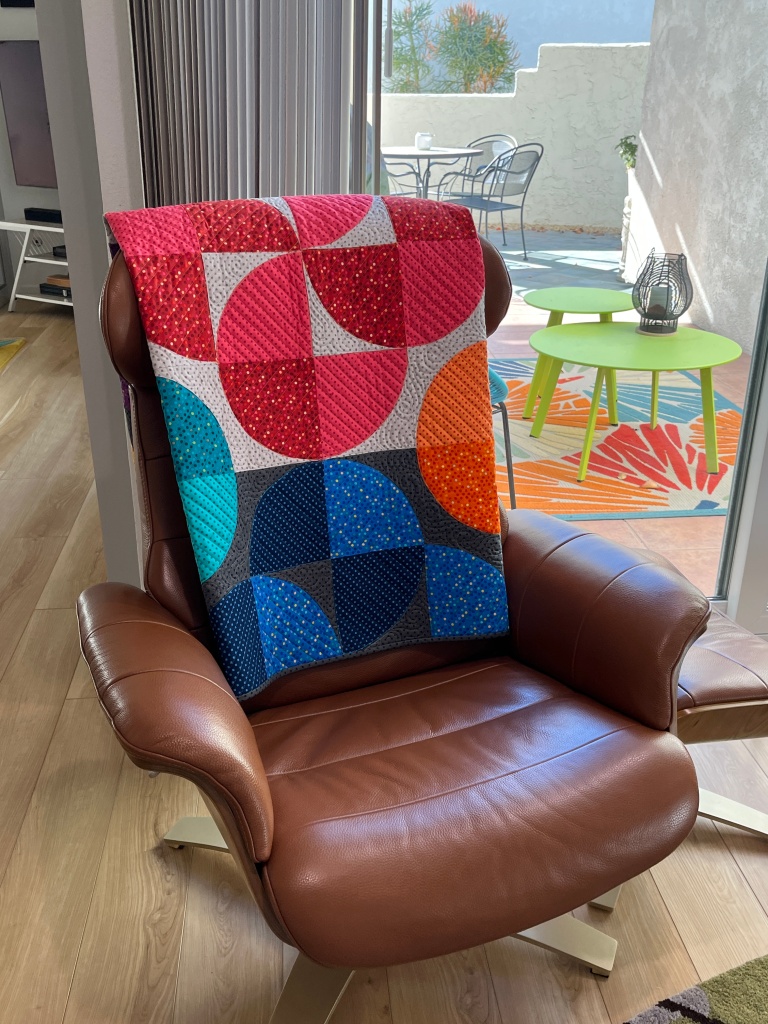
Once I was completed with my machine quilting, I trimmed the batting/backing edges square to the quilt top and cut the binding from my remaining sashing fabric and sewed it on.

Viola!  All done and ready to grace our dining room table…

Table 1

…or be taken on a nice picnic outside on this beautiful Spring day in our desert oasis!!

Outside 2


IMG_9836

This now concludes our PaintBox QuiltAlong – send me your pictures so we can see your gorgeous PaintBox quilts!

Thank you so much for following along and for your continued support!  Look for more Colourwerx QuiltAlongs on our Colourwerx Facebook page or on our website under QuiltAlongs!mouth21

Until your next colour fix – happy quilting!  Linda & Carl xxoo


New Colourwerx QuiltAlong Starting January 28th – Making PaintBox

Carl and I are super excited to announce our next Colourwerx Quilt Along starting on January 28th!   Yes, by popular demand, we’ll be making the Paint Box pattern together.  This is a very easy to piece yet fun quilt to make and I’m so happy that the Facebook Colourwerx Quilt Along Group chose this one for our second quilt along!

PaintBox Front Cover copy

WHAT’S A QUILT ALONG?   First, if you are unfamiliar with the concept of a “quilt along” – here’s how it works!

The quilt along is almost like a virtual sewing party or taking a virtual sewing lesson without leaving your home.   Everyone is invited to join in and you can sew along with me each week as I post lessons, tip and tricks or you can just observe from afar or just take the project at your own pace!  Anything goes!  As with all of my quilt alongs, all the videos and blog posts will remain accessible to you for many years after the quilt along has completed so you can jump in at anytime.

You can check our our last quilt Along – making the ColourMaze quilt by clicking here!

There is no cost to join in on the quilt along – and all you need is the pattern, a triangle ruler and to gather materials.  The Paint Box Quilt Along will begin on January 28th and will last 6 weeks – here ‘s the schedule.

PaintBox QAL Slug

You can also view my Introductory video by clicking here –

Screen Shot 2020-01-12 at 3.05.01 PM

HOW TO JOIN IN? – You can choose to follow along week to week here on the Colourwerx blog or by joining our free Colourwerx Quilt Along Facebook group where you can ask questions, share your progress and of course, post pictures of your finished projects so everyone can share in the fun!  You can also  share this invite and any QAL news with other quilty buddies and invite them to join along in the fun!

JOIN THE COLOURWERX QAL FACEBOOK GROUP HERE

Materials to make the Paint Box quilt are as follows:PaintBox Front Cover copy
1.  ThePaint Box pattern by Colourwerx- you can purchase the paper version or a PDF – and if you use the discount code QAL at checkout you’ll save 10% – yippee!

PURCHASE THE PAPER VERSION OF THE PAINT BOX PATTERN
PURCHASE THE PDF DOWNLOADABLE VERSION OF PAINT BOX PATTERN 

2.  You’ll need a speciality triangle ruler – CGRT90-1specifically the Creative Grids 90˙ Triangle Quarter Square Ruler CGRT90 -we have these available for purchase in our Colourwerx shop and again, if you use the discount code QAL at checkout you’ll save 10% – double yippee!


PURCHASE THE CREATIVE GRIDS TRIANGLE RULER HERE

3.  Fabrics Needed:  One 2-1/2″ strip roll with at least (40) strips (or cut from your stash (40) strips) plus two 1-yard cuts of coordinating fabrics.

HOW ABOUT SOME FABRIC KITS?  Both Colourwerx and our good sewing pal, Christa Watson from Christa Quilts have put together a special fabric kit for the Paint Box Quilt Along! Both of these kits are offered at a discount for a limited time!

PaintBox Designs copy

BRIGHT AND COLORFUL GRIDWORK KIT FROM CHRISTA QUILTS: Christa’s kit features her bright and geometric new fabric collection called “GridWork” (pictured on the left) and she’s offering a discount on this – use the code PAINT. (This kit does not include the pattern).


GORGEOUS JEWEL BOX BATIK KIT FROM COLOURWERX: If you love those jewelled toned batiks, then this Colourwerx Jewel Box batik fabric kit featuring Island Batik fabrics is the perfect kit for you.

PURCHASE COLOURWERX’S JEWEL BOX BATIK FABRIC KIT

That’s it!!  I hope you’ll join us for some colouricious fun as we start our next Quilt Along !!  I can’t wait to start making this quilt with your guys!  Until January 28th – please be sure to email us at colourwerx@yahoo.com if you have any questions.  Or feel free to post a question on our Colourwerx QAL Facebook Group!

Until your next colour fix ~  happy and bright quilting always!    L&C xxoo

Fall Quilt Market Fun!

IMG_8338It’s been a whirlwind these last few weeks (in fact the whole year!) but I  finally found time to sit down and share with you our experience at the recent International Quilt Market in Houston, Texas.  The International Quilt Market took place October 26th-28th (always over my birthday wouldn’t you know it!) and is THE PLACE to see all the new fabrics, patterns and products by shop owners and industry professionals before they arrive in the shops some six months later.

We didn’t have a booth this time around but rather chose to “be free” and able to roam the show floor – this was a first for us and very liberating!  As always, Market is full of seeing old friends, meeting new ones , super fun antics and just an all around generally inspiring, terrific quilty experience!

We debuted six new patterns for Quilt Market – You can see them below in the slide show, and we’ll highlight each of these new patterns  in future blog posts, but all are available for order in our Colourwerx shop right now!

This slideshow requires JavaScript.

We had several versions of our new quilts displayed with various companies throughout the quilt market floor.

First, we collaborated again with our good friends at Island Batiks and five of our quilts were displayed in a special preview window at the front of the Island Batiks Booth (slideshow below).  All of these quilts were made using the new and super gorgeous Jewel Box Batik Collection designed by Kathy Brett Engle for Island Batiks and coming to a shop near you in February 2020.   Check out the fabrics in the link above! Just lovely!!

This slideshow requires JavaScript.

We also collaborated again with our  partners at Free Spirit Fabrics and always welcome opportunities to make our new patterns using Kaffe Fassett’s newest fabrics or other beautiful collections coming soon.  Here’s our PaintBox pattern in both the Warm and Cool colorway of Kaffe’s new fabrics- arriving in shops in February 2020 and we will also have kits available too.

We  also made our new Waterfall pattern in Martha Negley’s newsest fabric collection called Veggies – I am super in love with the rich jewel tones of Martha’s newest collection and the vegetable designs of carrots, beets and cabbage are to die for – it partners super well with all things Kaffe and I just love it .

Martha Nagly Waterfall

Continuing on with our collaboration and great friendship with Christa Watson of Christa Quilts.com – I was thrilled when she asked if I would make our new Paint Box pattern in her new fabric collection called GridWork.  Of course I would!  Here’s the finished version and of course a cute picture of Christa & I in her colorful booth at Quilt Market. Her new fabrics, GridWork will be coming to your local quilt shop in February!

We also formed a new relationship with Windham Fabrics and their popular fabric designer, Carrie Bloomston.  You all know Carrie by her popular fabric design, Love Newsprint that we sell in our Colourwerx shop right here!

Screen Shot 2019-11-11 at 12.48.34 PM

Carrie’s fabric collections are always full of whimsical motifs and adventures and mostly have a collage look with super beautiful color palettes of magentas, turquoises and golds.  Her newest collection “Wish” was fabulous and fun and we were thrilled to make our ModBlossom quilt for display in her booth!  Carl and  loved meeting Carrie and also love her new Wish fabric collection which will be coming to shops in the Spring!

Last but not least and perhaps most exciting, because we were free to roam the show floor, we were finally able to share our fabric design portfolio with many of the fabric companies’ design directors.   We can’t say anything just yet, but Carl and I were super pleased by the positive feedback we received regarding our fabric designs and are excited to explore this additional design avenue in our business! Look for more news on this in the very near future! 🙂

img_8339.jpg

Until your next colour fix – thanks as always for following along and Happy Fall!  L&C xxoo


ColourMaze QAL – Week #1 – Choosing Your Strip Roll and Different Combinations

ColourMaze Front Cover(1)
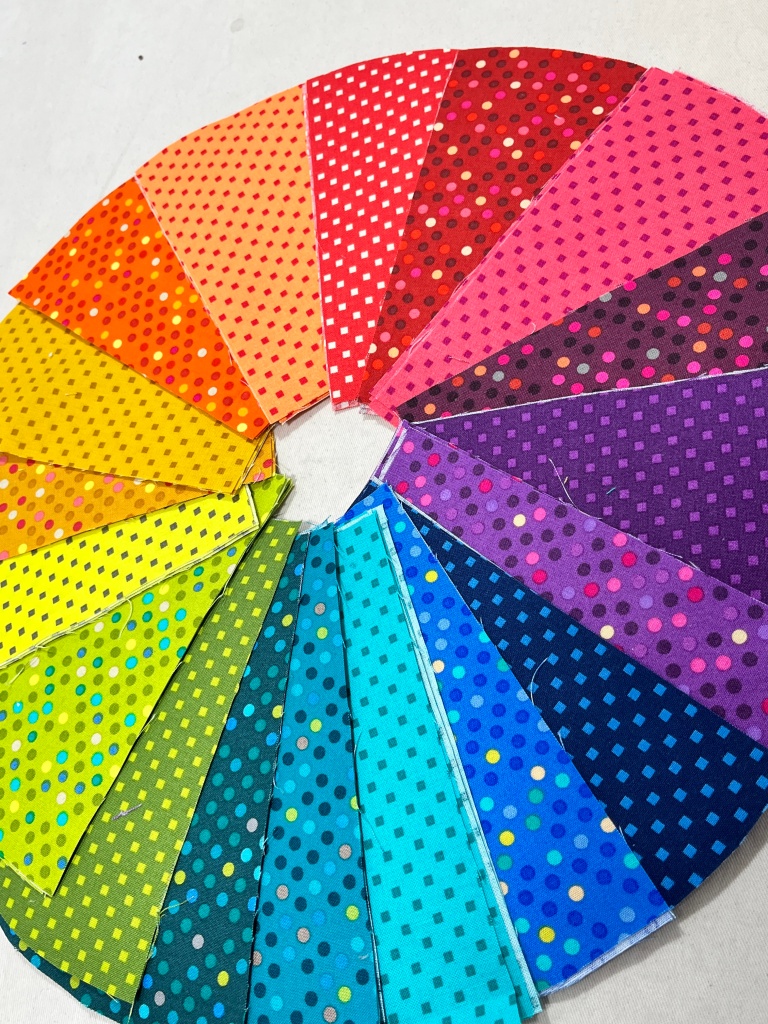
Hello!  And welcome to the ‘first week’ of the ‘first ever’ Colourwerx QAL (quilt along) where we’ll be making our super fun ColourMaze quilt!

First, I want to thank you so much for joining us for our first QAL.  Whether you’ll be sewing up the pattern along side us or just observing from afar, we welcome you and are overwhelmed by your enthusiasm so far – so thank you, thank you, thank you!

Also, we invite you to join our free QAL Facebook group where you can ask questions, share your progress and of course, post pictures of your finished projects so everyone can share in the fun!  Also feel free to share this invite and any QAL news with other quilty buddies and invite them to join along in the fun!

JOIN THE COLOURWERX QAL FACEBOOK GROUP HERE

I also have a companion video on or Colourwerx UTube channel so if you’d like to watch me ‘yak on’ instead of reading this post – you’ll find that video here…

lindavideo.png
So this is Week#1 of the Colourmaze QAL –  First let’s review the schedule!
Colourmaze QAL 2As you can see it’s a 4-week QAL but you can take it at your own pace and join in anytime.  All of the videos and blog posts will remain here, as well as be posted on our website and social media pages throughout the year.  It’s free to join and you can choose to make the 50″x70″ lap quilt, or just a few blocks for a table runner or placemats, or just even one block – it’s all your choice!   So feel free to hop in anytime!

Here’s what you’ll need though to join in on the stitchin’ fun –
• The ColourMaze pattern by Colourwerx

PURCHASE THE COLOURMAZE PATTERN – PAPER VERSION
PURCHASE THE COLOURMAZE PATTERN – PDF VERSION

MaterialsJPG•  Background Fabric – 1-3/4 yards – choose a coordinating fabric to the strip roll or a neutral color with perhaps a tone on tone texture;

•  A strip roll (or jelly roll) – choose a strip roll containing (40) precut 2-1/2″ wide strips.  If you’d like you can choose these other options as well:

— Bust Your Stash – Cut (40-42) 2-1/2″ wide x 41-43″ long strips from your stash;
— 6″ Design Roll – this is a roll containing 20 fabrics all cut at 6″ x WOF – you would need to cut (2) 2-1/2″ strips from each of the (20) strips to make (40) 2-1/2″ strips for the project;
— Fat Quarter Bundle – a Fat Quarter is (18″ x 22″).  Choose a bundle that has at least (21) fat quarters and you would need to cut (4) 2-1/2″ x 21″ strips from each of the Fat Quarters.

•  Optional for the QAL – Binding : 5/8 yard and Backing Fabric : 4-1/2 yards

I always think that seeing different color combinations with a new quilt pattern is helpful when choosing fabrics so here a few different color combinations we have designed using some of our favorite fabric designers’ collections…

This slideshow requires JavaScript.

You can purchase fabric kits for most of these combinations here:

PURCHASE THE KAFFE FASSETT RAINBOW FABRIC KITS
PURCHASE THE VIOLET CRAFT MODERN BASICS FABRIC KIT
PURCHASE THE GEO POP FABRIC KIT FROM CHRISTAQUILTS.COM

Preparing Your Fabrics for Week #2:
1.  Once you’ve selected your fabrics, be sure to measure the precut 2-1/2″ strips for accuracy.  Flash – flash – not all strip rolls are cut exactly alike or are accurately cut by the fabric factories! Yup – it’s just the way the ball bounces here in the quilting world and there are inconsistencies on these precuts from fabric company to fabric company.

So go ahead and unroll that strip roll and measure the width of the strip.  You may find as I did, that some need a little tiny trim off the width to make them a perfect 2-1/2″ wide.  (And remember if your strip roll has a pinked edge, you would measure from the outer tip of the pinked edge).


2.  Next, feel free to starch your background fabric and the 2-1/2″ strips if needed.  However – warning – DO NOT PREWASH YOUR STRIPS.  The strips are pretty fragile and if you wash and dry them, there will be tears (literally) – The strips will shrivel up and be unsable – trust me on this one!

3.  Lastly, each ColourMaze block is made using (2) different 2-1/2″ strips plus some background fabric.  So to prepare for Week #2 and cutting, pair up your strips for each block you will be making.  If you are making (1) block, then you will need (2) 2-1/2″ x WOF strips; if you are making the 50″x70″ Lap Size, then  you will need  (20) pairs of strips….

IMG_6988
ColourMaze Front Cover(1)….which brings us to a burning question where the 50″x70″ Lap Quilt is concerned….There are actually (21) blocks to make and you might be asking yourself “Where do I get the extra 2 strips for that 21st block if I am using a strip roll that only contains 40 strips?”  Well I have the answer below…  As you group your strips together this week, start thinking about which option you might like to choose:

 OPTION #1:  If your strips measure aprox. 42-43″ long, there is a way to cut your pieces more efficiently from each strip in order to have the necessary fabric left over to create the 21st block.  In next week’s blog post and tutorial video, I will demo this for you so wait for the answer before cutting;
IMG_7007
OPTION #2:  Once we cut the strips next week, there will be generous offcuts of each strip left over…so you could choose to cut your 21st block from these offcuts and create a scrappy block that goes in the center or off to one side of your quilt.  You can also use these offcuts to make your binding strips (which is what I’m going to do) or to make scrappy placemats or a table runner at a later date.

OPTION #3:  If you wish to purchase your binding fabric this week, purchase as the pattern states 5/8 yard.  This 5/8 yard is more than enough fabric to create your binding strips and also allows you extra yardage to cut the extra (2)  2-1/2″ wide strips to add to your (40) strips to make the (21) blocks total.

Next week – Week #2: we’ll be Cutting Your Strips and Background Fabric – woohoo!

Until then, please be sure to email us at colourwerx@yahoo.com if you have any questions.  Or feel free to post progress pictures on our Colourwerx QAL Facebook Group

Until your next colour fix and next week’s QAL post ~  happy and bright quilting always!    L&C xxoo