Robo Boogie All Stacked Up!

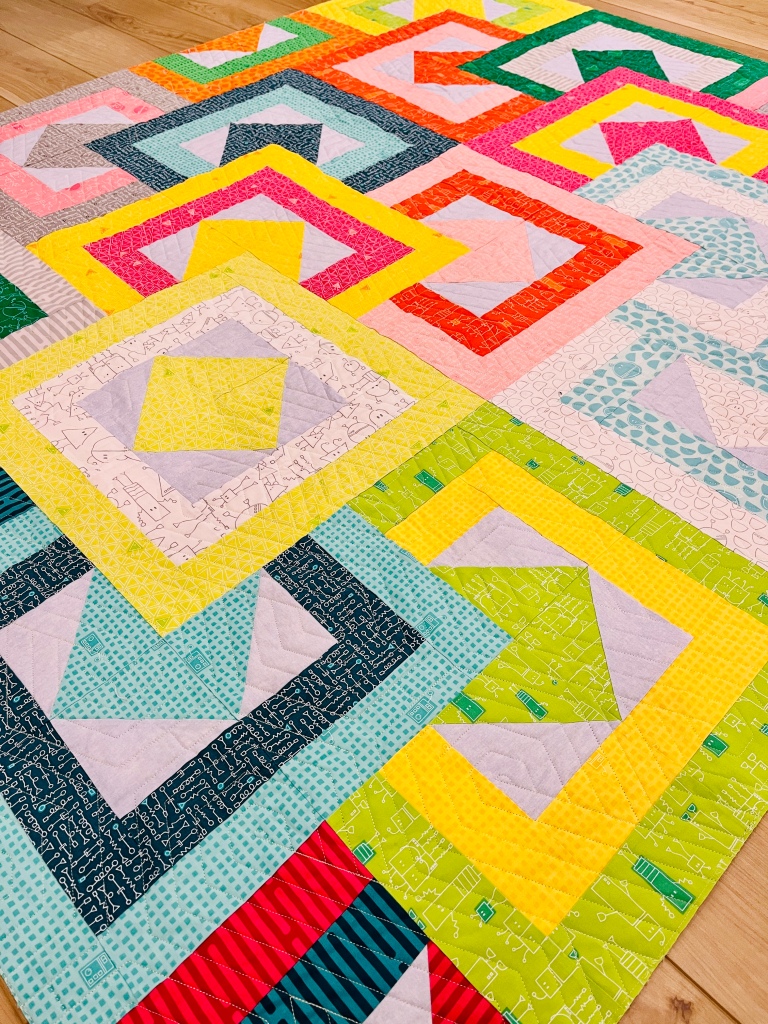
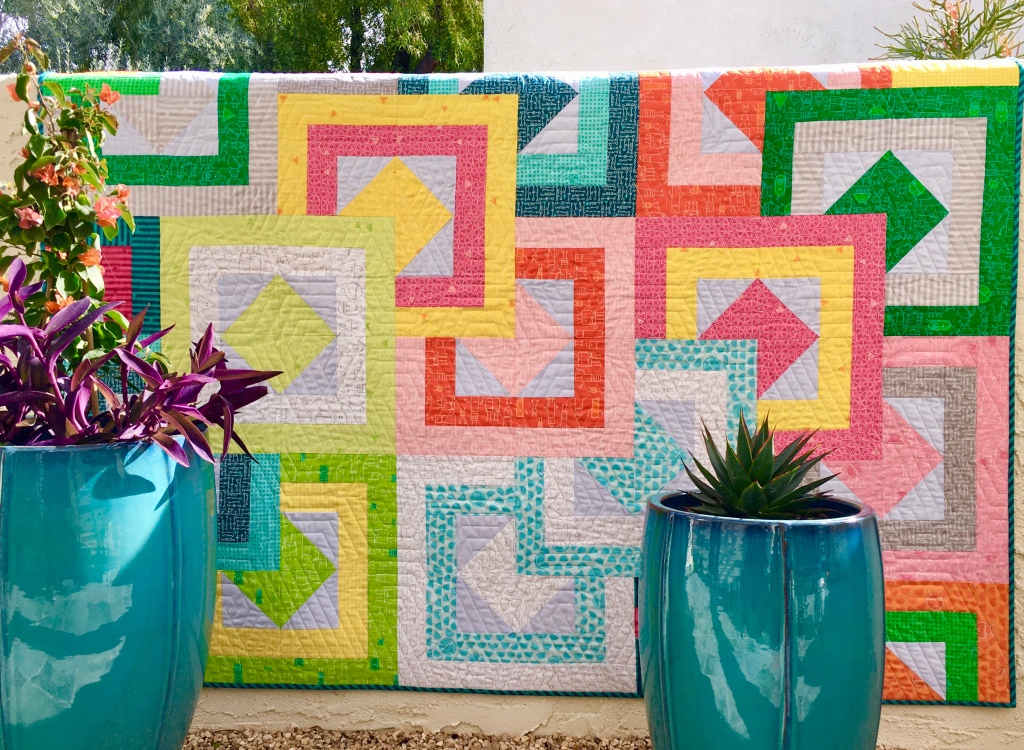
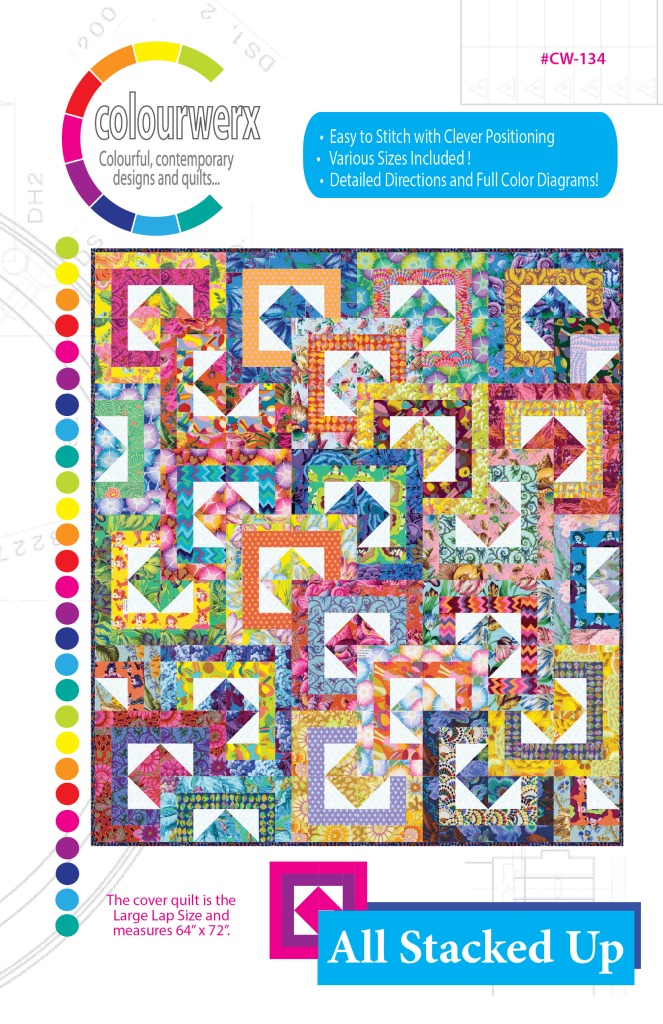
My first quarter project as a Benartex Ambassador was oh so much fun to create! It’s a familiar quilt pattern in our Colourwerx catalogue of patterns called ‘All Stacked Up’. The beauty of this ‘looks complicated but it’s not’ pattern design is that it’s oh-so-easy to piece and it looks great in almost any fabric collection out there.

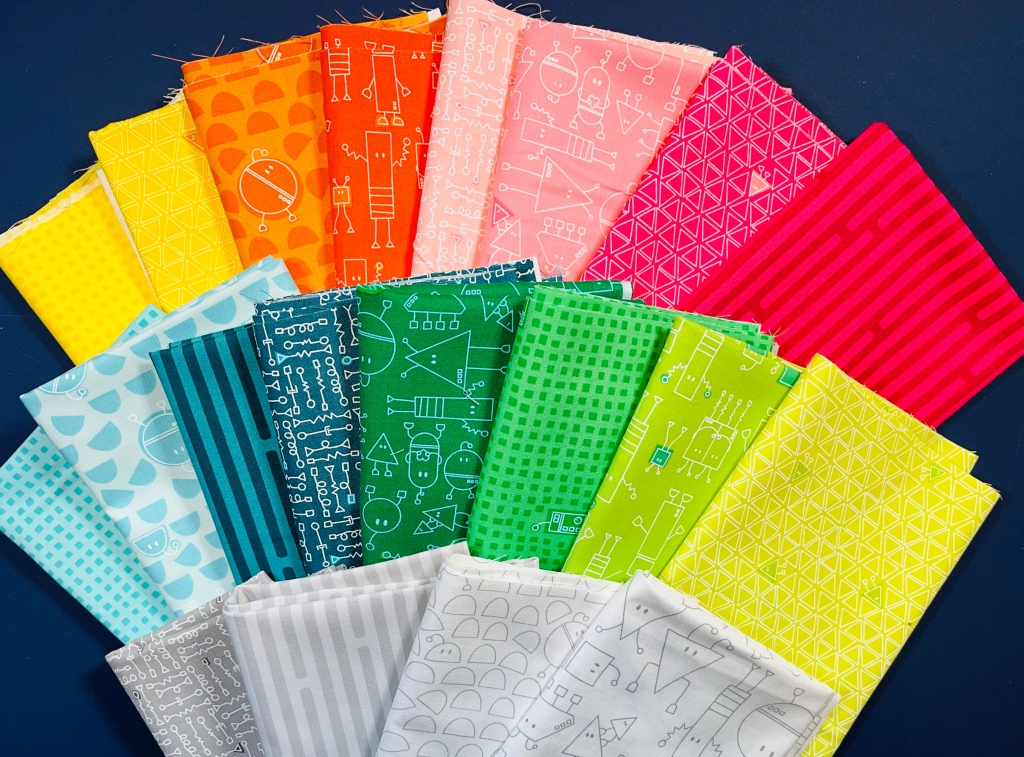
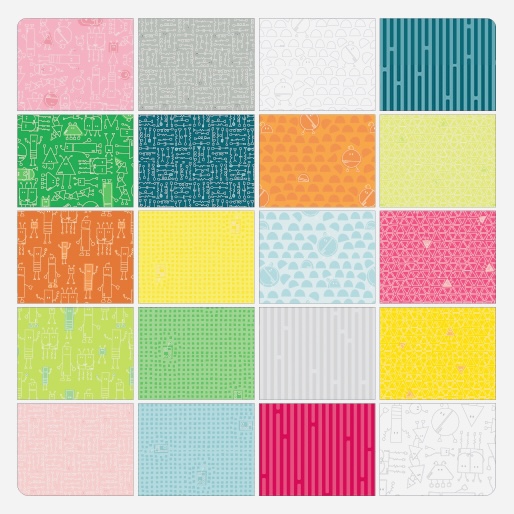
For the fabric I chose a new collection that is super sweet and cute called ‘Robo Boogie’ designed by Irene Staal from Sugaridoo Designs. This new collection from Irene is super cute – the colors are fresh and modern and the designs range from playful robots, widgets, digits and all things that look like computer code. They’re geometric elements; tiny squares, dancing half circles and quirky triangles. Irene’s love for color and her background as a robotics engineer, merge perfectly together in this fabric line.


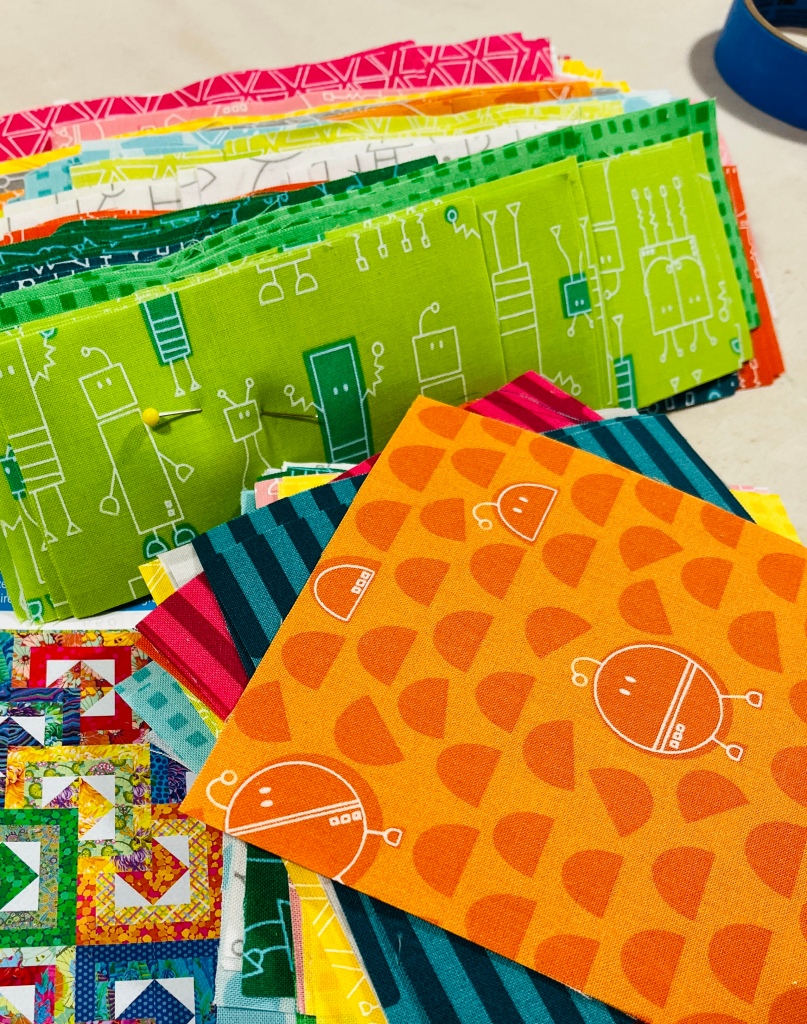
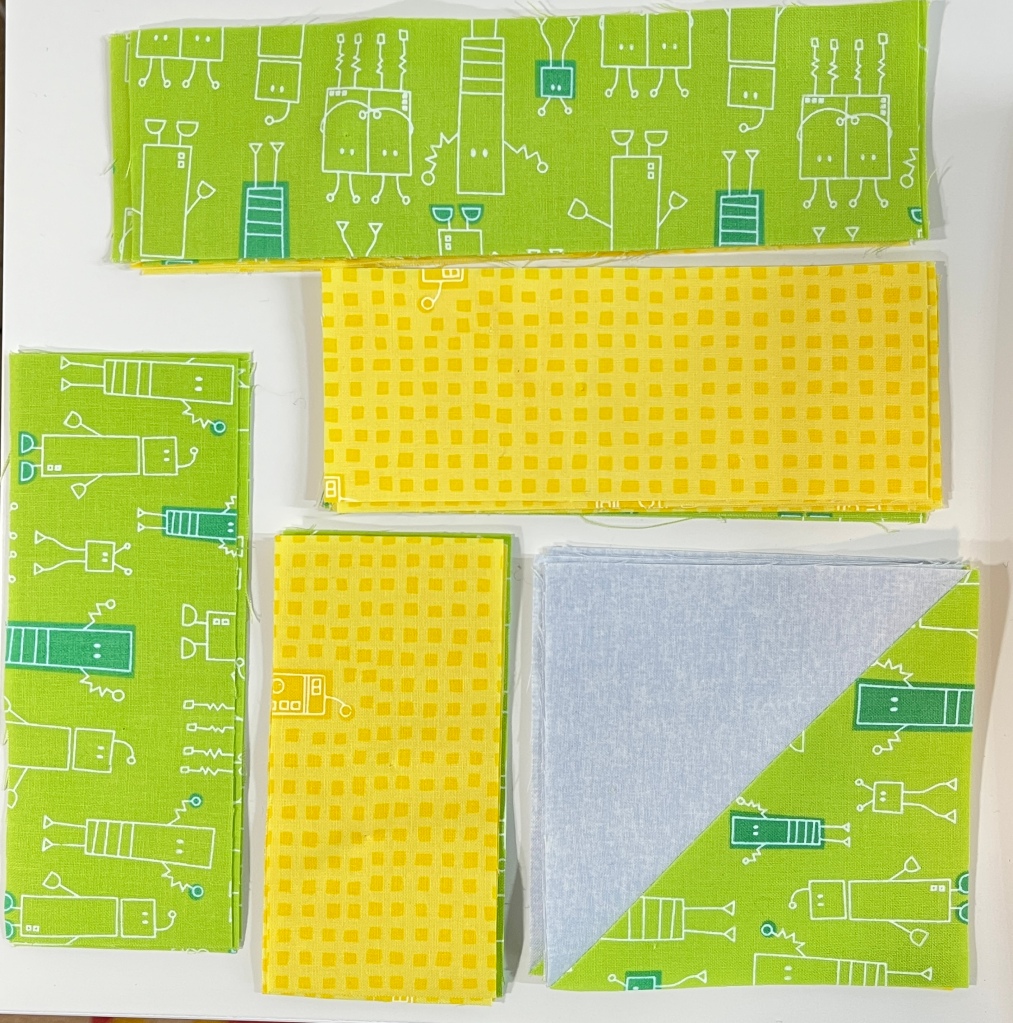
I started with (1) Fat Quarter bundle of ‘Robo Boogie” and a light gray background fabric from Benartex Fabrics’ Basics line called Chalk Basics. After cutting all of the fabrics according to my ‘All Stacked Up’ pattern instructions, I paired fabrics together to make the blocks. Looks at the super cute designs on the fabrics and the fresh happy colour palette!


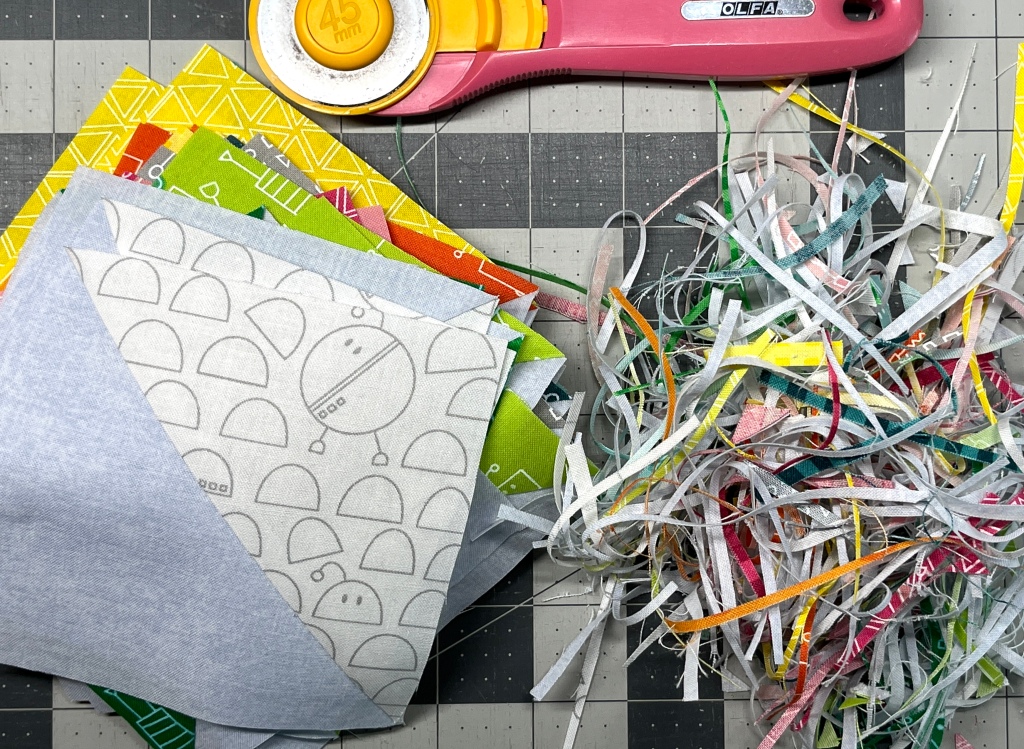
Then I made Half Square Triangles for the day. I love this type of familiar repetitive stitching and trimming as I can relax and plan out other projects that would be fun to make! Lots of stitching and lots of trimming!


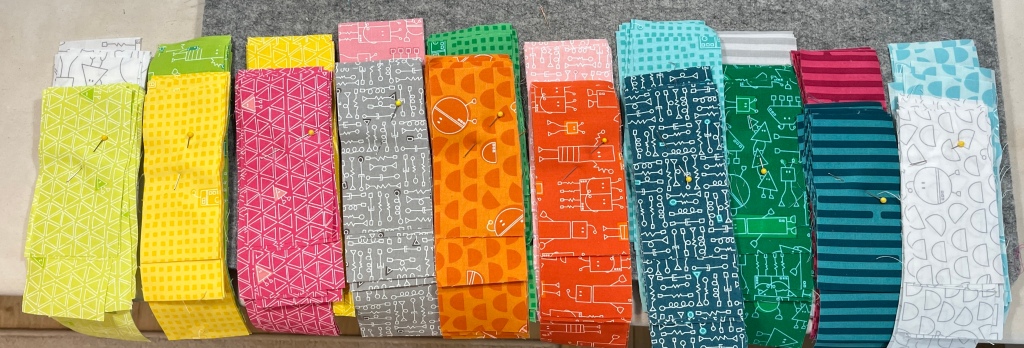
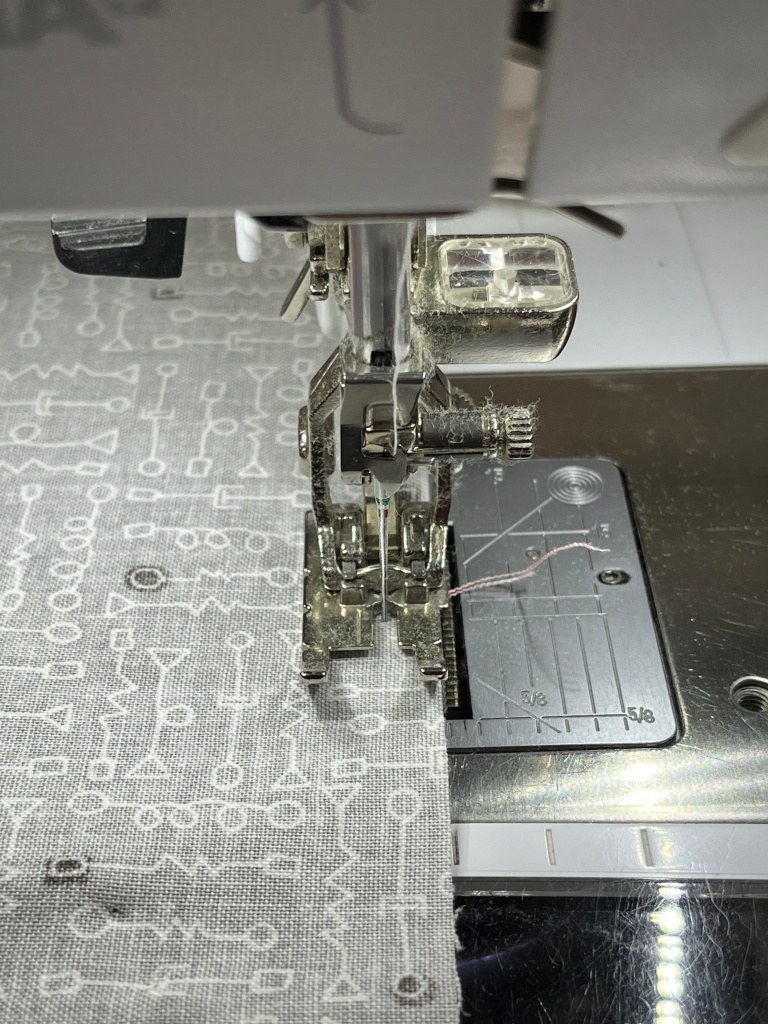
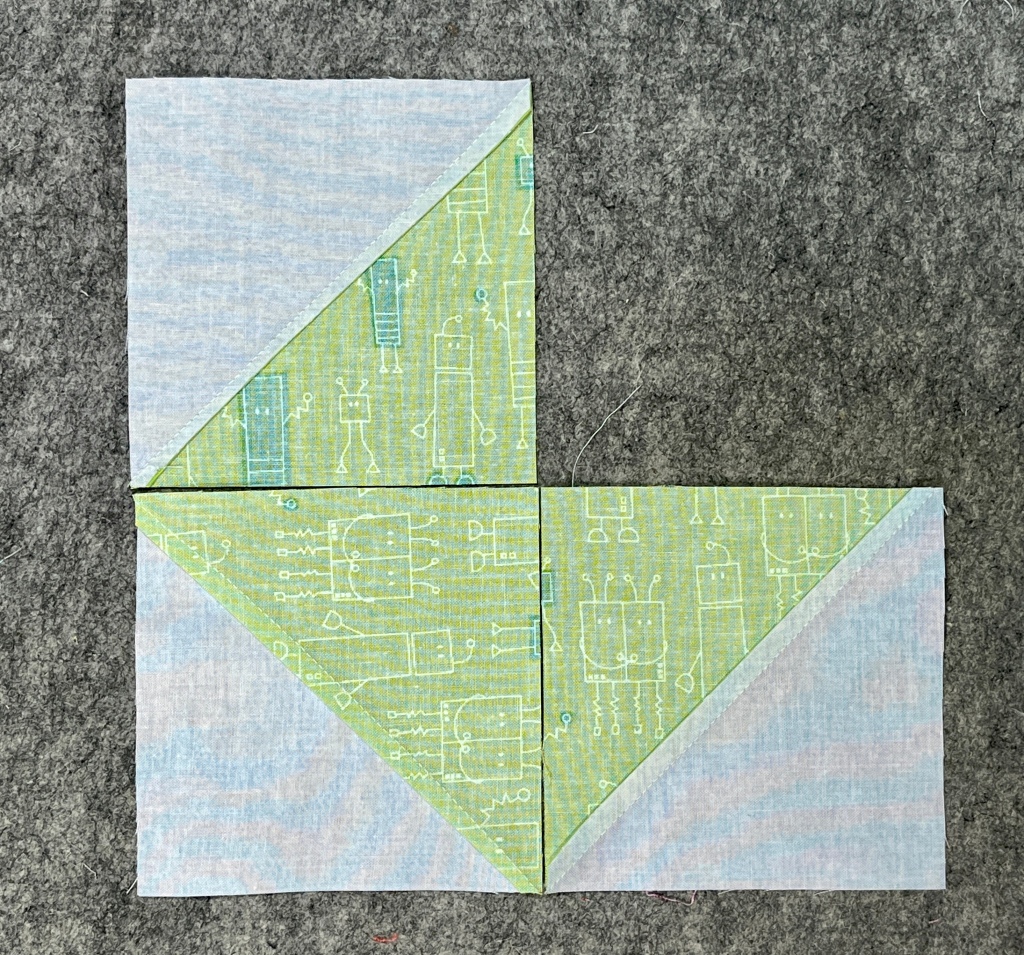
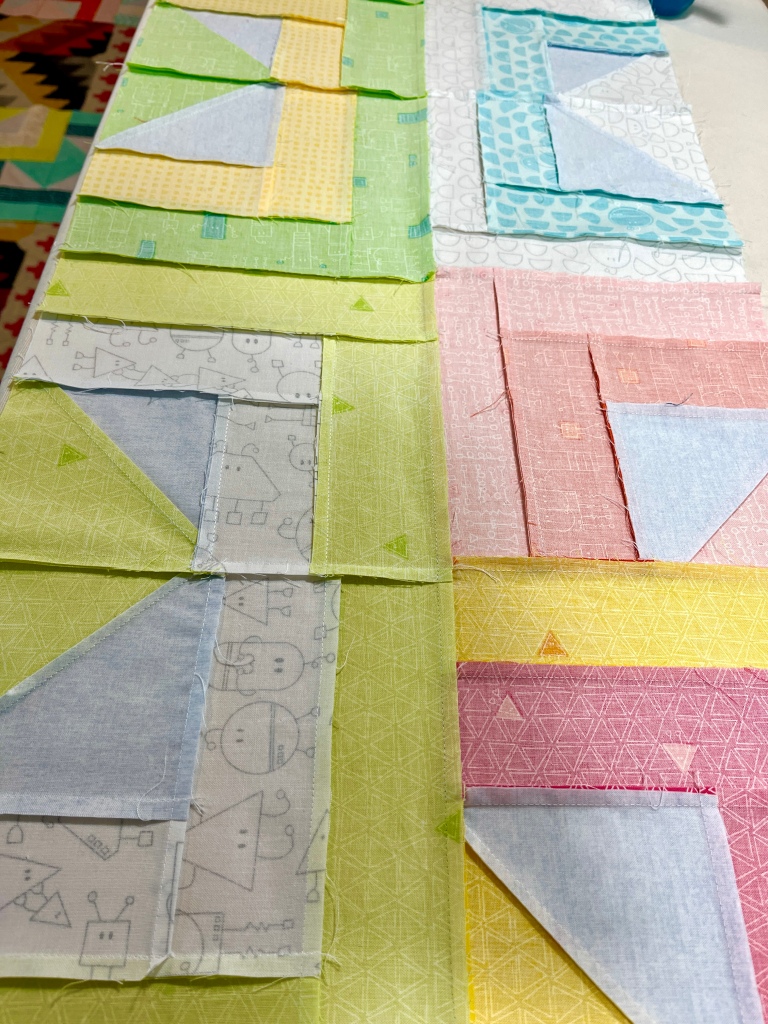
Then I got my scant 1/4″ sewing mojo going and started to piece the blocks. It was a piecing party with just me and my trusty BERNINA. This is the truly satisfying part about patterns like this – once the fabrics are paired, each pairing of fabrics is pieced in the exact same way to create (3) identical blocks – but take note that one of the blocks’ seams should be pressed in the opposite direction from the other two blocks.


Check out the variety of combinations and blocks that I made – I love the fabrics as the colors are bright and happy and the robot designs are just oh-so-cute!!


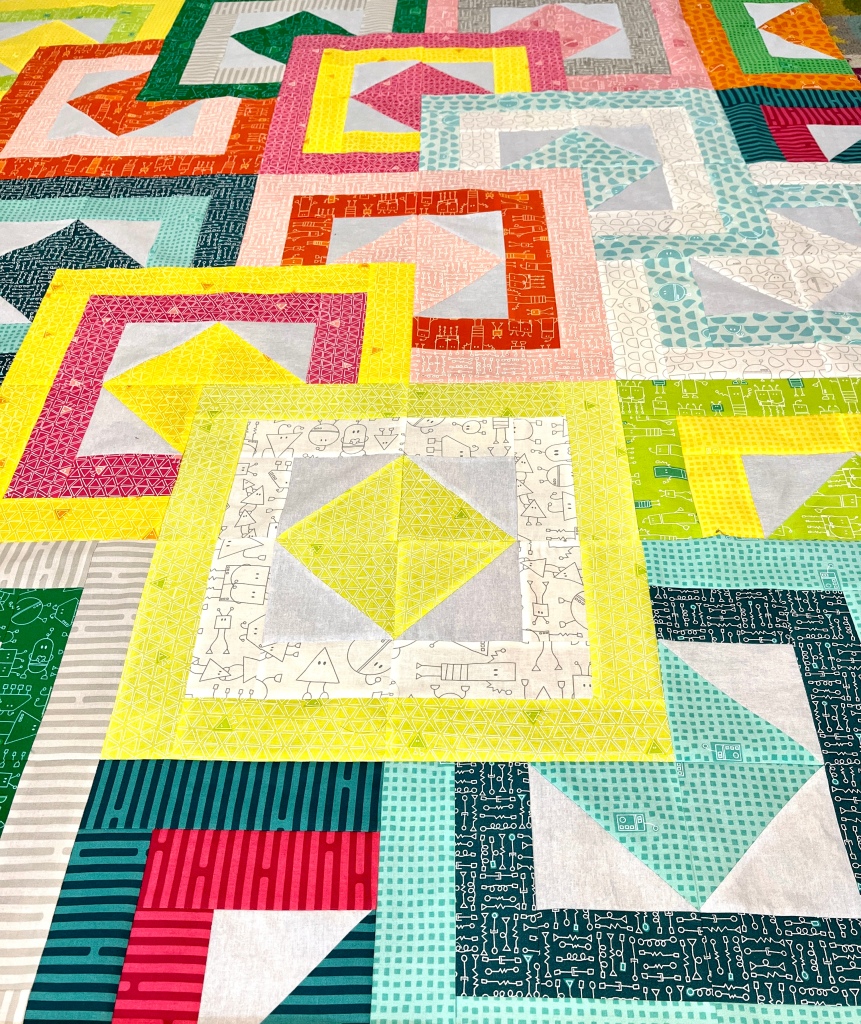
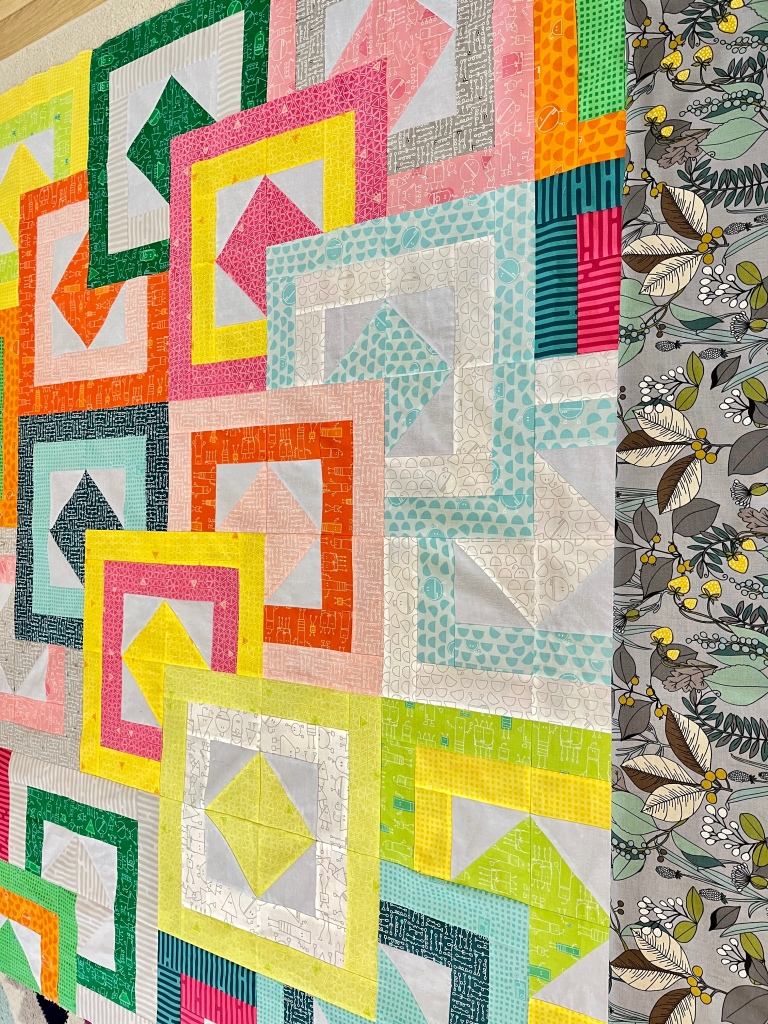
Once all the blocks were made, I was ready to start laying out the blocks according to the diagrams in our ‘All Stacked Up’ pattern and start to stitch blocks together to form rows – and then rows together to complete the quilt top. Yay! Almost complete!~


Once the top was completed, I choose a backing fabric. What do you think? This is an Alexander Henry piece from the “Ghastleys” fabric collection. I thought it complimented the fabrics well!


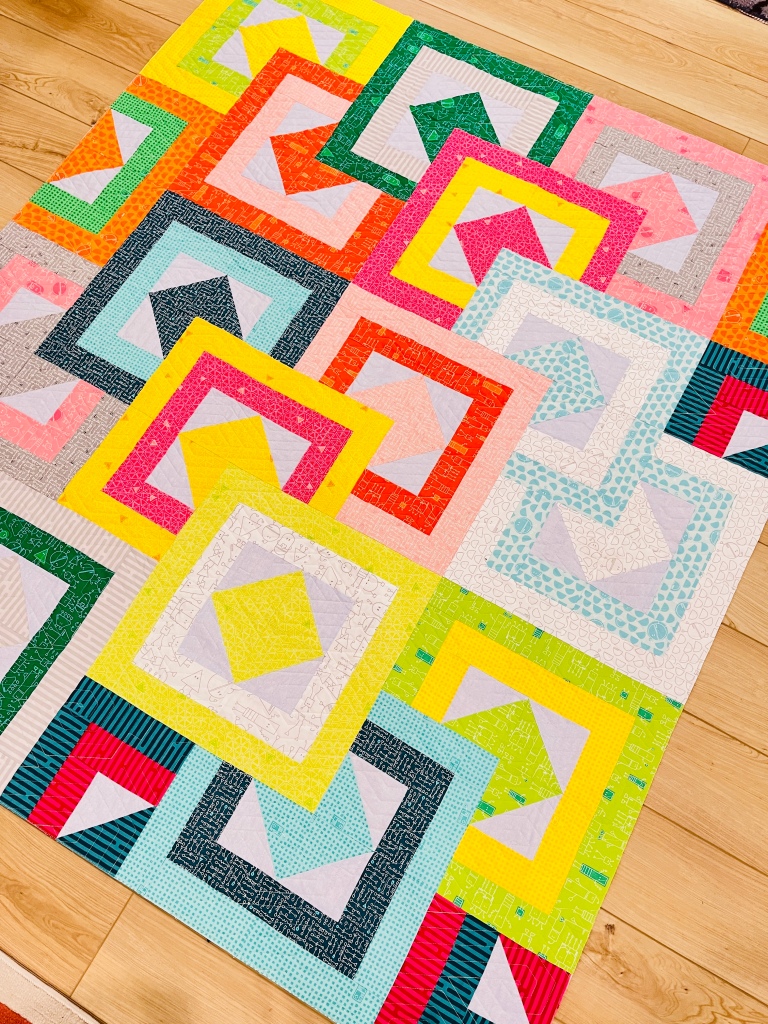
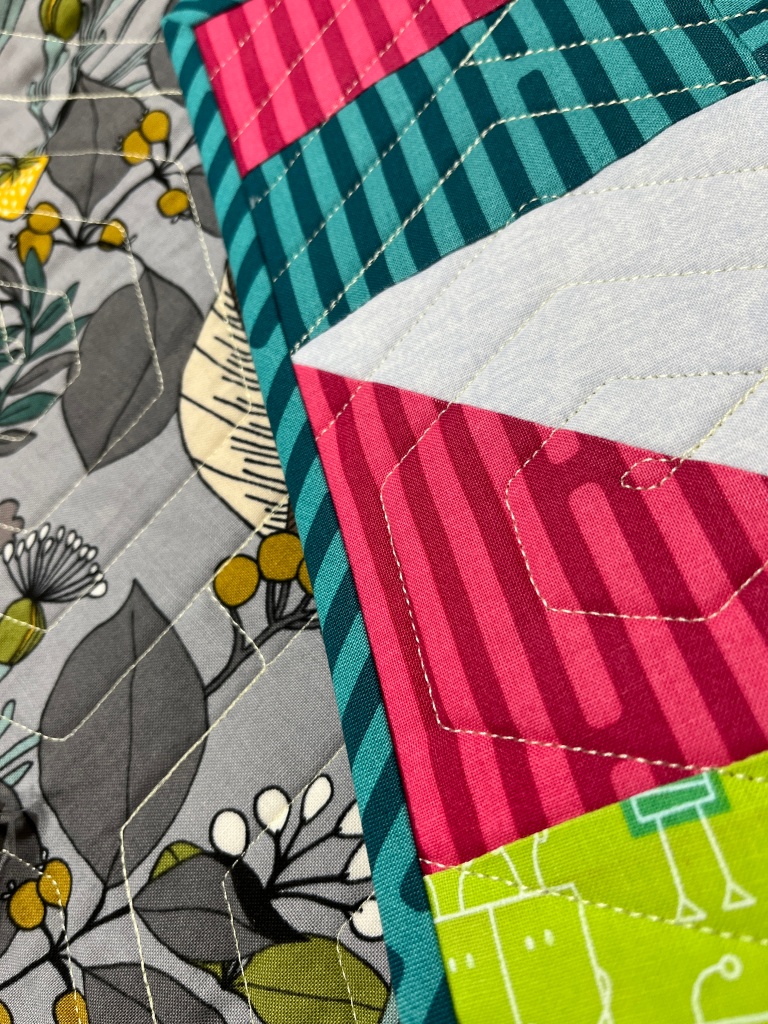
Next it was Teresa’s – at Quilting is my Bliss – turn to do her magic machine quilting. She always does such a wonderful job with all of our quilts and this time was no exception. She chose a fabulously modern edge to edge pattern and quilted the top with a light lemon yellow colored thread. Perfection!


For the binding, I chose to use the teal colored stripe from the collection and cut it on the 45 degree bias so the stripe ‘candy-caned’ down the edges of the quilt. I alway stitch my binding on by machine through the whole process – no hand stitching here! If you’d like to learn my fast method of stitching binding on by machine, I have a tutorial that you can view right here!


Voila! All done…..All in all, it was super fun quilt to make for my for my first ambassador project!

If you’d like to make one of your very own, we currently have ‘Robo Boogie’ fat quarter bundles available in our Colourwerx shop. To make this Small Lap Size (57″ x 65″) you’ll need just one fat quarter bundle with 20 FQ’s, 3/4 yard of a neutral background fabric and the All Stacked Up pattern.

Now I’m looking forward to my 2nd Quarter Ambassador project where I’ll be getting wonky and curvy in the same quilt! Thanks for following along and until our next colour fix! xoxo. Linda

Just My Type Digital Design Challenge Blog Hop

Hello Colourwerx Peeps! It’s time to meet another multi talented designer in our industry and one whose work I have admired ever since Carl and I started working with Island Batik.

Meet Tammy Silvers from Tamarinis – she is a multi talented quilt teacher, pattern designer and fabric designer for Island Batik. And today is our day on the “Just My Type” Digital Design Challenge Blog Hop – welcome everyone!

When Tammy asked us to digitally render one of our patterns from her new batik collection,“Just My Type”, we of course said yes!   Quilty pals are the best and it’s always a pleasure to help out a colleague and at the same time get to play with super gorgeous yet to be released fabrics.

Tammy’s new fabric collection, called “Just My Type” from Island Batik is oh-so-cute and filled with a delightful array of vintage typewriter keys, coffee mugs, swirls and other tone on tone designs. The colors are a gorgeous collection of jewel toned teals, turquoises, deep dark blues, sea greens and bright chartreuse (my favorite)! Here’s a sneak peek of all the fabrics in the collection.

Tammy decided to ask many of her colleagues and friends to digitally render one of their patterns in her new fabric collection. Carl and I chose one of our newest patterns called “All Stacked Up”.

“All Stacked Up” looks complicated but it’s not. Easy piecing makes this quilt go together in a flash! Twenty 1/3 yard cuts plus about 3/4 yard of a neutral background is all you need to whip up this Lap Size quilt! But the pattern give you four other size options in case you want a smaller or larger quilt!

You can purchase the All Stacked Up pattern in our Colourwerx Shop right here:

PURCHASE THE PAPER PATTERN – ALL STACKED UP

PURCHASE THE PDF PATTERN – ALL STACKED UP

Even though we are near the end of the digital challenge blog hop, a heap of other talented designers have created digital images for inspiration so I hope you’ll take a moment and hop over to Tammy of Tamarinis’ website and these other designer pages:

Be sure to ask your local quilt shops and online stores to order up Tammy’s new batik line “Just My Type” from Island Batik. It should hit the shops this month!

Until your next colour fix~

L&C xxoo

Wonky Piecing & Easy Applique QAL – Week 4 – Easy Machine Applique & Finish

Wonky Week 3 Slug 4Welcome back!   It’s our final week – Week #4 – of our Wonky Piecing & Easy Appliqué QuiltAlong !  This week is all about applique stitching your animal shapes to your background fabric and then finishing off your project into either a wallhanging or pillow!

I’ll also be sharing with you how to get your sewing machine ready for machine applique, how to do some basic applique stitches, sew in and out of points and some very  general “rules of the road” to perfect your own applique stitch!  So let’s get started!

Screen Shot 2020-04-27 at 11.23.01 AM

First off, my biggest tip to perfect applique stitching is: practice, practice practice….  Machine applique requires practice and alot of patience.  You may want to review this blog post, watch my companion video or subscribe to our Colourwerx UTube channel.  Then set yourself up with some basic scrap shapes like squares and circles on a background fabric and practice, practice, practice.

But first things first….

Set Your Machine Up For Success –
Here’s how I set my machine up for a day of applique:
1.  Open Toe Presser Foot – a must!  Notice that this foot  has no bars or metal in the middle of the two outer prongs – this allows you to see the “open road” ahead of you while stitching.  For me, it is a must have before I start any applique stitching;
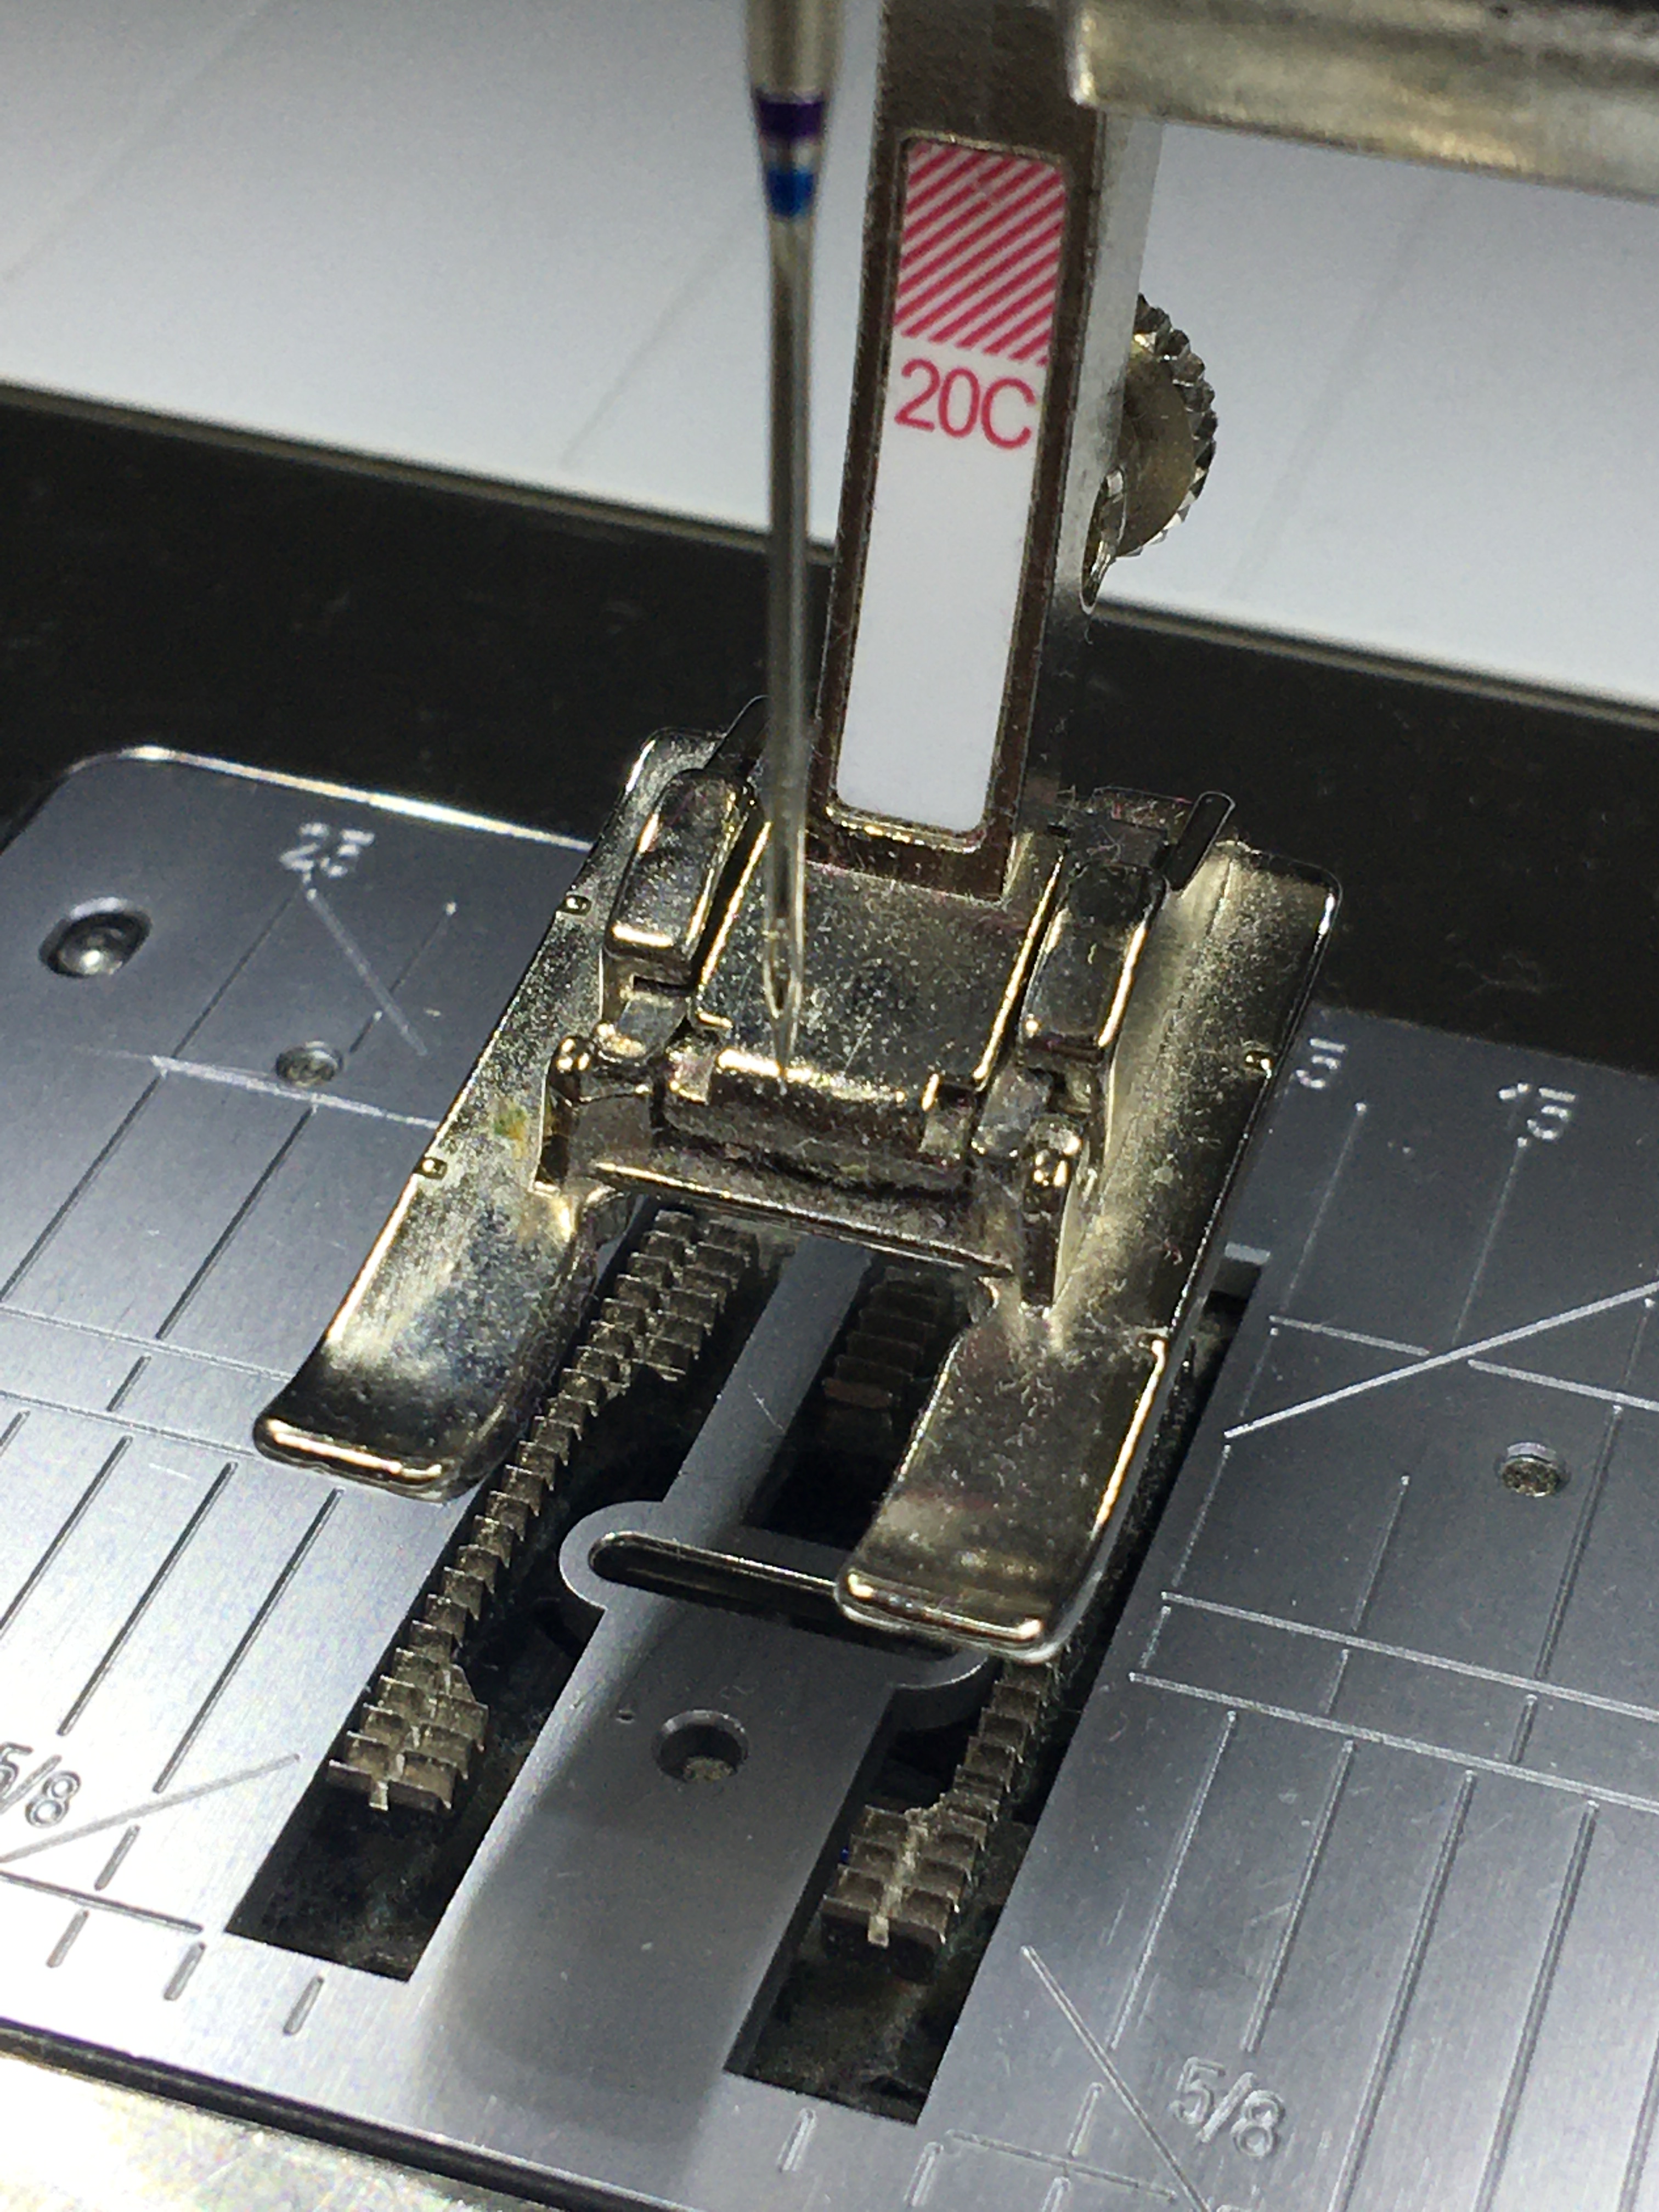
Open Toe
2.  Schmetz 90/14 Quilting Needle – here we go again 🙂  but this size and type needle is perfect for applique stitching and allows me to switch from thread to thread regardless of the thread thickness as I applique stitch;
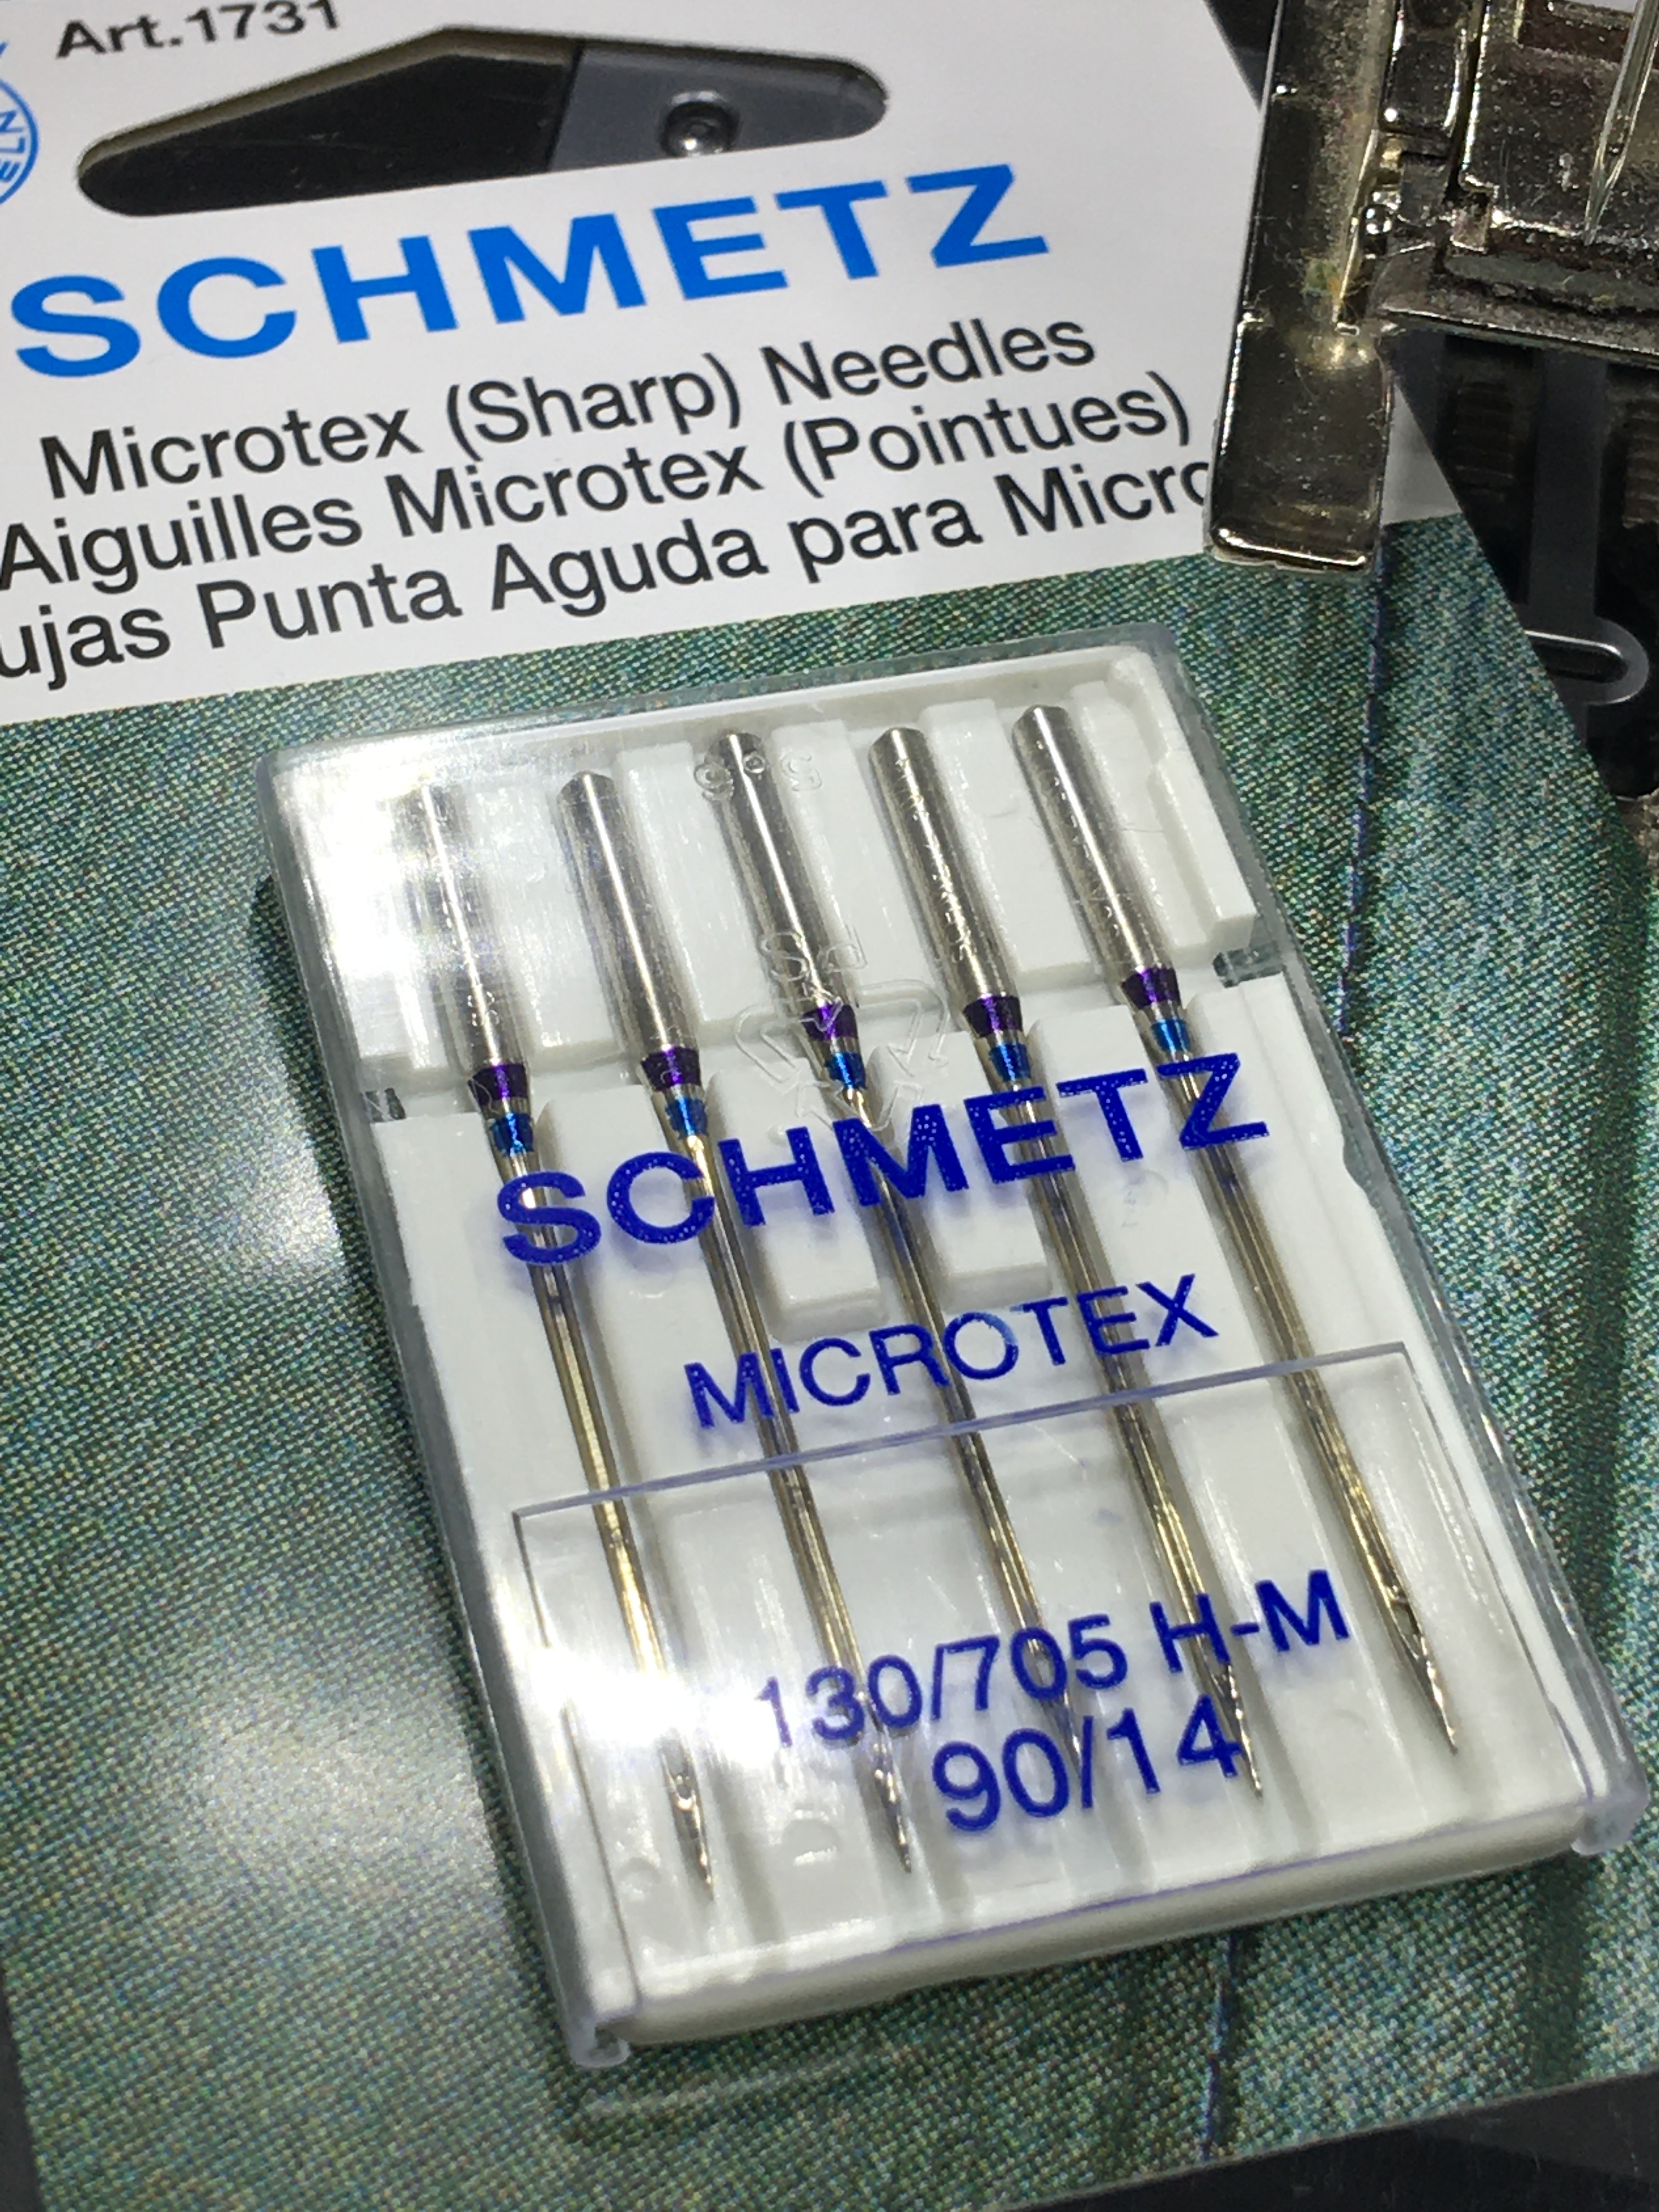
Needle
3.  Bobbin Thread – Regardless of the thread you choose for stitching around your shapes, I always use a neutral colored cotton 50 weight thread in the bobbin – usually the same weight and color thread that I piece my quilts with — something like a tan or light grey Aurifil 50 weight (look for the orange colored spool) works well.  Although the exception to this is that if the piece will be finished as a wallhanging and I have already pre-quilted the background fabric, I will match my bobbin thread to the backing fabric – again, using a 50 weight thread;


4.  Set Your Stitch to ZigZag – This is stitch #2 on my Bernina machine and my go-to stitch settings are: Width – 3.0, and Length – just under 0.8-0.9.  This seems to be good starting point for me.  Your machine may be slightly different and more than likely, you’ll need to adjust your settings as you practice and gain more confidence.
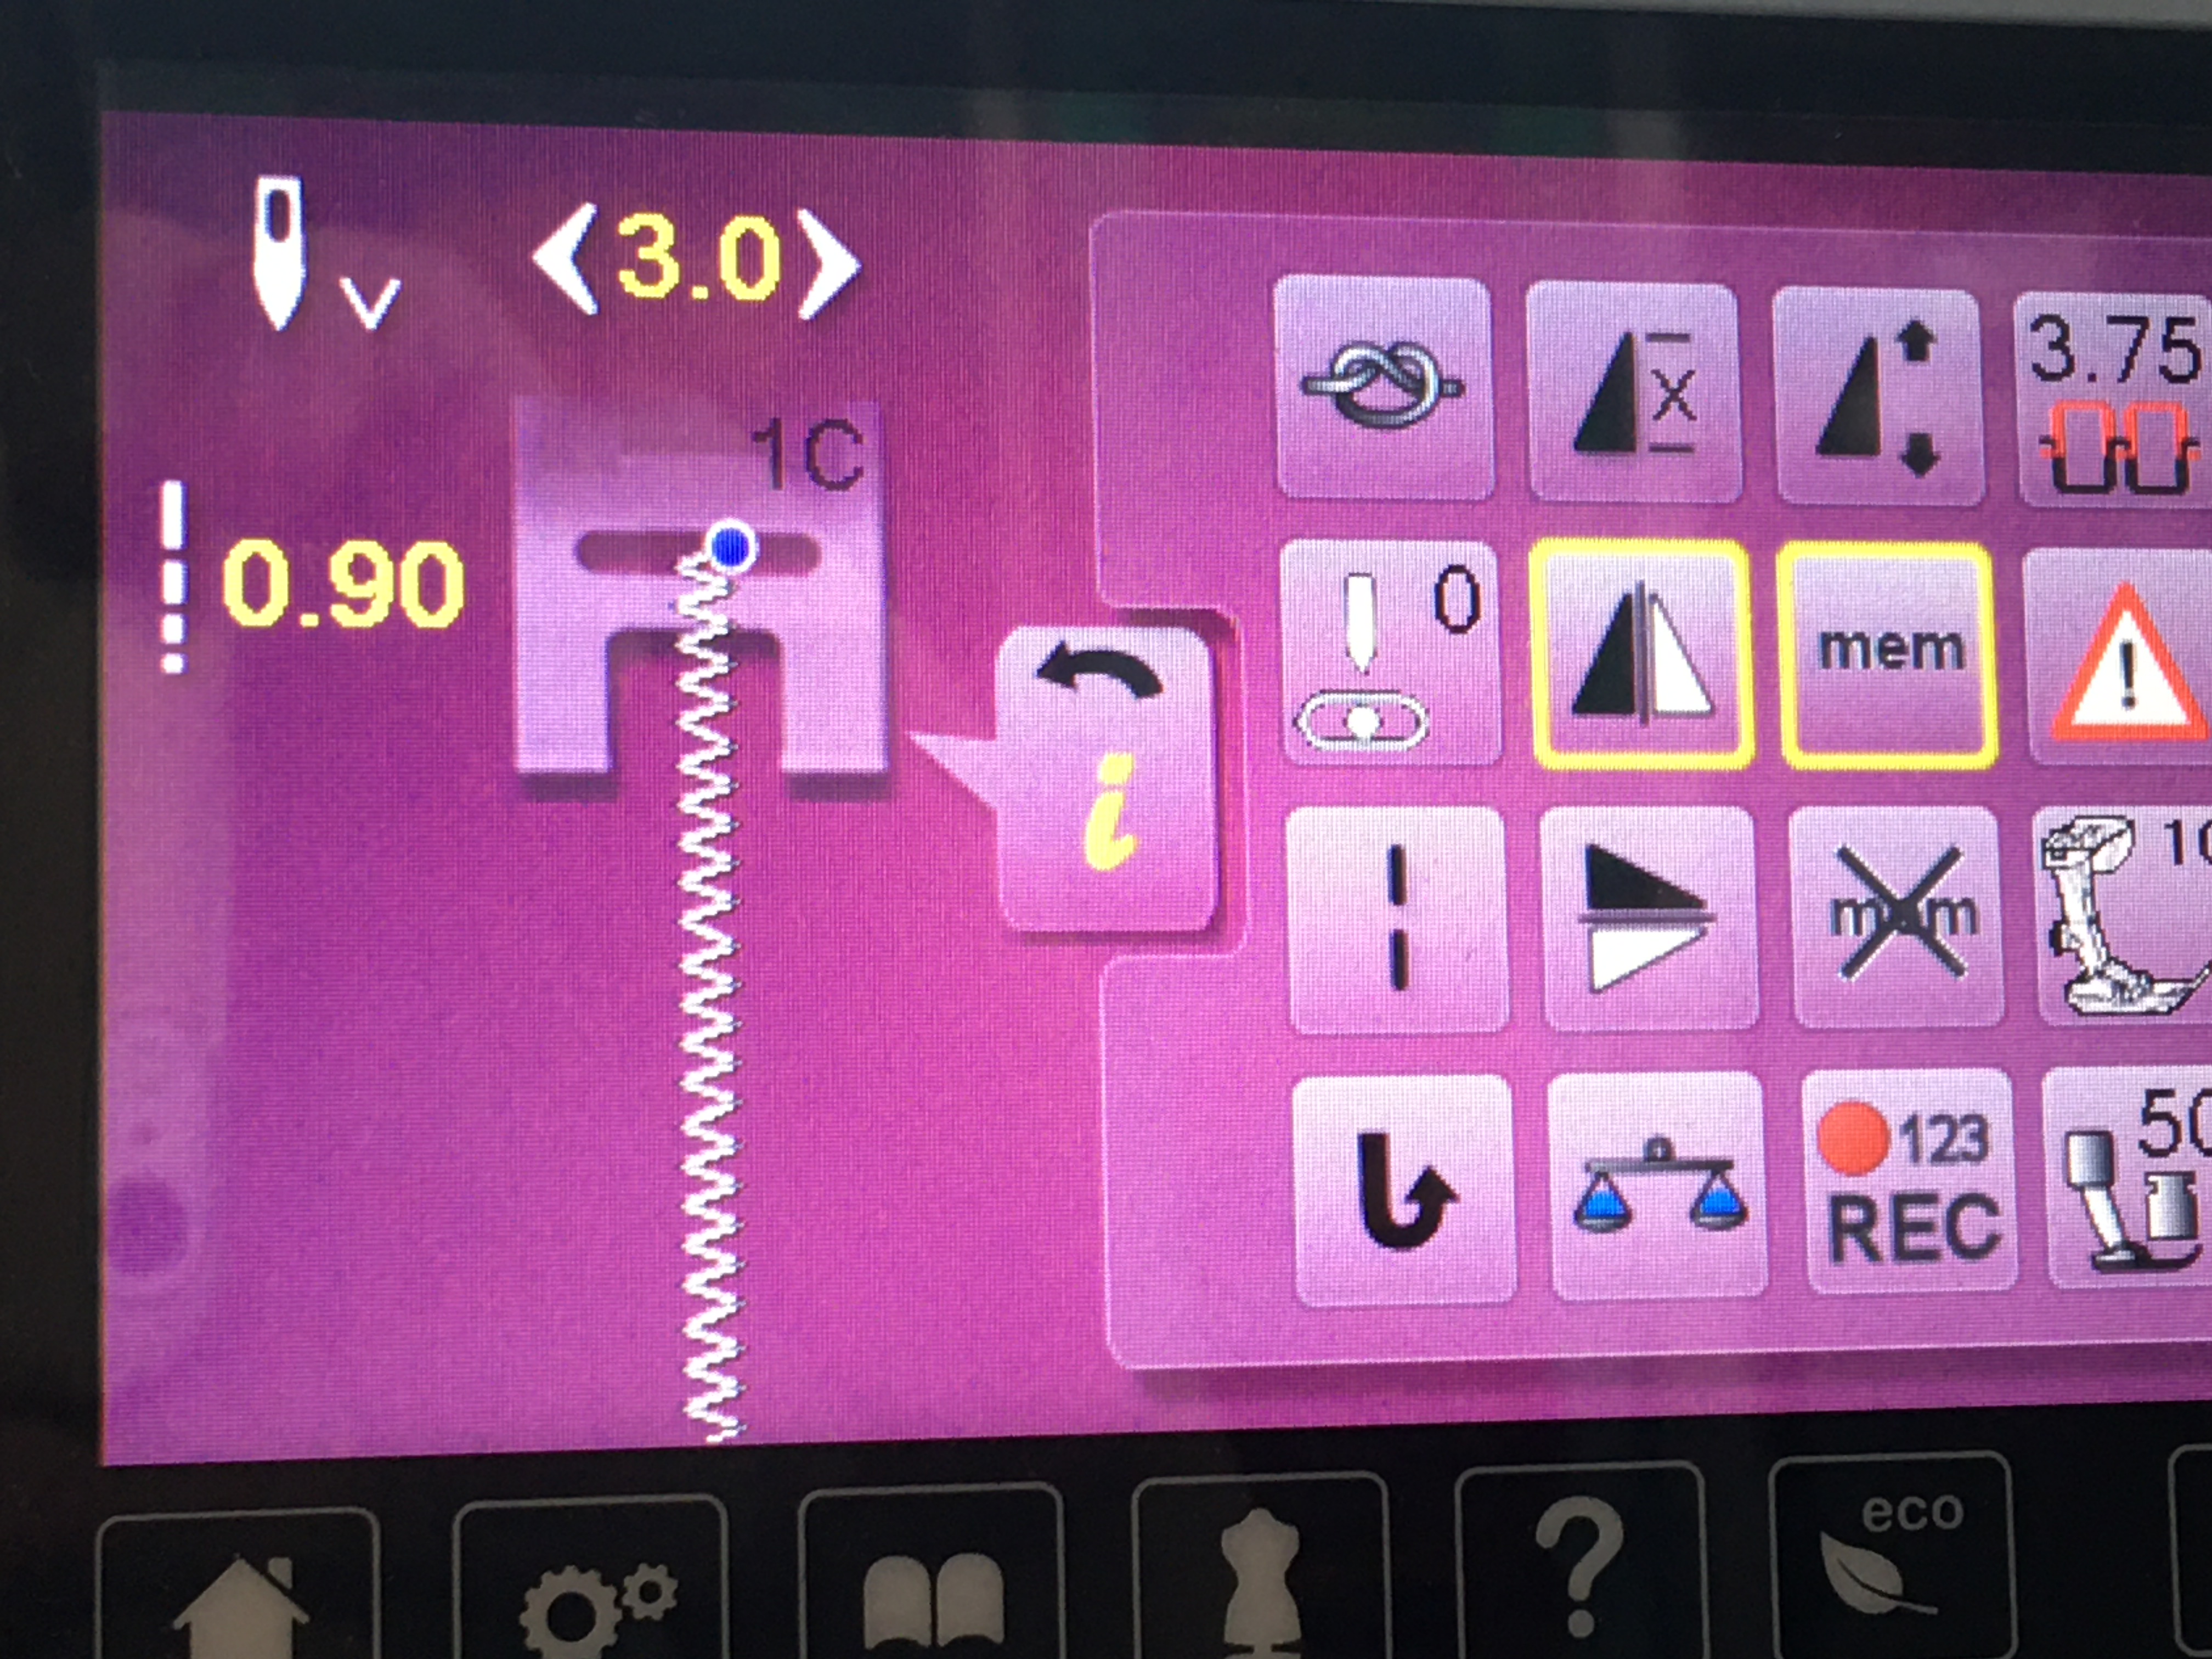
Machine 1
5.  Very Important:  Test Your Stitch & Adjust Your Tension – Once you have your machine set up, test your machine by stitching out a straight line of zigzag stitches.
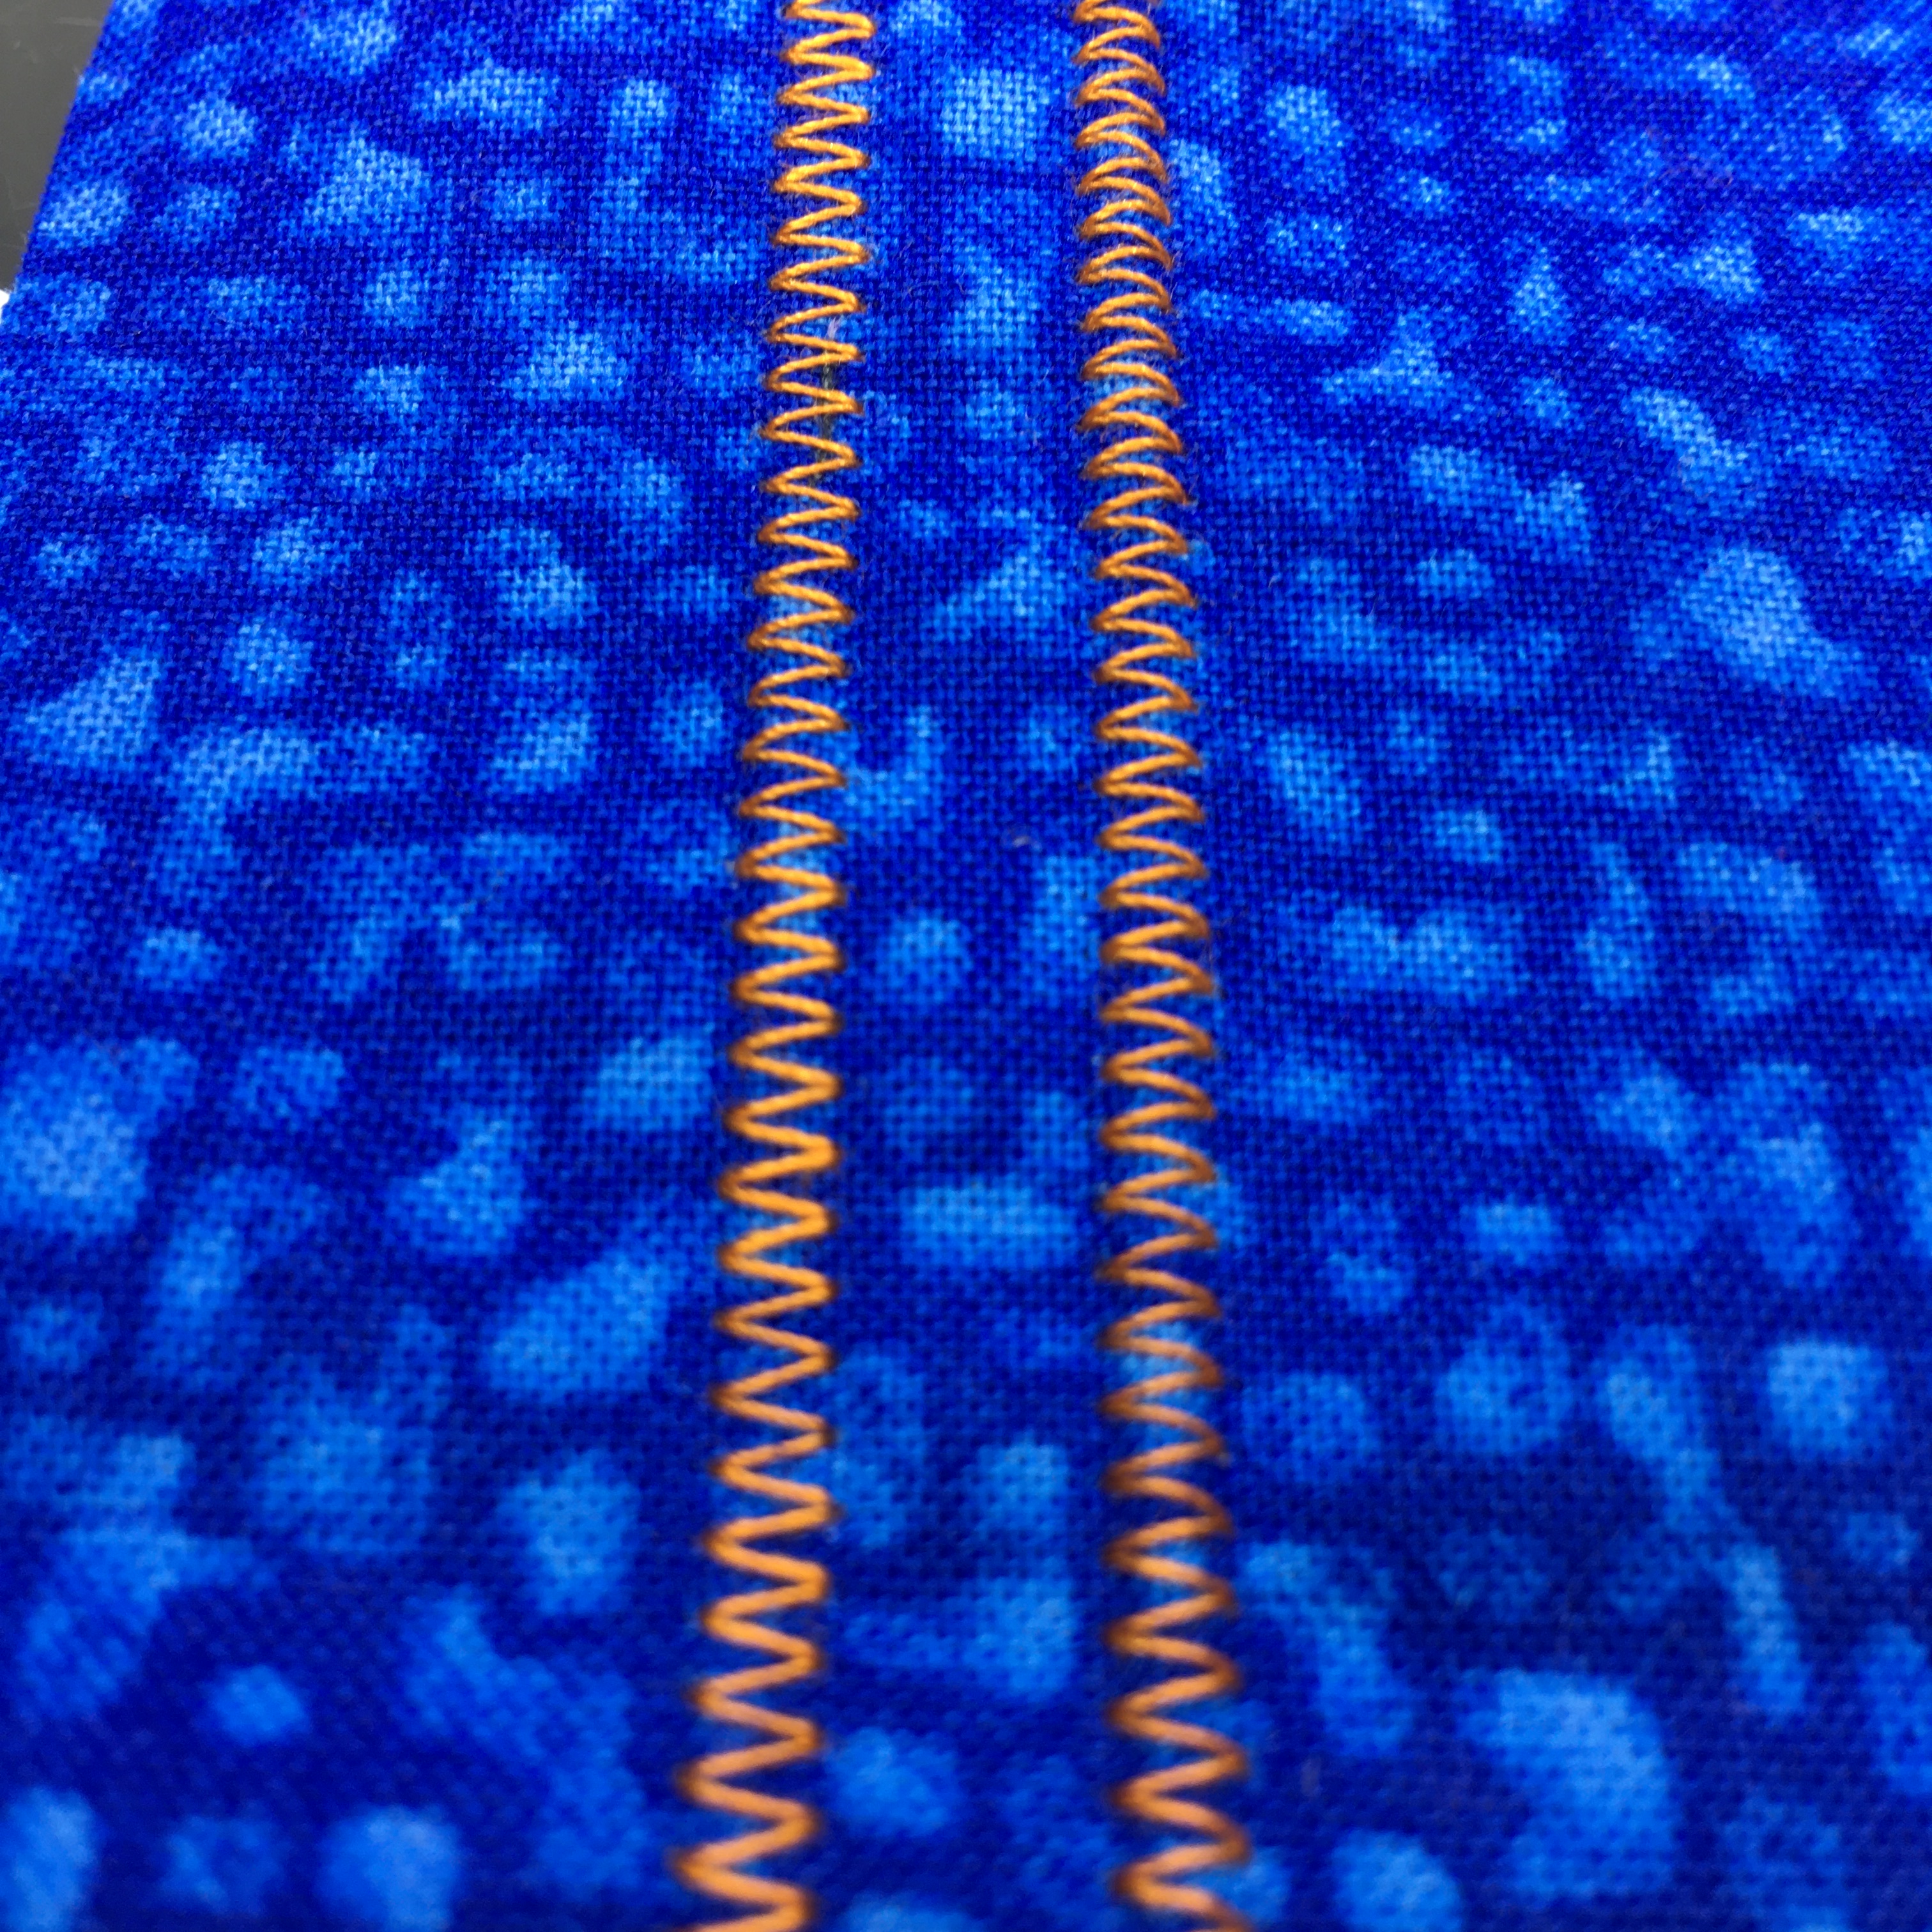
Test 1

Check your tension –   common issues are these:
If you see the bobbin thread (gray) on top like this, adjust your tension dial to a higher number;
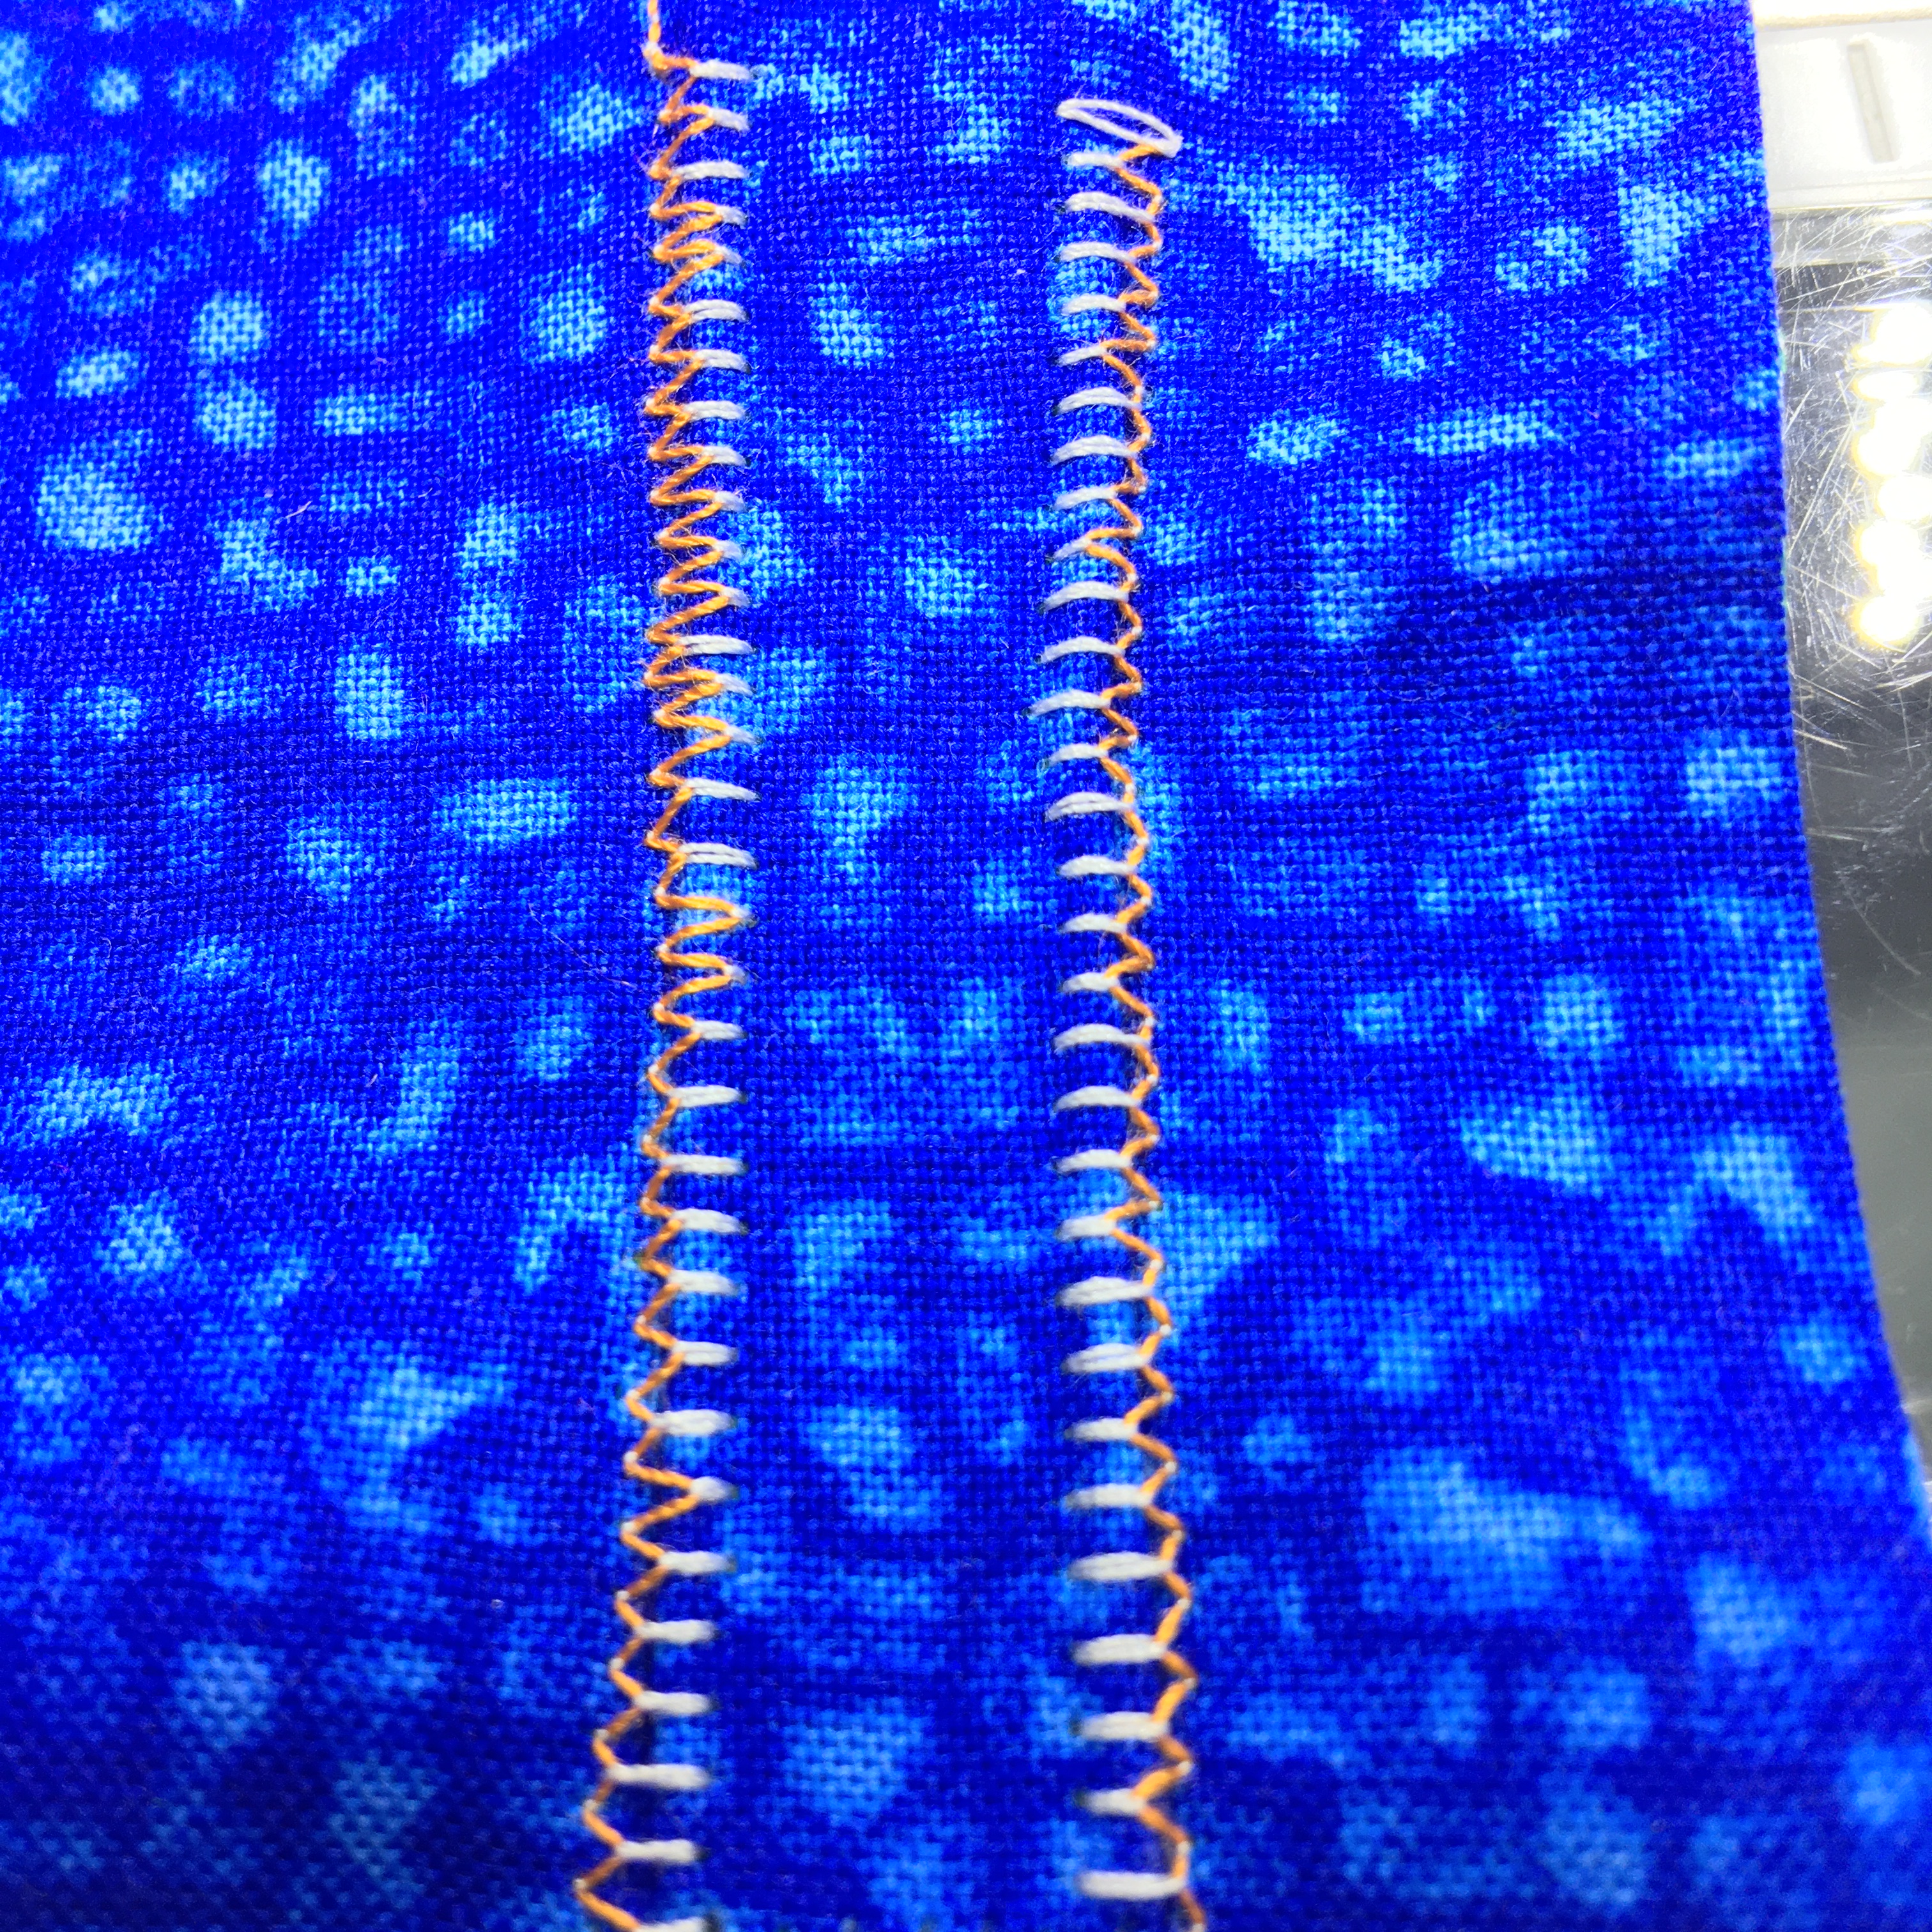
Test 2

If you see the top thread (orange) on the bottom of your stitches like this, adjust your tension dial to a lower number;
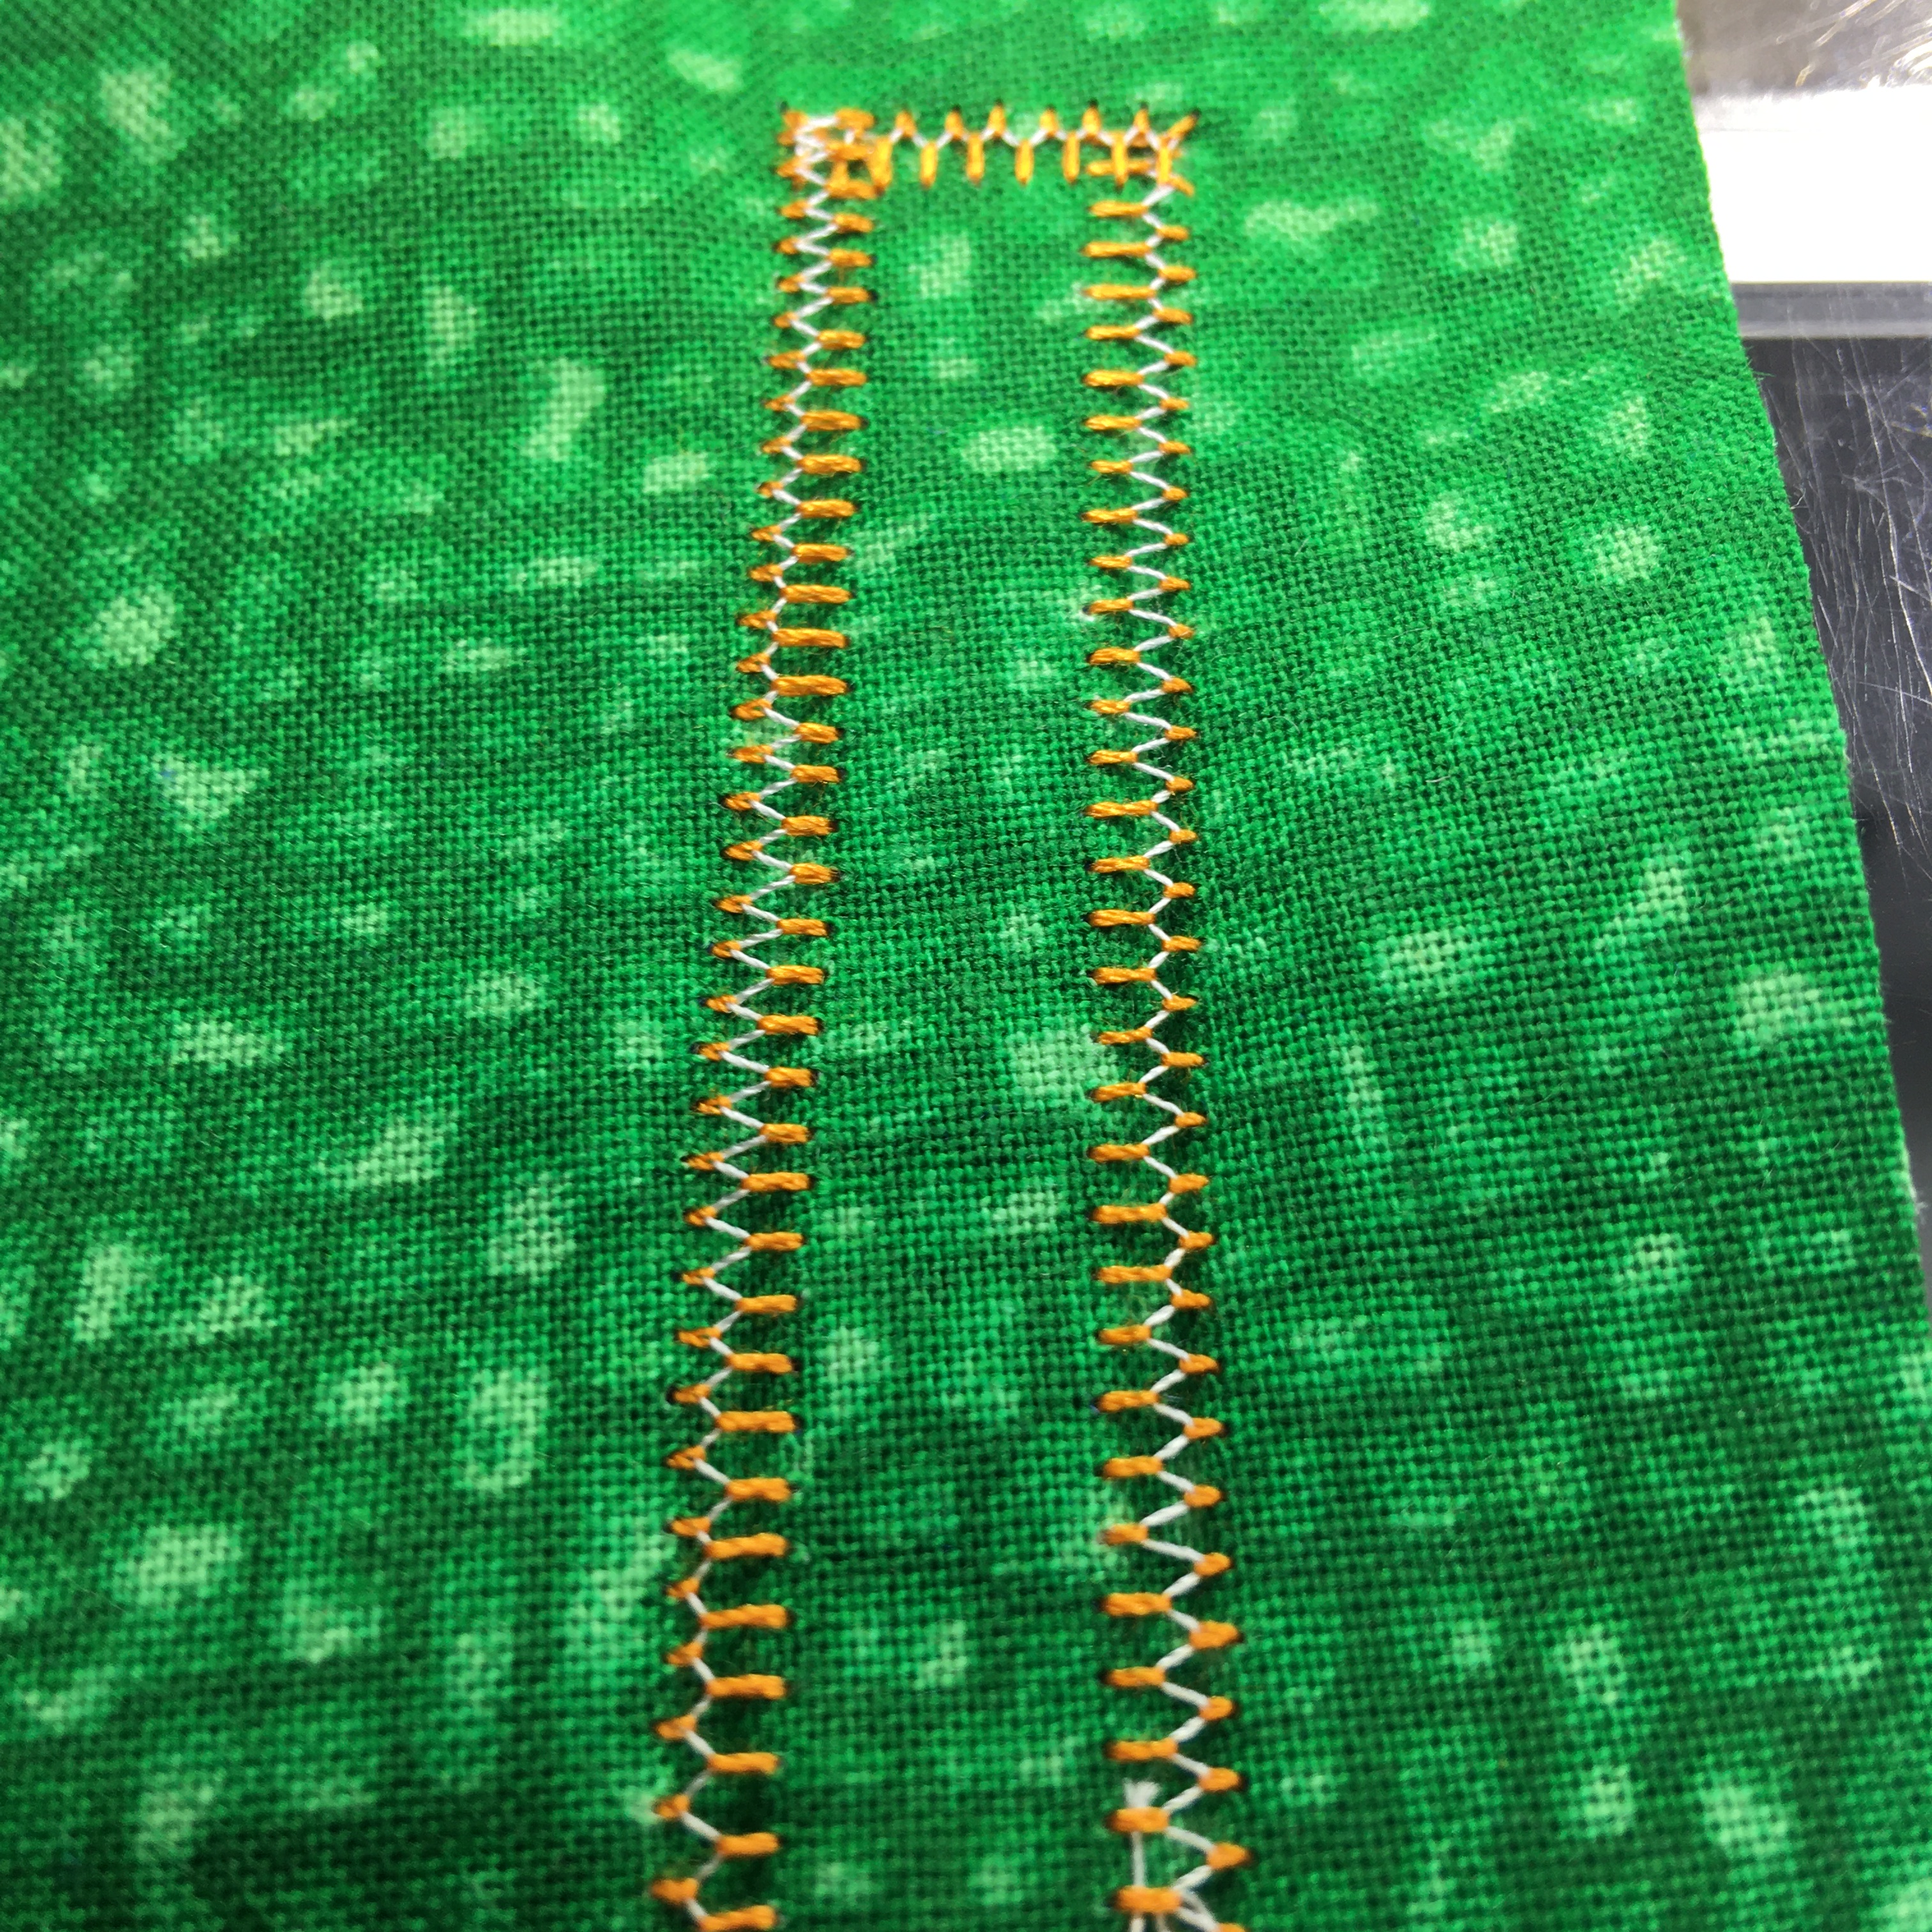
Test 3

If your stitches “caterpillar” like this – you’ll need to attach a stabilizer to the wrong side  of your background fabric.
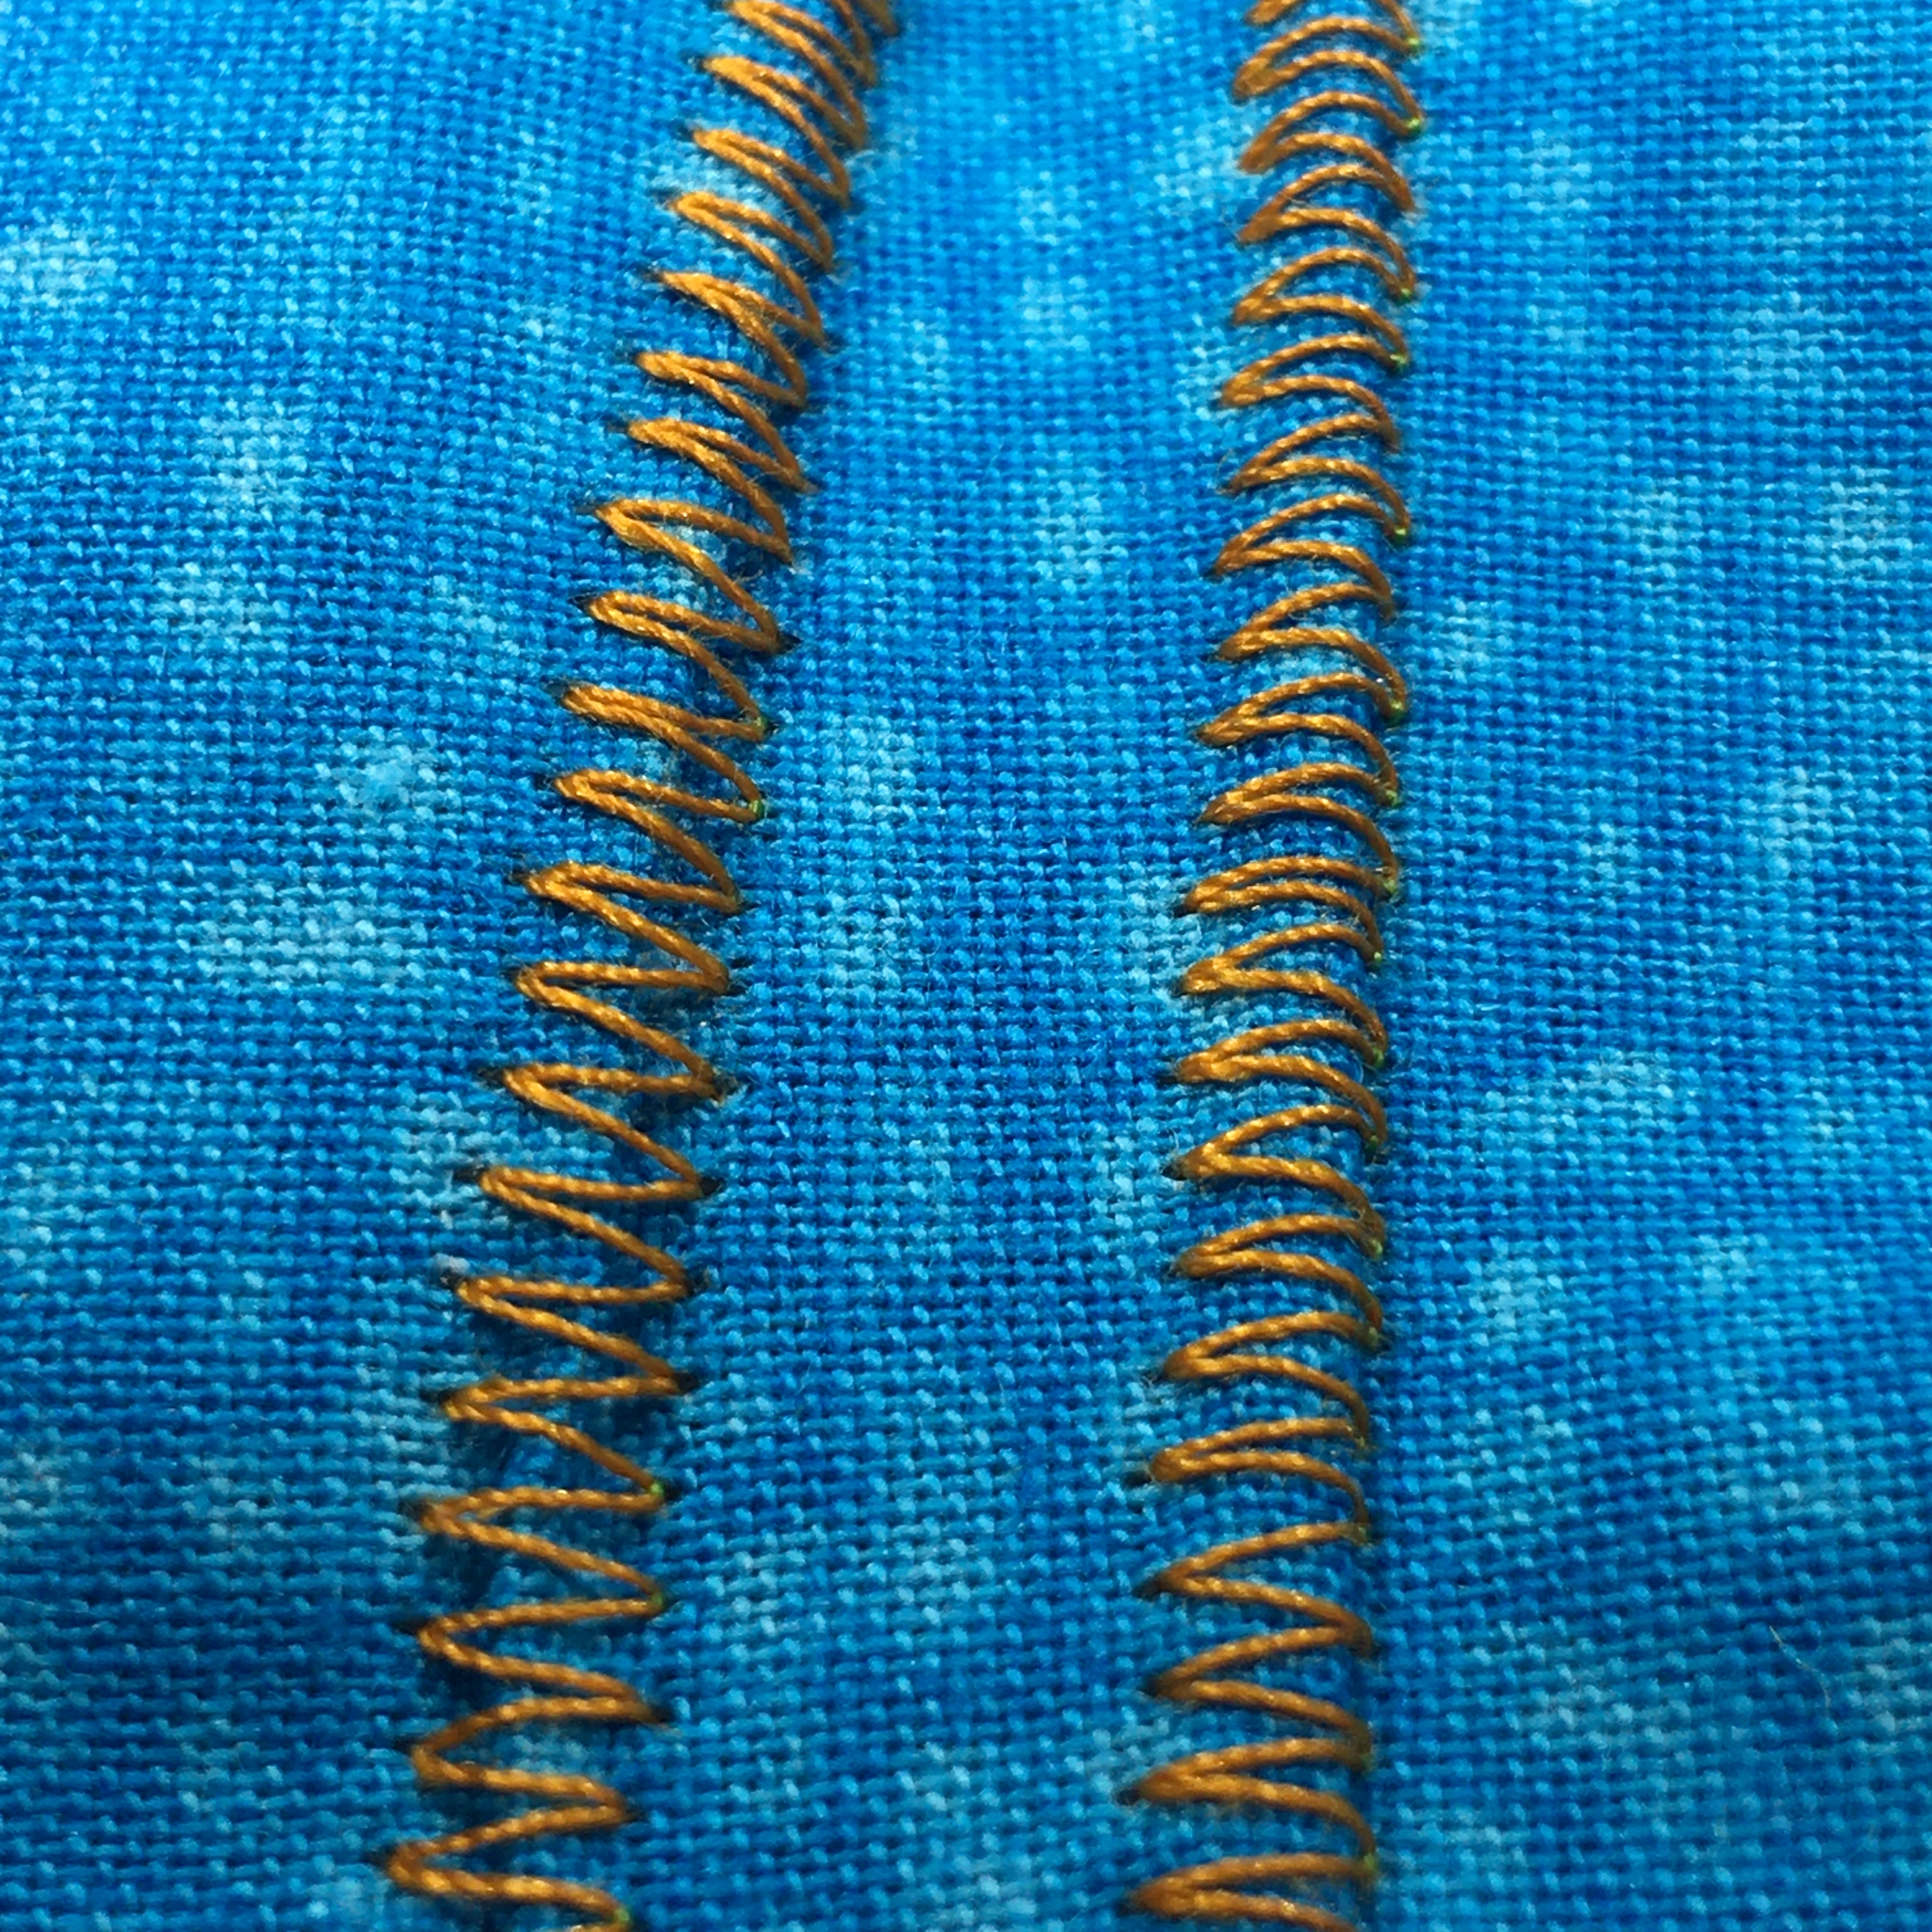
Test 4

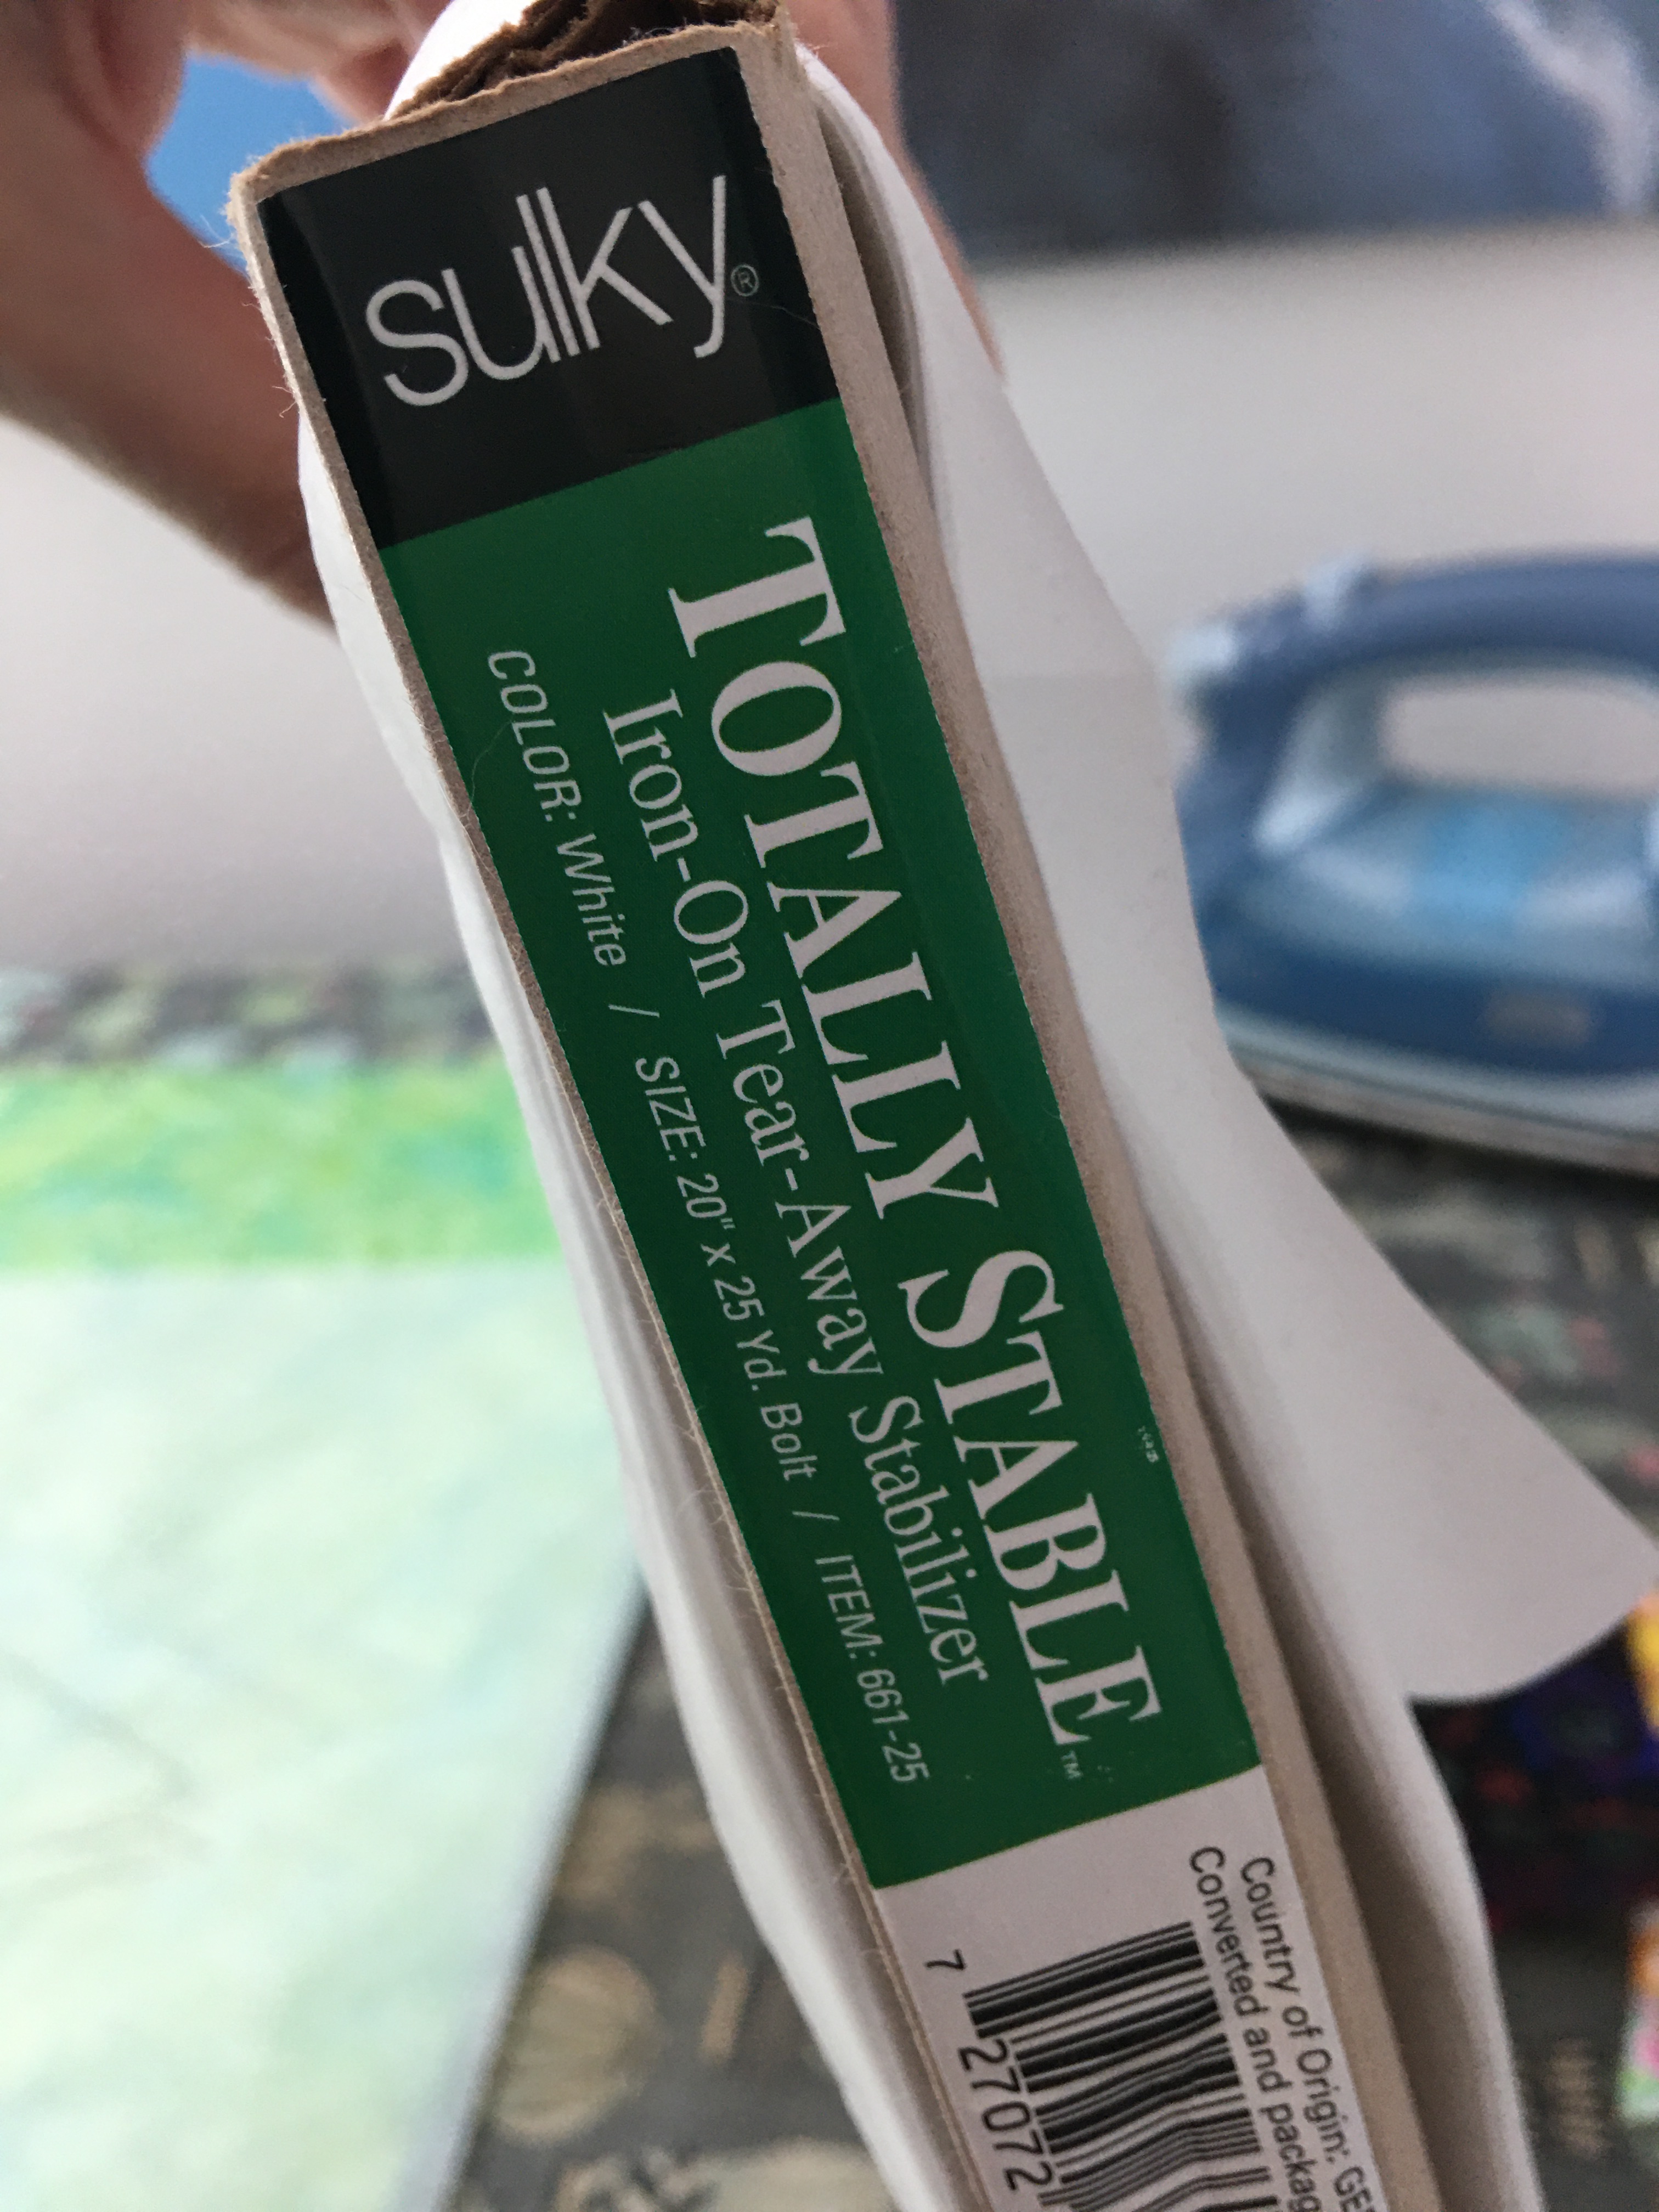
Sulky

Stabilizer is just as the name suggests:  it provides stability to your stitching and helps to avoid distorted stitches.  Any stabilizer (like you use with digitized embroidery machines) will work just fine and even freezer paper works in a pinch!  My favorite brand is Sulky Iron On Tear Away Stabilizer.  (Sidenote:  If you pre-quilted your background fabric,  you won’t need to add a stabilizer.  The batting acts like the stabilizer.) 

Iron Your Shapes On to Your Background Fabric –
Once your machine is set up, you are ready to go and it’s time to iron your animal shapes onto your background fabric.

Score the release paper on the back of your applique shapes with a pin and then peel the release paper off.
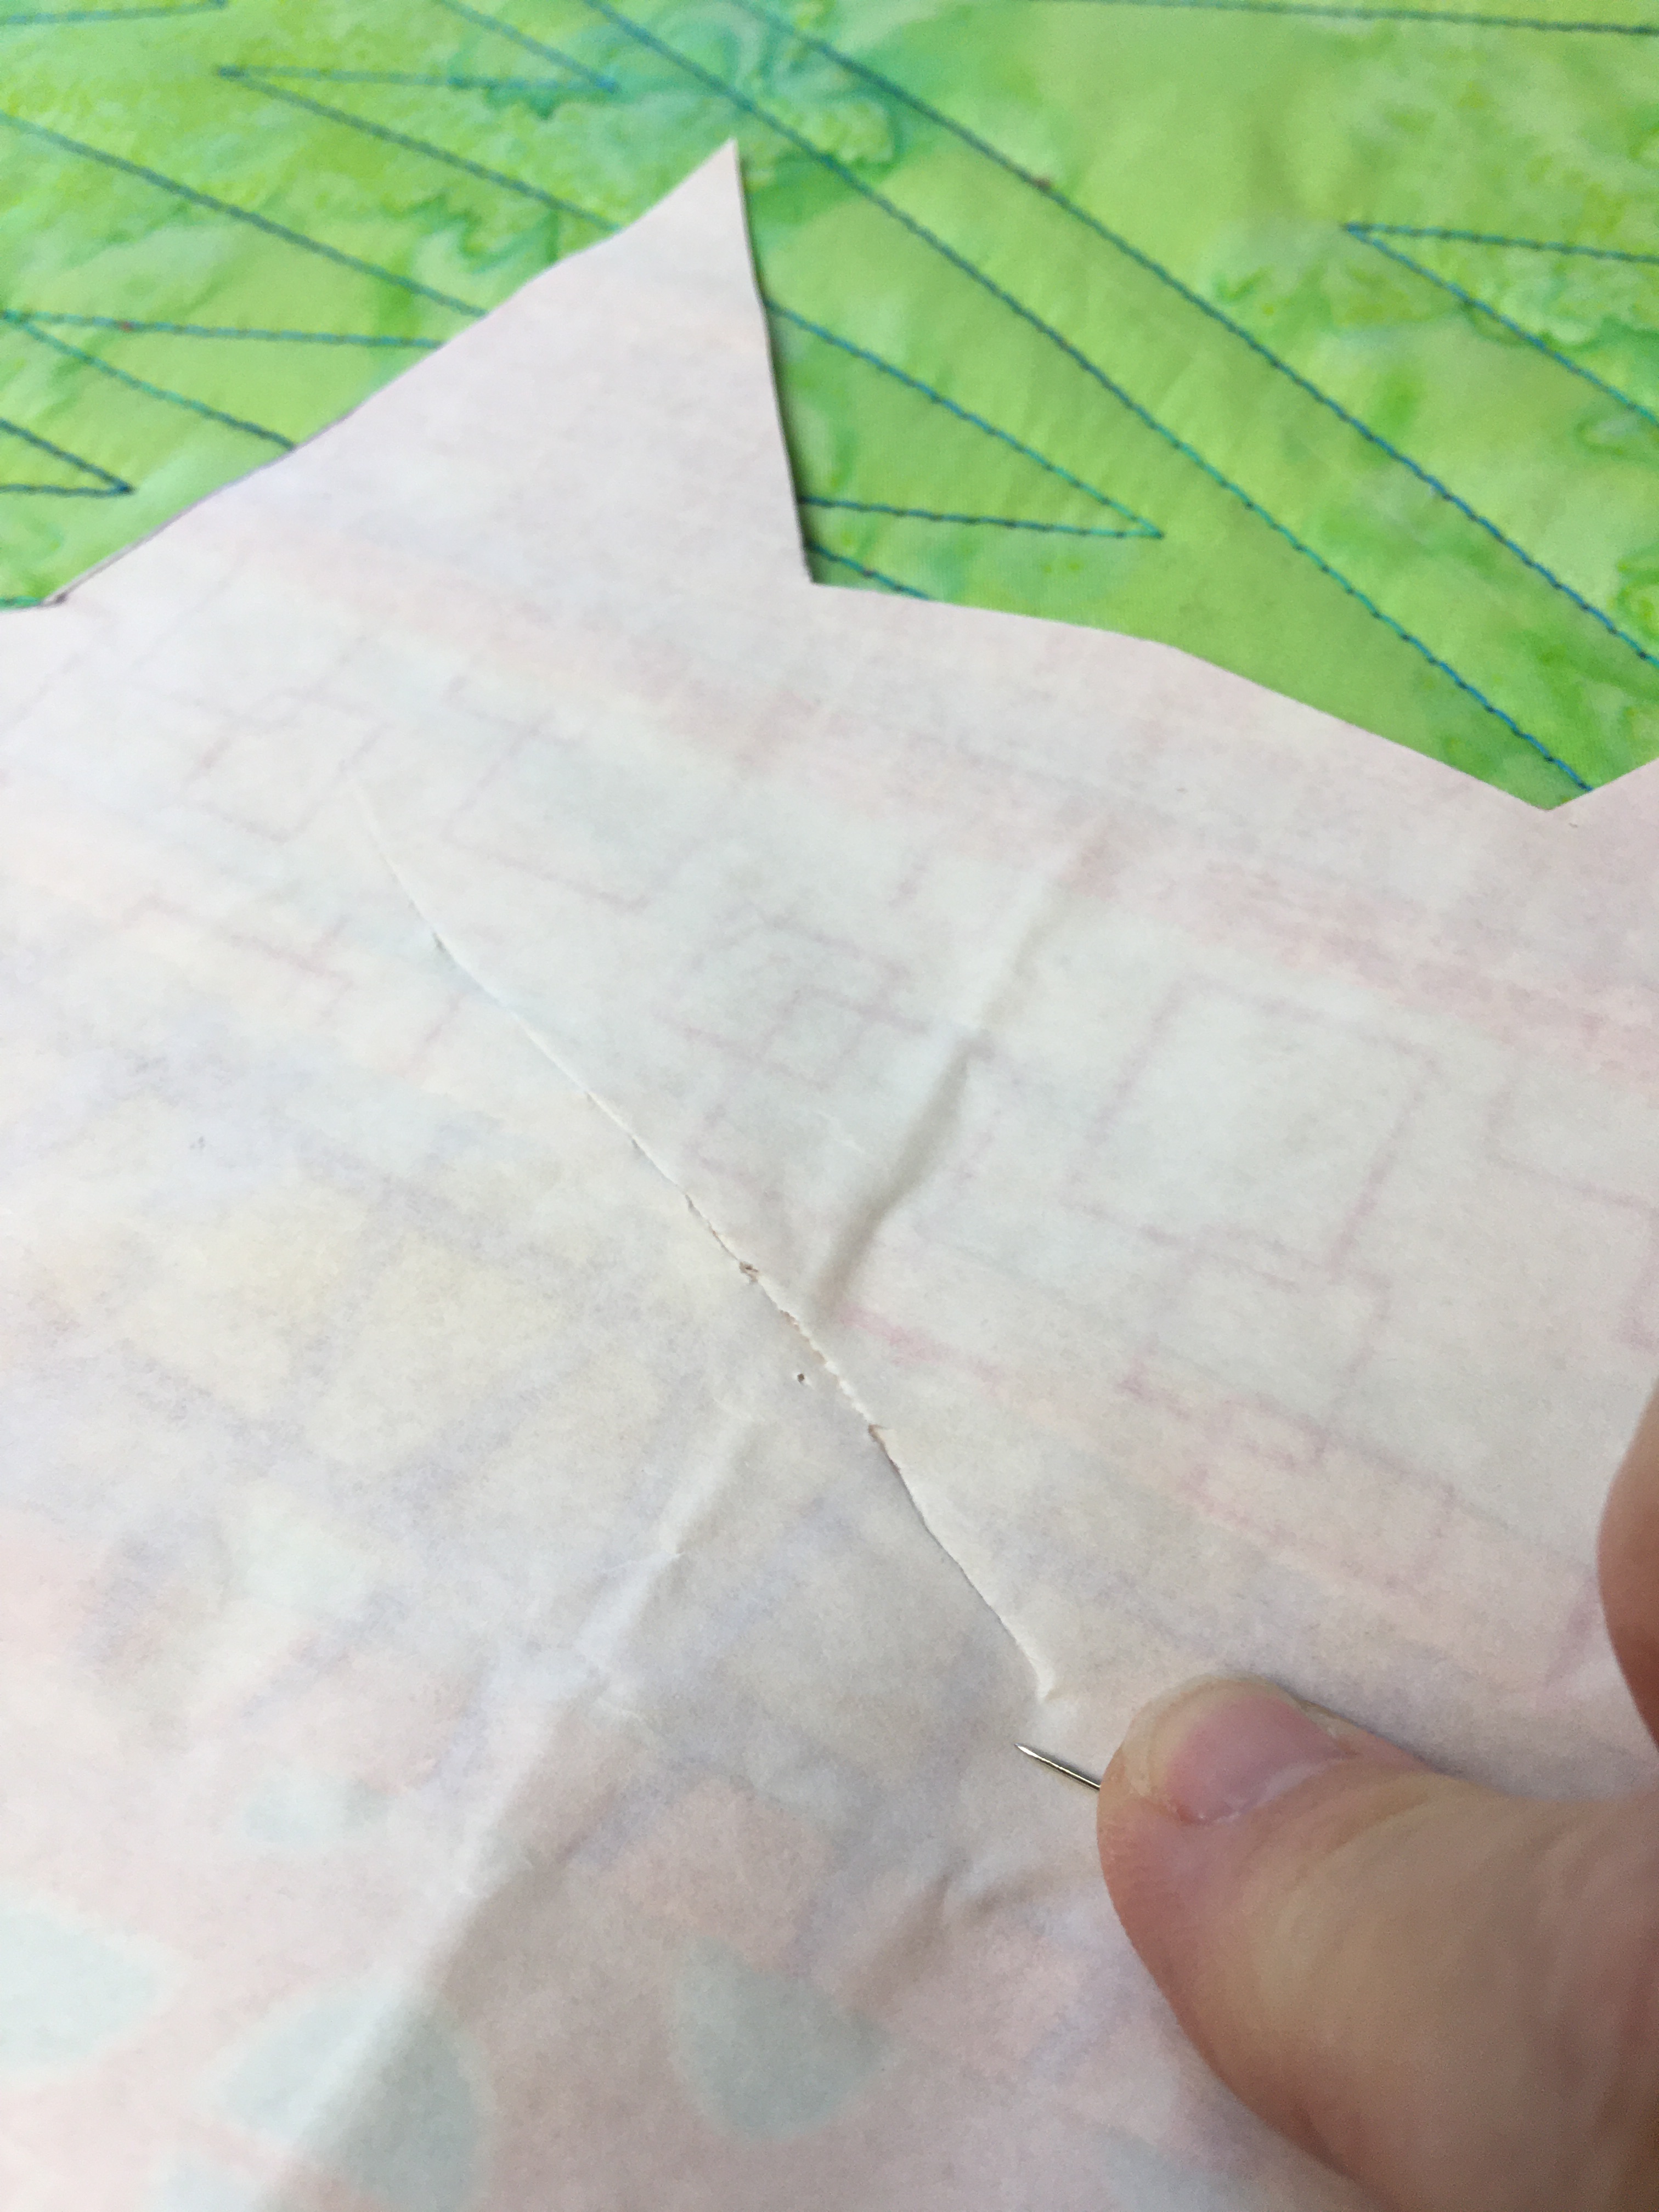
Score

Place your shapes in place on your background fabric – making sure that those shapes  that are overlapped by others are placed down first.  Once satisfied with placement, with a hot iron, press the shapes down applying at least 10-15 seconds of heat to the shape to secure it firmly to your background fabric.
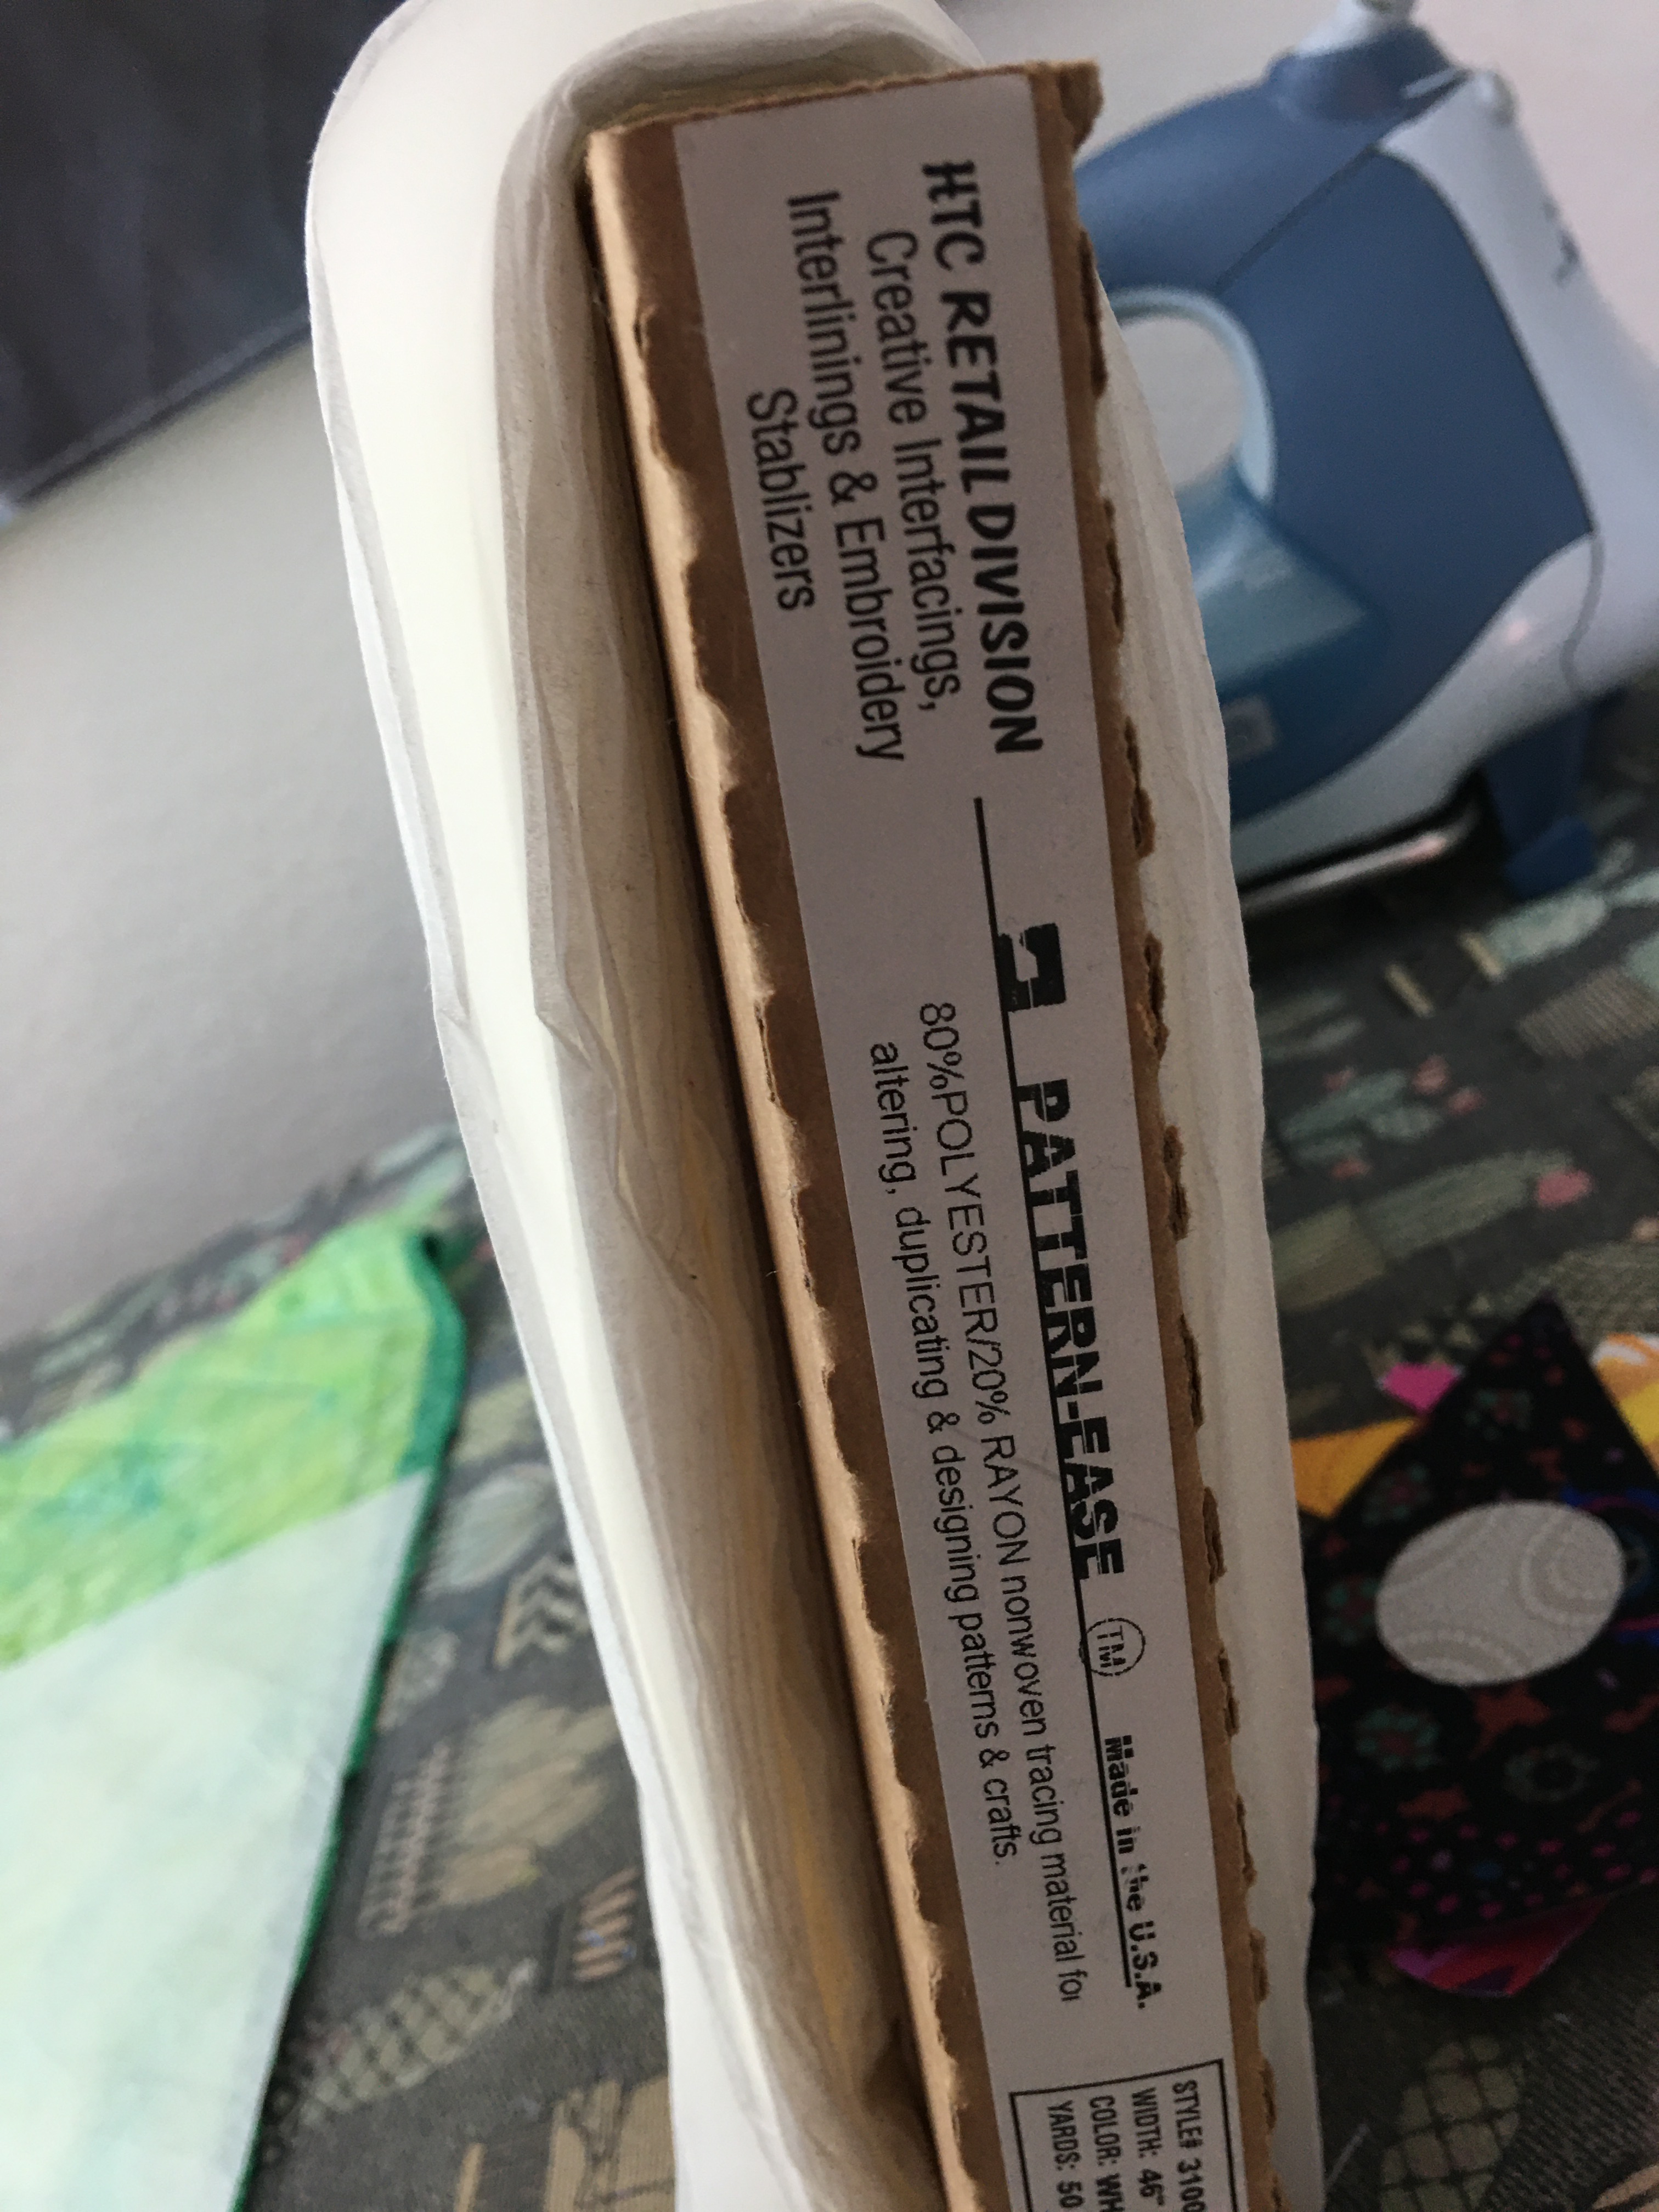
Pattern Ease

You might want to make an overlay sheet for something like the ModFish which has several shapes overlapped on one another.  This can be made from tracing paper or a dress making interfacing product called Pattern – Ease which is sold at stores like Joann’s.  Pattern Ease is a non fusible, woven lightweight interfacing.  I like it because I can trace my pattern on it, place it over my background and then move the individual shapes into place under the Pattern Ease. Once satisfied, I can iron right through the Pattern Ease to secure the shapes in place.

This slideshow requires JavaScript.

Additionally, I like to fuse the smaller shapes onto their bigger shapes and stitch around those smaller shapes before fusing that bigger shape onto the background fabric.  Great examples of this are: the ModCat head and eyes and eyelids, or the ModDog eyeball; or the ModFish eye, or ModFish fin on the belly! .
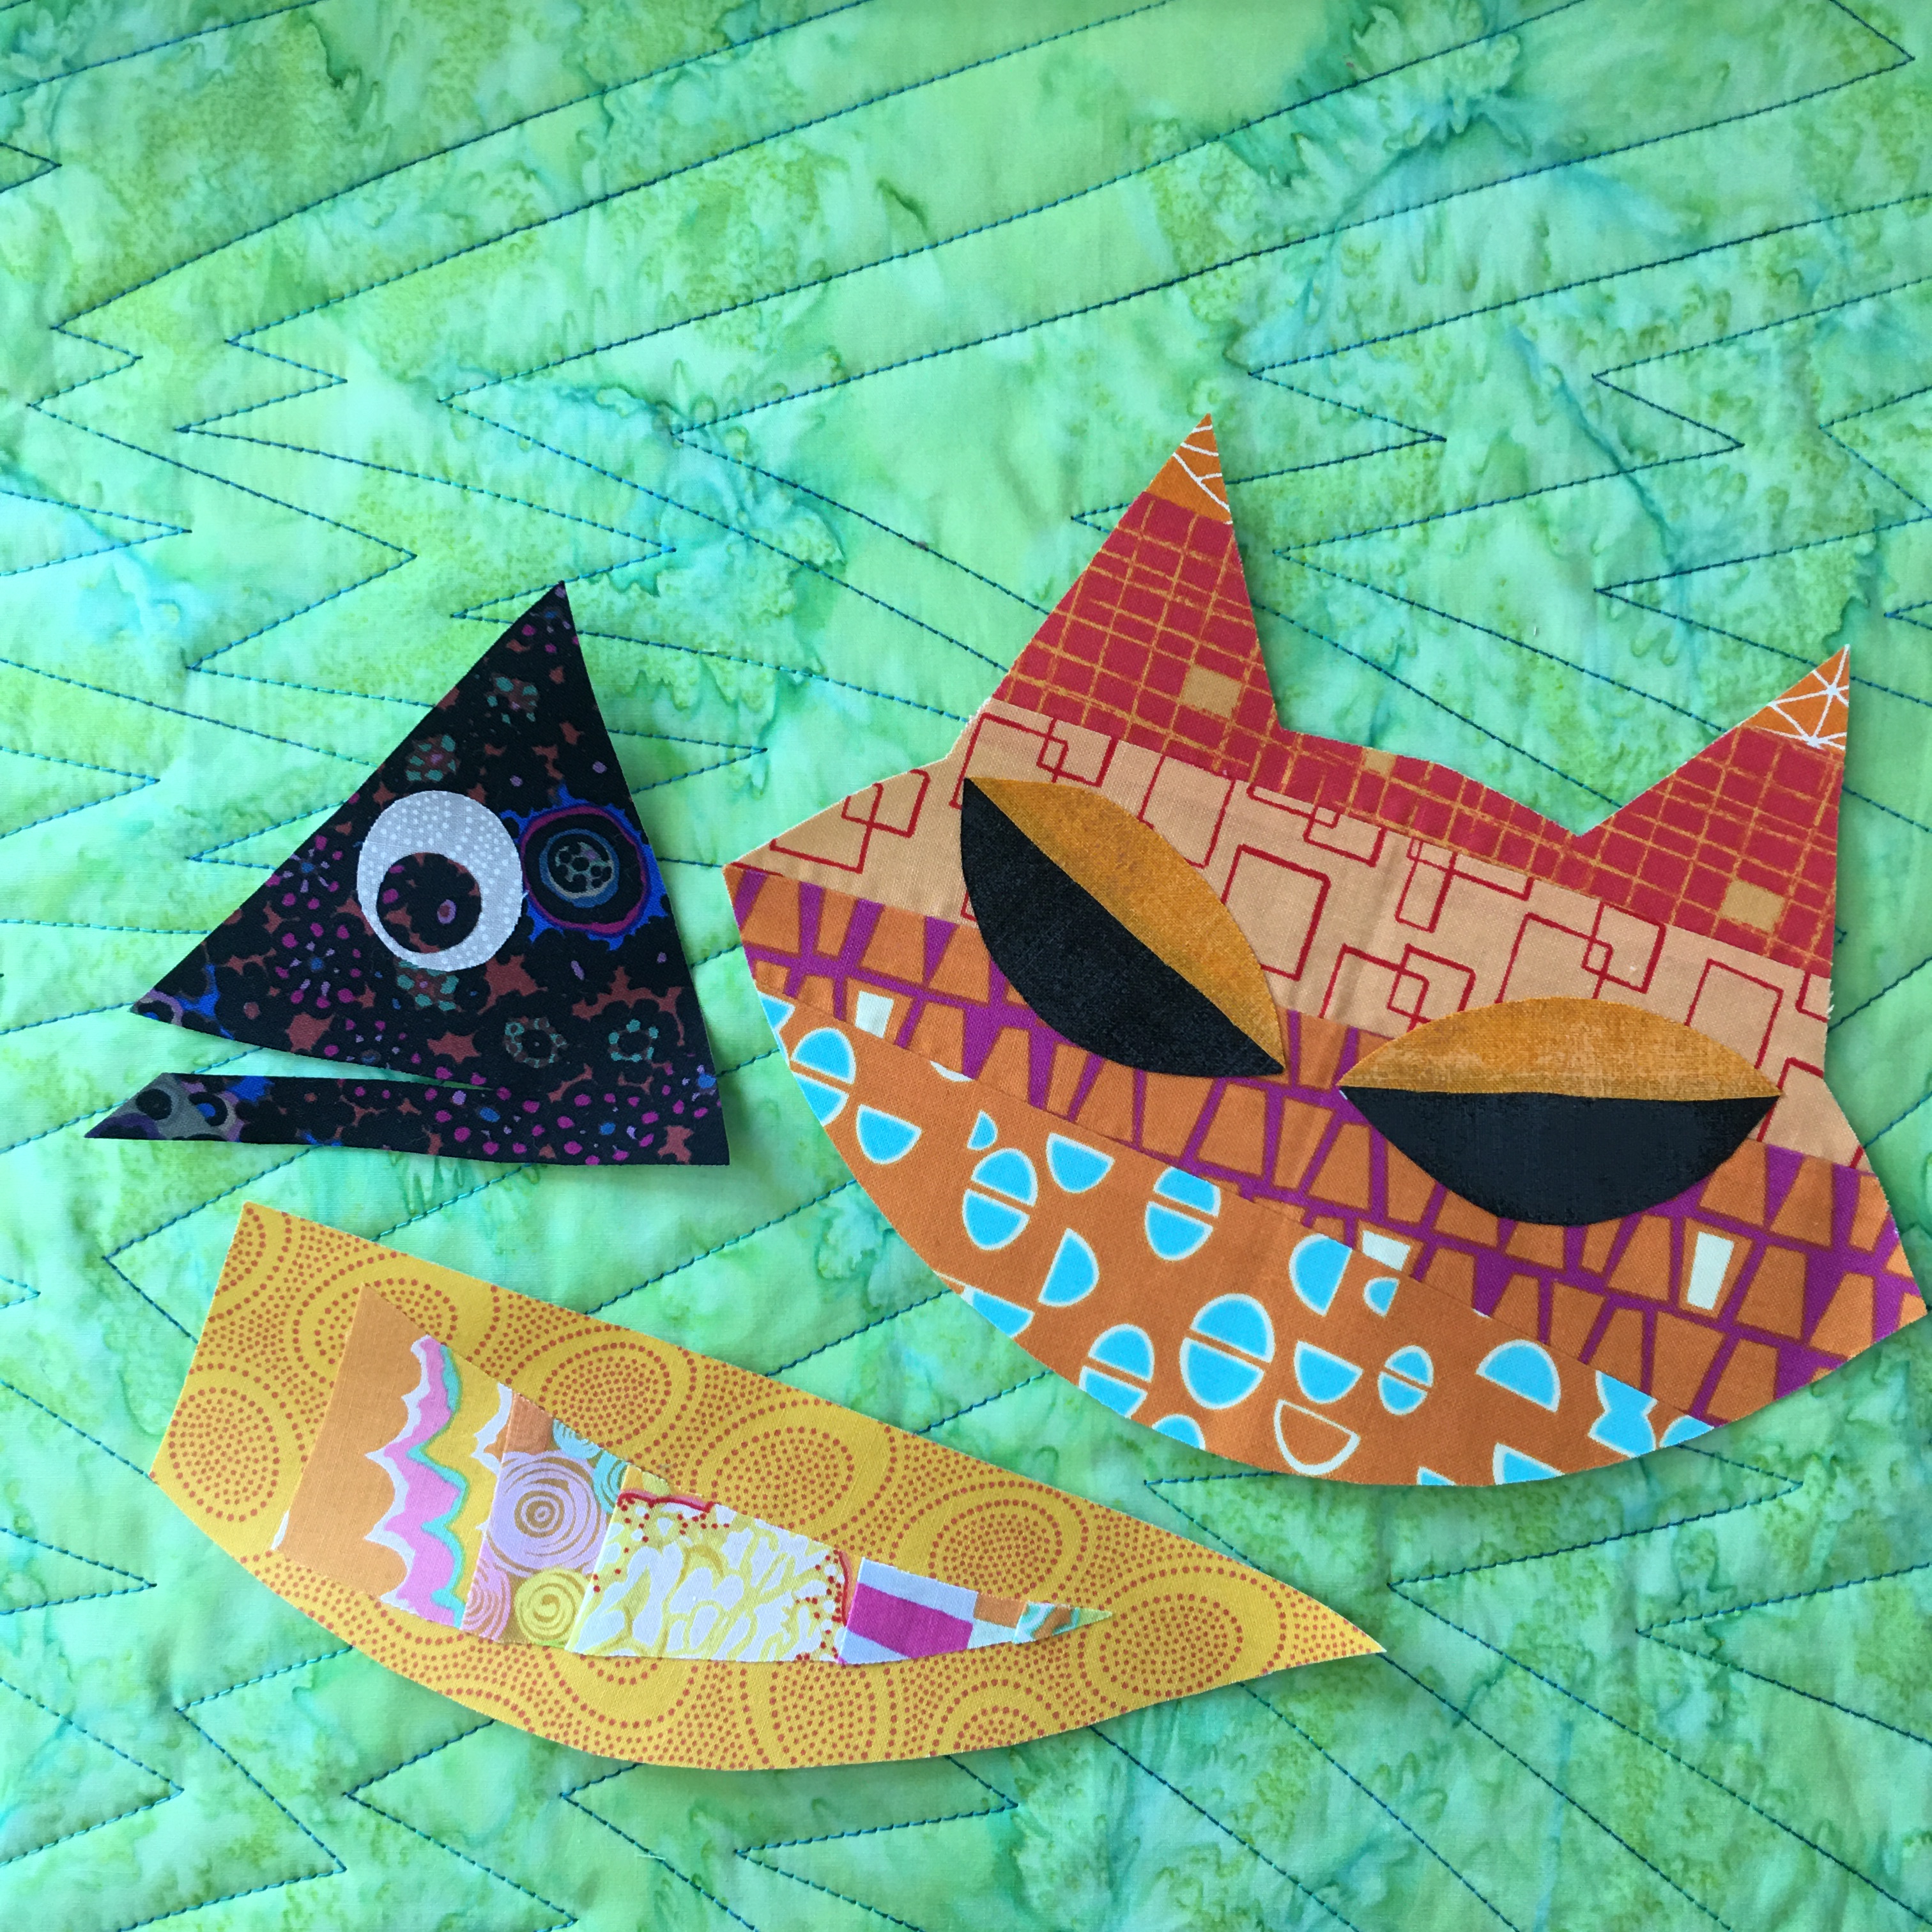
Small Shapes

Why make your job harder?  Take for example the ModCat head, once the eyes and eyelids are fused in place, I leave the release paper on the wrong side of the head as it acts as a stabilizer and then I applique stitch around those shapes…I only have to wrestle with the head and concentrate on making my stitching around the eyes perfect and not deal with the whole background fabric, etc.  Easy-peazy!

Applique Stitching “Rules of the Road” –
I’ll do my best to explain these here on the blog but if you are more of a visual learner than I would encourage you to check out my companion video to this week’s quilt along which is now posted on our Colourwerx website and Colourwerx UTube channel.

1. Starting: Whenever I start, I like to bring my bobbin thread to the top.  This stops all of those nasty thread nests from occurring as you start. Turning your hand wheel one whole rotation, lower the needle into the fabric and then all the way back up again.  Pull on the top threads and pop the bobbin thread up to the top.  Now hold onto both the top and bobbin threads to start stitching. Secure the start of your stitch by either engaging your “secure stitch function” (check your manuals) or taking a stitch in place.   You can also just start stitching and when you finish going around the shape, you can bring all the threads to the backside, knot the threads and tie off.

This slideshow requires JavaScript.

2.  Start Stitching:  Notice the photos below – the needle is “zagging” just to the outside of the applique shape and then “zigging” back onto the shape itself.  The foot is NOT really positioned in “dead center” of the shape and the background fabric.  The foot actually rides more onto the applique shape itself .  This is where I personally like my zig zag stitch to fall when I stitch.

3.  Stitching Around Curves:  Again check out the companion video as that might help, but the general rule on stitching around curves is as follows:

if it’s an outside curve, stop and pivot on the on the outside edge:  to do this, stop with the needle down on the OUTSIDE edge of the applique, lift the presser foot with the needle still down,  pivot (or turn toward you) the applique piece ever so slightly, drop the presser foot and take a stitch or two until you feel you need to stop again and pivot to maintain your stitch quality and position on the edge of the applique;


…if it’s an inside curve, stop and pivot on the inside edge: just as above, stop with the needle down on the INSIDE edge of the applique, lift the presser foot with the needle still down,  pivot (or turn away from you) the applique piece ever so slightly, drop the presser foot and take a stitch or two until you feel you need to stop again and pivot to maintain your stitch quality and place on the edge of the applique.

When you are turning the corner and the stitch is falling on the outside edge of the applique, try to aim for the same exact point as you go around the corner (see the 4th picture where the purple pen indicates).

Straightaways are easy – curves and circles are not so easy because it requires patience and lots of stop and pivots , stops and pivots to stitch around the curve.  You might find that it will take you just as long to stitch around a small curve as it does for you to stitch the rest of the applique with straightaways. A great example of this is the top of the cat tail or the little paws on the Mini ModDog.   Be patient, slow down and practice.

3.  Stitching In and Out Of A Point: There are some really beautiful ways of stitching in and out of points but this requires dialing your stitch width down and up again as you keep stitching (meaning reducing your stitch width as you approach the point and then increasing your stitch width as you stitch out of the point)…this is a little like rubbing your stomach and patting your head at the same time and takes a lot of practice.

I prefer to do a more “lazy man’s” way of stitching in and out of points.  Stitch all the way down and directly over the point. Keeping the needle down, lift your presser foot and pivot the piece so that it is now at a 45 degree angle to the presser foot.  Take one, (sometimes two) complete stitches so the needle is again on the outside edge but on the opposite side of the point.  Again keeping the needle down, lift the presser foot and pivot the piece so you are ready to stitch down the new side.  Continue on stitching.   It’s appears a bit bulky but it works!

Now with that and a little practice – applique away!

Finish your Animal –
To Make Into a Wallhanging – Once all appliqué stitching is complete, trim your project down so the edges are neat and even.  Here are the approximate measurements of my samples to give you an idea:
•  Mini MoDog 12-1/2″ x 16-1/2″
•  ModCat – 15″ x 21″
•  ModFish – 21″ x 14-16

Bind the wallhanging as desired.

To Make Into a Pillow – Once all appliqué stitching is complete, trim your project down so the edges are neat and even. I’ll explain in detail below what I do for a Mini ModDog, but if you are making a Cat or Fish, you may want to find the appropriate size pillow form first and then cut the project 1/2″ larger than the pillow size and then size the backing fabric accordingly using the Mini ModDog examples below.

Trim the Mini ModDog to 12-1/2″ X 16-1/2″.

I use a Travel Pillow Form for my Mini ModDogs that measures 12″ x 16″.

Cut the Backing Fabric into 2 pieces: 12-1/2” x 14-1/2” and 12-1/2” x 12-1/2”.  Turn and press only one outer edge (not the 12-1/2” edges though) of each backing piece 1/4” over twice to the wrong side to encase the raw edge. Topstitch down the edge to secure. Place the two backing fabric units RIGHT SIDES TOGETHER over the Mod Dog and stitch around all sides. Turn the unit right side out and poke out the corners. Stuff with a 12” x 16” travel pillow form through the slit on the backside.

This now concludes our Wonky Pieced & Easy Applique QuiltAlong – send me your pictures so we can see your cute and fun Wonky Pieced Mod Animals!!

Thank you so much for following along and for your continued support!  Look for more Colourwerx QuiltAlongs on our Colourwerx Facebook page or on our website under QuiltAlongs!mouth21

Until your next colour fix – happy quilting!  Linda & Carl xxoo


Wonky Piecing & Easy Applique QAL – Week 3 – Machine Quilt the Background

Wonky Week 3 SlugWelcome back!   It’s Week #3 of our Wonky Piecing & Easy Appliqué QuiltAlong !  This week we’ll be machine quilting the background fabric.

There are so many different ways you can machine quilt the background fabric and anything goes so don’t be afraid to use this little quilt along project to experiment:

•  you could practice your free motion quilting and simply stipple the background;
BG Quilt 1
•  you could practice ‘matchstick quilting’ – this is simply stitching straight lines about 1/4″ apart up and down over the background fabric; or,

BG Quilt 2
•  you could mark diagonal lines about 3″ apart, set your machine to a decorative stitch and stitch a crosshatch pattern.

BG Quilt 3

Really – anything goes, so have fun ….

But I’d like to share with you three of my favorite machine quilting patterns that look “artsy”, are pretty easy to do and imho, make a great quilted background for smaller quilts like these.  I’ll do my best to explain how to do these patterns here in the blog but if you are more of a visual learner than I would encourage you to check out my companion video to this week’s quilt along which will be posted on our Colourwerx website and Colourwerx UTube channel in a few days.

Linda Week 3

These are the three patterns I use most often:
•  The Wonky Slanted Line pattern – you see this most often in my Mini ModDog pillows and quilts, and if you have the Mini ModDog pattern, you’ll find instructions on how to do this pattern on page 2;

Wonky Slanted

•  The Curvaceous Quilting Pattern – easy to do and very relaxing!

Curvaceous

•  The Wonky Chevron Pattern – this is fun and  is wonderfully forgiving.

Wonky Chevron

Create the Quilting Sandwich —
First you’ll need to gather your Background Fabric (a fat quarter or a piece about 18″ x 21″) , and a scrap piece of batting or fusible batting of the same size.  If you’ve already decided to make your animal into a wallhanging, then you should also gather a fat quarter size of fabric to use as your backing fabric too. (If you are making a pillow, you don’t need to add a backing fabric unless of course you think you might wash the pillow in the future).

Place the batting on the WRONG side of the Background Fabric and secure.  You can do this by safety pinning the two layers together or using a fusible adhesive spray like 505 Temporary Spray Adhesive.  If you are making a wallhanging, go ahead and fuse (or safety pin)  your backing fabric to the other side of the batting as well.    You now have your quilting sandwich ready for machine quilting.

FuseWonky Slanted

Let’s get started with the first quilting pattern –

#1 – The Wonky Slanted Line Pattern —
When I quilt this pattern, I like to use a chunky thread – like the Aurifil 12 weight – and a variety of different thread colors – usually I choose 5-6 different colors.  But this method also looks very nice with any variegated thread or even just a lovely solid thread.

Also just a tip – if you are using a a chunkier thread, make sure you change your sewing machine needle to a larger size.  I prefer to use the Schmetz 90/14 Quilting Needle.  This size accommodates a variety of different weight threads with no problems.

schmetz-quilting-needles-size-90-14-184-p
The first step is to draw a few wonky lines on your background fabric.  With a iron off marker (or water soluble pen), just drop your ruler at a slant and draw a line.  Slant the ruler in opposite direction and draw another line.  You can also use a Hera marker to make these lines as well.  Hera Markers are sold at all quilt shops and actually just crease your fabric with the rounded edge – so no fear of a marker staining the fabric or never coming off.

Start with about 3-4 lines and with your first thread color.  Set your machine to a straight stitch, leave the feed dogs up and put your walking foot on (or engage your even feed system).  Also set your stitch length to about 3.0 so the stitches are a bit longer.   Stitch directly across those drawn lines.

Wonky 1

Mark another 3-4 lines.  Switch threads if you’d like, and stitch on those lines.

Wonky 2

Continue adding wonky slanted lines and stitching until you have filled the background fabric.


Voila!  Done And it looks super especially behind your dog, cat or fish!Curvaceous

#2 – The Curvaceous Quilting Pattern —
I really love doing curvy quilting – it looks very artsy and I love the movement it provides to the background fabric.  I use this pattern alot when making the ModFish as it gives the feeling that the fish are swimming with the movement the curved lines create.

To start, again set your machine to a straight stitch, leave the feed dogs up and put your walking foot on (or engage your even feed system).  Also set your stitch length to about 3.0 so the stitches are a bit longer.  Start in the middle of the fat quarter and just stitch straight stitches from the top to the bottom, gently ‘ungulating’ from right to left creating a curved stitched line.  Think of driving down a country road – no sharp turns.

Curvy 1

Move over about 2-3″ and stitch another curvy line.  Again move over another 2-3″ and stitch another curvy line.  Keep filling the background with curved stitched lines about 2-3″ apart.
Curvy 2
To fill in the background, next begin to stitch in between the stitched lines with more curvy quilting.  How dense you make the curvy quilting is entirely up to you.  I find that it really depends upon my mood – some curvaceous quilting is quilted quite dense and some not so much…again, anything goes and stop when it looks good to you!

That’s it – doesn’t that look great!?!?Wonky Chevron

#3 – The Wonky Chevron Pattern —
This is a fun pattern, looks great with a variegated thread and one that I use alot on my little ModCat wallhangings .  Once again, set your machine to a straight stitch leave the feed dogs up and put your walking foot on (or engage your even feed system).

The first step is to draw a few chevron-like lines across the center portion of your background fabric.  With a iron off marker (or water soluable pen),  just drop your ruler slanting it right and left and draw wonky angles or chevrons. Don’t worry about making the chevrons too even or regimented – in fact the more uneven they are the better!
Chev 1

Stitch directly on the drawn line  (it’s ok if you are not directly on the drawn line – it’s more of a guide for you to start from…)  Now move down about an inch and “echo” the same chevron pattern but don’t try to be too perfect – in fact, adding little changes or additional little chevrons to “mix it up” as you stitch along makes it look more artsy.

Chev 2

Keep echoing and stitching  out from the middle drawn first chevron until you reach the edge.  Turn the background fabric around and start to do the same chevron echo stitching from the middle drawn line out to the other edge filling up the background fabric with wonky chevron lines.   Check that out!

What fun!  🙂  I can’t wait to see what you guys come up with!  be sure to chedk out the companion video to this week’s blog coming out in a few days on the Colourwerx website and Colourwerx UTube channel .

That’s it for Week #3!!  Next week – our final week – Week #4: we’ll be machine applique stitching our animal shapes onto the background fabric and I’ll be sharing some tips and tricks with you!

Until then, please be sure to email us at colourwerx@yahoo.com if you have any questions.  Or feel free to post progress pictures on our Colourwerx QAL Facebook Group.

Until your next colour fix and next week’s QAL post ~  happy and bright quilting always!    L&C xxoo

Stay at Home and Hop – Let’s Hop To It! – Post #4

PrintHello friends!  Welcome back to our last post for the Stay at Home and Hop Virtual Designer Shop Hop!

I have one last list of designer links to share with you!  When you need a break from sewing or from the news this week, hop on to your Ipad or computer and visit my fellow friends and colleagues below.  In case you’ve missed my previous posts or lost the links, I’ve also listed ALL the shop links from my previous posts at the end of this blog post!

I hope you’ll take a moment from your day and pop in to see some of my friends!  The hop runs until Tuesday, March 31st!

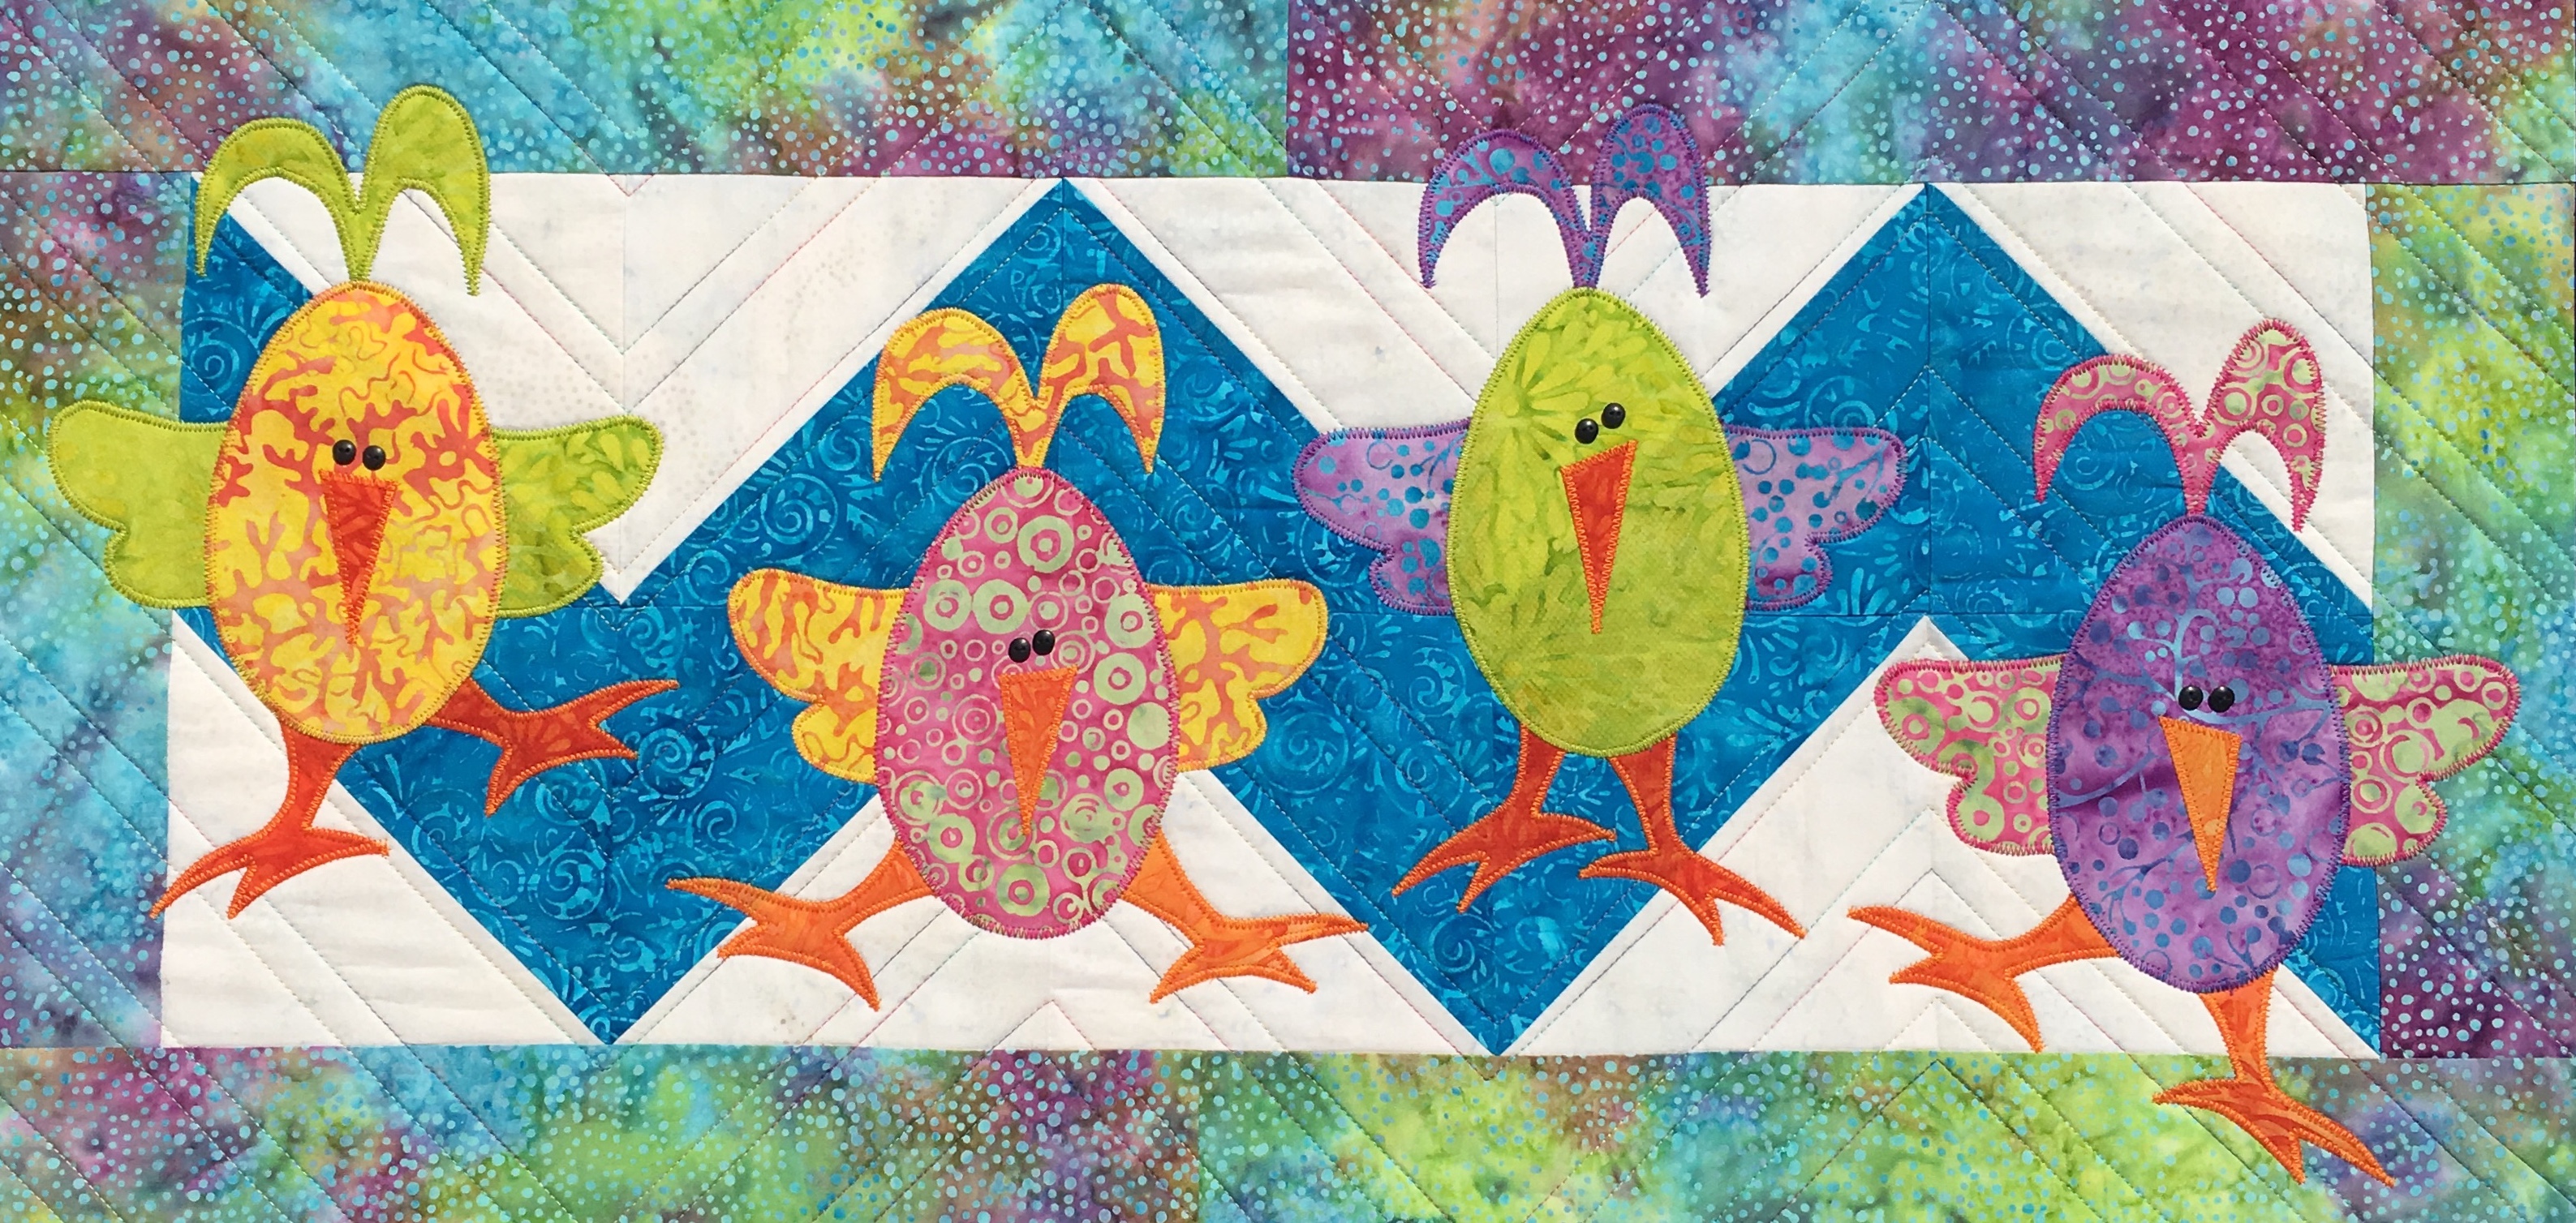
And speaking of hopping – be sure to download my free pattern – the Easter Hip Chicks Table Runner!  This pattern will only be available as a free download for a limited time!   To download the  Easter Hip Chicks Table Runner, just click here to download the pattern for free!!

New Chicks 1

OK – LET’S GET HOPPIN”!!  Here’s the last list of links for you to visit from our Stay at Home and Hop with Us Virtual designer Shop Hop! Click on the links below to take you to that designer’s shop!

DaySpring Quilt Company
https://www.dayspringquiltcompany.com

Ms P Designs, USA
https://www.mspdesignsusa.com

Stitchin’ at Home
http://www.stitchinathome.com

Sew Joy Creations
https://www.sewjoycreations.com

Ships & Violins
https://www.shipsandviolins.com

Patti’s Patchwork
https://www.pattispatchwork.com

Your Sewing Friend
https://www.etsy.com/shop/yoursewingfriend

The Geeky Bobbin
https://www.geekybobbin.com

Colourwerx Designs (that’s me!!)
https://www.colourwerx.com

Kate Colleran Designs
https://www.seamslikeadream.com

mouth21Thank you for hopping with us, friends!  We all really appreciate your support at this time!  Happy quilting! xxoo L&C


And if you missed my Stay at Home & Hop previous posts this last week – here are those Designer shop links again for you to explore or share with your quilty friends:

Lone Star Pattern Works
https://www.lonestarpatternworks.com

Powered by Quilting
https://www.poweredbyquilting.com

Cottage Rose Quilt Patterns
https://www.cottagerosequiltshop.com

The Cloth Parcel
https://www.theclothparcel.com

Faith and Fabric
https://www.faithandfabricdesign.com

Linen Closet Designs
http://www.linenclosetdesigns.com

Designs by Sarah J
https://www.designsbysarahj.com

Rona the Ribbiter Quilts
https://www.ronatheribbiter.com

Quilt Fox Designs
https://www.quiltfox-design.com

Seam to Be Sew
https://www.seamstobesew.com

Studio R Quilts
https://www.studiorquilts.com

Toadally Quilts
https://www.toadallyquilts.com

From Blank Pages
https://www.fromblankpages.com

Cotton Street Commons
http://www.cottonstreetcommons.com

Puppy Girl Designs
http://www.puppygirldesigns.com

Phoebe Moon Quilt Designs
https://www.facebook.com/phoebemoondesgins

The Devoted Quilter
https://www.devotedquilter.com

Christa Quilts
https://www.christaquilts.com

Stitched by Susan
http://www.stitchedbysusan.com

Tamarinis
https://www.tamarinis.com

Bequilter   
https://www.beaquilter.com/shop

Presto Avenue Designs
https://www.prestoavenuedesigns.com

Cheryl Lynch Quilts
https://www.cheryllynchquilts.com

Love to Color My World
https://www.lovetocolormyworld.blogspot.com

Hissyfitz Designs
https://www.hissyfitzdesigns.com

Canton Village Quilt Works
https://www.cvquiltworks.com

Anjeanette Klinder Designs
http://www.anjeanettek.com

Pat Sloan – The Voice of Quilting
https://www.blog.patsloan.com

Said With Love
https://www.saidwithlove.com.au

Orange Blossom Quilt Design
https://www.orangeblossomquilt.com


Stay at Home and Hop – Meet Some of My Favorite Friends! – Post #1

Welcome to our Virtual Designer Shop Hop!  The word is to stay at home so why not just stay at home and hop with us!?!Print

These are extraordinary times we are living through and and many of us are no doubt stitchin’ up a storm at home:  perhaps starting new projects, completing those in progress or finding some beloved UFO’s from long ago that require nothing more than a seam here or there to complete them.

But with all that stitchin’ goodness, I bet you wouldn’t mind taking a break….right?   Yup! I thought so !  Good!

Carl and I feel so lucky to be part of this amazing quilting community filled with wonderful quilt shops, quilting guilds, Facebook QuiltAlongs, and best of all, my fellow pattern designers who are always coming up with new techniques and patterns  to use up our stash and make gorgeous quilts, handbags or garments !

So for these next ten days,  I want to take an opportunity to introduce to you to some of my favorite quilting colleagues.  A great many of them of have been in industry as long as we, but many are new and just starting out!  All of these quilty businesses are super eager to greet you – our stay at home hoppers – and are offering you super special greetings and/or incentives when you hop over to their websites!

I have over forty websites to share with you but let’s start with these ten first…

I’ll be back in touch with you within a few days to share more!  Now go forth and explore and have fun!  You never know what you might discover!!

Click the link to take you to that designer’s shop! 

Bequilter   
https://www.beaquilter.com/shop

Presto Avenue Designs
https://www.prestoavenuedesigns.com

Cheryl Lynch Quilts
https://www.cheryllynchquilts.com

Love to Color My World
https://www.lovetocolormyworld.blogspot.com

Hissyfitz Designs
https://www.hissyfitzdesigns.com

Canton Village Quilt Works
https://www.cvquiltworks.com

Anjeanette Klinder Designs
http://www.anjeanettek.com

Pat Sloan – The Voice of Quilting
https://www.blog.patsloan.com

Said With Love
https://www.saidwithlove.com.au

Orange Blossom Quilt Design
https://www.orangeblossomquilt.com

Talk to you soon!  Stay safe and sane!
And happy and bright quilting always!  xxoo&C

Stay Home & Hop with Us!!

PrintHi Quilty Peeps!

No doubt like me, all of your upcoming quilty events have been postponed or cancelled and you find yourself now stitchin’ up a storm at home! Why not take a break and join me on a virtual pattern designer shop hop!?!

Starting on Saturday, March 21st, I’ll introduce you to some of my favorite quilty friends in the quilting industry!!  Starting this Saturday, I’ll invite you to explore the newest offerings, patterns and notions from my fellow colleagues. You’ll meet new pattern designers, explore new quilting websites, and perhaps make a purchase or two along the way. All of them have something unique to offer to you!!

With new and exciting sites to explore throughout the week, you’ll be happy you took and break and virtually hopped and shopped with all of our new friends!

You can follow along in the fun by just subscribing to my Colourwerx Blog (on the right) or subscribe to my Colourwerx Newsletter.  Every few days, I’ll send you a list of links to my friends’ websites for you to discover and explore and shop right at home!

Until then, stay safe and be sane!  XXOO L&C


PaintBox QAL – Week #6 -Machine Quilting Your Top

PaintBox Front Cover copyWelcome back !!  It’s the final week of our PaintBox QuiltAlong and this is the week to finish off your quilt top.

Last week we pieced the triangles and also stitched the rows together to complete your quilt top.  You can review Week 5’s post right here!

This week, I’m going to share some insights, successes and some fails (at least for me) into machine quilting your Paint Box quilt top on your domestic sewing machine.

Full disclosure now! – I am “the world’s worst free motion machine quilter” (at least that’s what I think) and because of that – I own a longarm machine and 100% prefer my quilt tops machine quilted on my longarm with an overall pattern or for something fancier, sent to a professional machine quilter like  Teresa Silva of Quilting is my Bliss for some of her gorgeous free hand long arm machine quilting – however, I know that not everyone can afford long arm services or a long arm machine or may just prefer their tops not to be longarmed, so hence this week’s blog subject about quilting your top on your domestic home machine!

However before moving on and in case you are taking your PaintBox quilt to your favorite longarm machine quilter,  pictured below is the pantograph all over quilt design I use on most of my PaintBox samples – it’s called Monsoon and I love it!

Pattern 1

On the other hand though sometimes a nice straight stitch will do the trick.

One of my favorite books out there for ideas on using your walking foot and  straight stitch machine quilting is Jacquie Gering’s “Walk” – I highly recommend this book as it’s a terrific reference on straight stitch machine quilting and is chocked full of different ideas and designs that you can quilt on your tops using just the walking foot and your straight stitch on your domestic machine.

The designs she offers range from very simple to very complex but all are accomplished with just a straight stitch and your walking foot (or even feed foot), and best of all no lowering of feed dogs or feeling totally out of control (my problem with the process).  Also the sequel to this best selling book, “Walk 2.0”will be released in May, so both books together would be a terrific reference pairing for your quilting library!

When I do choose to quilt my tops on my domestic machine, I prefer the control and regimented pace I feel when using my walking foot/dual feed foot, keeping the feed dogs up and just using my straight stitch across the top.  That doesn’t mean I don’t make a design though.  Here’s some “curvacious” quilting I just completed on this single ModCat wallhanging.  My feed dogs were up, I set my machine to the straight stitch and used my dual feed foot (which is similar to a walking foot).  I then gently moved the quilt top from side to side to create the gentle curves.

Cat Curvy
And some more quilting I did on a ModTiki – again nothing fancy – just straight stitch quilting and making a wonky chevron look.  Beautiful and looks fancier than it really is!
Tiki Chevron
First things first – Get a plan!

You should have an idea of what pattern or stitch you might like to machine quilt on your quilt top before beginning.  I like to have a plan before I begin quilting.  Instead of marking your top and then erasing and marking and erasing, why not take a picture of your quilt top and print out the picture on your printer.??

Now you can draw on the printout your ideas for patterns or lines across the quilt top and see how you might like to quilt your top.  You can do this just once or print more copies and try out a whole bunch of different ideas.  Penciling in your quilting ideas before beginning will give you an idea of what the design will look like on your quilt top and also provide you with at the very least a starting point – a good thing!  Here’s a few examples of the quilting ideas and plans I drew before starting to quilt my PaintBox quilt top.  The first one is just some simple straight up and down gridding…..

….and the second drawing plan had simple diagonal cross hatching plus a squarish design within the blocks…

Basting Your Quilt Top with the Batting & Backing Fabric
Next get ready to make your quilting sandwich – meaning baste your quilt top with the batting and backing.  For this project, I spray basted my batting to my backing fabric and then again, spray basted the top to the batting.  This was my first time spray basting a larger quilt like this and I  used the 505 Temporary Adhesive Spray .  It worked great – no safety pins needed.
Baste 1
It did take quite a bit of patience though and I had to roll the batting (and then the quilt top) accordian style and work on only basting about 1 foot at a time.   I just kept smoothing and smoothing the fabric or batting across the surfaces and then gave it a really good pressing before starting to quilt the top.

If you like using fusible spray to baste your quilt – please check out Christa Watson’s tutorial on basting your top.  She actually spray bastes small to queen size quilts with her method, and machine quilts all of her tops on her domestic machine with no problems!

WATCH CHRISTA’S BASTING YOUR QUILT TOP TUTORIAL HERE!

Marking and the First Stitches to Stabilize
I chose to diagonally cross hatch my quilt top referring to my 2nd plan above.  I wanted to stitch a 1/4″ to either side of the seam lines so that it would be like a double stitch line, but I needed to mark in some of these lines first.  I did use my Frixion pen to make the markings BUT BUT BUT – I am fully aware that my pen markings may reappear sometime in the future  as this is the chance I take when marking my lines with the Frixion pen.  If you are not ok with this, please do use a washable marker or water soluble pen. 

I also threaded my machine with a 90/14 Microtex Needle and King Tut 40 weight thread in the color of Alabaster.  This particular thread color is a wonderful variegated neutral and works marvelous with almost any fabric collection.

Since I don’t like to ‘fight’ with my quilt when I machine quilt I rolled up the sides of the quilt diagonally toward my first center seam lines to be machine stitched.  The first lines I stitched were what I call the “main veins” of the quilt.  Since I was cross hatching on a diagonal, the first seams I stitched were the long diagonal lines from top left to bottom right and vice versa thus stitching what you might call a large “X” across the quilt.

The main “veins” of the quilt have now been stabilized and I can now cross hatch and stitch my diagonal lines working always out from the center “main veins” of the quilt to the outer edges.

Stitch 1
And I kept stitching and stitching……

Stitch 2

…and stitching and stitching……

Stitch 3

…and then I decided to stitch 1/4″ to either side of the vertical and the horizontal seam lines….
Stitch 4

And I kept stitching and stitching……as you can guess, although simple to do, this process can take a long, long, long time.  Just cross hatching 1/4″ to either side of the seam lines on this 48″ square top took me almost 7 hours of straight stitching with just a few short breaks to stretch here and there.

Stitch 6
Next I thought I would try my idea to machine quilt the ‘square within the square design’  I had drawn on my quilt top photo (see below) —

Drawing 2B

I marked a center square in the middle and tried out my idea…..

Well – time again for another full disclosure!  I hated it!  It just didn’t ‘sing’ to me and frankly I was having a hard time keeping the stitched squares even with the sewn squares –  it just looked sloppy!  😦    So out came the seam ripper and time to reconsider what to do next.

Eager to finish the quilting as I was now in hour 8 of machine quilting, I decided to carry on with the diagonal and straight seam quilting and halved the distance between those lines I already stitched.

The results as you see was a nice effect even though some of my stitching was a bit wobbly due to the evening wearing on and I was getting tired!

Stitch 9
Life Lesson 101!  Which reminds me to remind you of one big life lesson – be kind to bekindyouyourself – I have to remind myself of this all the time!  We are our own worst critics!  But let’s face it – we are not perfect and guess what – your machine quilting will likely not be either….its only fabric and it is a handmade item.  Also believe me on this one – your quilt top always looks 200% better after you remove all of your drawn lines (that you may or may not have stitched on when quilting your top) and after the quilt is squared down and trimmed.

Once I was completed with my machine quilting, I trimmed the batting/backing edges square to the quilt top and cut the binding from my remaining sashing fabric and sewed it on.

Viola!  All done and ready to grace our dining room table…

Table 1

…or be taken on a nice picnic outside on this beautiful Spring day in our desert oasis!!

Outside 2


IMG_9836

This now concludes our PaintBox QuiltAlong – send me your pictures so we can see your gorgeous PaintBox quilts!

Thank you so much for following along and for your continued support!  Look for more Colourwerx QuiltAlongs on our Colourwerx Facebook page or on our website under QuiltAlongs!mouth21

Until your next colour fix – happy quilting!  Linda & Carl xxoo


New Colourwerx QuiltAlong Starting January 28th – Making PaintBox

Carl and I are super excited to announce our next Colourwerx Quilt Along starting on January 28th!   Yes, by popular demand, we’ll be making the Paint Box pattern together.  This is a very easy to piece yet fun quilt to make and I’m so happy that the Facebook Colourwerx Quilt Along Group chose this one for our second quilt along!

PaintBox Front Cover copy

WHAT’S A QUILT ALONG?   First, if you are unfamiliar with the concept of a “quilt along” – here’s how it works!

The quilt along is almost like a virtual sewing party or taking a virtual sewing lesson without leaving your home.   Everyone is invited to join in and you can sew along with me each week as I post lessons, tip and tricks or you can just observe from afar or just take the project at your own pace!  Anything goes!  As with all of my quilt alongs, all the videos and blog posts will remain accessible to you for many years after the quilt along has completed so you can jump in at anytime.

You can check our our last quilt Along – making the ColourMaze quilt by clicking here!

There is no cost to join in on the quilt along – and all you need is the pattern, a triangle ruler and to gather materials.  The Paint Box Quilt Along will begin on January 28th and will last 6 weeks – here ‘s the schedule.

PaintBox QAL Slug

You can also view my Introductory video by clicking here –

Screen Shot 2020-01-12 at 3.05.01 PM

HOW TO JOIN IN? – You can choose to follow along week to week here on the Colourwerx blog or by joining our free Colourwerx Quilt Along Facebook group where you can ask questions, share your progress and of course, post pictures of your finished projects so everyone can share in the fun!  You can also  share this invite and any QAL news with other quilty buddies and invite them to join along in the fun!

JOIN THE COLOURWERX QAL FACEBOOK GROUP HERE

Materials to make the Paint Box quilt are as follows:PaintBox Front Cover copy
1.  ThePaint Box pattern by Colourwerx- you can purchase the paper version or a PDF – and if you use the discount code QAL at checkout you’ll save 10% – yippee!

PURCHASE THE PAPER VERSION OF THE PAINT BOX PATTERN
PURCHASE THE PDF DOWNLOADABLE VERSION OF PAINT BOX PATTERN 

2.  You’ll need a speciality triangle ruler – CGRT90-1specifically the Creative Grids 90˙ Triangle Quarter Square Ruler CGRT90 -we have these available for purchase in our Colourwerx shop and again, if you use the discount code QAL at checkout you’ll save 10% – double yippee!


PURCHASE THE CREATIVE GRIDS TRIANGLE RULER HERE

3.  Fabrics Needed:  One 2-1/2″ strip roll with at least (40) strips (or cut from your stash (40) strips) plus two 1-yard cuts of coordinating fabrics.

HOW ABOUT SOME FABRIC KITS?  Both Colourwerx and our good sewing pal, Christa Watson from Christa Quilts have put together a special fabric kit for the Paint Box Quilt Along! Both of these kits are offered at a discount for a limited time!

PaintBox Designs copy

BRIGHT AND COLORFUL GRIDWORK KIT FROM CHRISTA QUILTS: Christa’s kit features her bright and geometric new fabric collection called “GridWork” (pictured on the left) and she’s offering a discount on this – use the code PAINT. (This kit does not include the pattern).


GORGEOUS JEWEL BOX BATIK KIT FROM COLOURWERX: If you love those jewelled toned batiks, then this Colourwerx Jewel Box batik fabric kit featuring Island Batik fabrics is the perfect kit for you.

PURCHASE COLOURWERX’S JEWEL BOX BATIK FABRIC KIT

That’s it!!  I hope you’ll join us for some colouricious fun as we start our next Quilt Along !!  I can’t wait to start making this quilt with your guys!  Until January 28th – please be sure to email us at colourwerx@yahoo.com if you have any questions.  Or feel free to post a question on our Colourwerx QAL Facebook Group!

Until your next colour fix ~  happy and bright quilting always!    L&C xxoo

Waterfall – New Pattern Preview

CW125 Waterfall Front copyIt’s time for another pattern preview from our Fall release of new patterns that previewed at the International Quilt Market in Fall 2019.

Meet Waterfall. You can purchase the pattern in paper or PDF format right here in our Colourwerx shop!

I absolutely love this pattern that Carl designed.  The 15″ block itself is quite simple but when twelve 15″ blocks are stitched together to make the 60″ x 60″ quilt,  the secondary patterns created are magical and it’s pretty difficult to decipher where the actual block starts and stops.

Waterfall Patterns

Selecting fabrics for the Waterfall pattern is super simple too.   Just 2-1/2 yards of a neutral background fabric plus twelve 3/8 yard cuts of other fabrics – the twelve fabrics should be separated into four color groups with each group containing three fabrics.

Cutting and stitching each block together is a breeze and as long as your 1/4″ seam is consistent – you shouldn’t have any worries about creating this simple block and finishing off a super simple quilt for yourself or a loved one in no time. I find once I get stitching this quilt – I cannot stop – the block is fun to make and I can’t wait to see the finished quilt put together.

Our first version of this new pattern was made for Island Batik using our second signature collection,”Jewel Box” designed especially for Colourwerx by Kathy Brett Engle.

Oasis copy

We also made a Cool and a Warm version out of Kaffe Fassett Collective Classic fabrics for our friends at Free Spirit Fabrics.

Here’s another one I can’t wait to make using Martha Negley’s rich and super saturated “Veggies” collection from again our friends at Free Spirit Fabrics.

Waterfall Veggies Rev 2
We also made one using the Good Vibes Only collection designed by Sassafras Lane for Windham Fabrics.  This version graces the cover of our pattern!

New GVO Waterfall copy
And here are a few more virtual versions that we submitted to various fabric companies using a selection of gorgeous fabrics  from Figo fabrics, beiges and taupes from Windham Fabrics and also a Christmas themed fabric from Michael Miller Fabrics (how appropriate considering the day I am writing this post 🙂 !!

This slideshow requires JavaScript.

The possibilities for this Waterfall pattern are endless!
Purchase the Paper Waterfall Pattern here! 
Purchase the PDF Waterfall Pattern here!

And also be sure to check back into our Colourwerx shop as we will have kits for most of these versions coming real soon!

And of course, by all means – please do send us a picture of your completed Waterfall quilts – we always love to see and share all of your beautiful creations made using our Colourwerx patterns!

Carl and I are so thankful for your support and wish you happy and bright quilting always!  And also Merry Christmas and the happiest of holidays to you all!  Until your next colour fix and see you in 2020 ~ L&C xxoo