

Hello! And welcome to the ‘first week’ of our second Colourwerx QAL (quilt along) 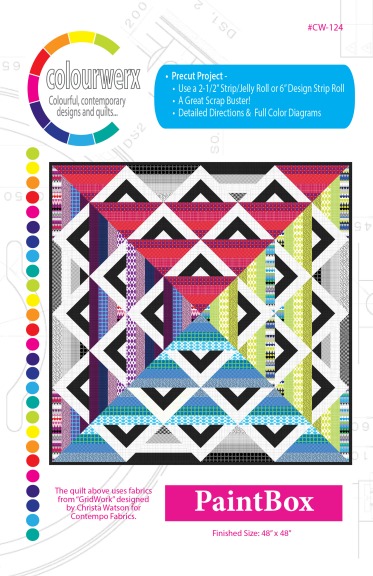 where we’ll be making our super fun Paint Box Pattern!
First, I want to thank you so much for joining us here and on our Facebook Colourwerx QuiltAlong Page. Whether you’ll be sewing up the pattern along side us or just observing from afar, we welcome you and are overwhelmed by your enthusiasm so far – so thank you, thank you, thank you!
Also, if you want to join with other quilty friends and aren’t yet a member of our Facebook group, I invite you to join our free QAL Facebook group where you can ask questions, share your progress and of course, post pictures of your finished projects so everyone can share in the fun! Also feel free to share this invite and any other QAL news with quilty buddies and invite them to join along in the fun!
JOIN THE COLOURWERX QAL FACEBOOK GROUP HERE
Look for a companion video to be posted later this week…..
So this is Week#1 of the Paint Box QAL – First let’s review the schedule!

As you can see it’s a 5-week QAL this time, but please know that you can take it at your own pace and join in anytime. All of the videos and blog posts will remain here, as well as be posted on our website and social media pages throughout the year. It’s free to join and we’ll be making the 48″ x 48″ quilt top. Feel free to hop in anytime!
GATHER YOUR PATTERN, MATERIALS & TOOLS —
Here’s what you’ll need though to join in on the stitchin’ fun –
• The PaintBox pattern by Colourwerx – use the coupon code QAL at checkout to save 10% off the pattern! Yippee!
PURCHASE THE PAINTBOX PATTERN – PAPER VERSION
PURCHASE THE PAINTBOX PATTERN – PDF VERSION
• A strip roll (or jelly roll) – choose a strip roll containing (40) precut 2-1/2″ wide strips – alert! you’ll need to cut each strip to 2″ wide!! If you’d like to “bust your stash” – Cut (40) 2″ wide x 41-43″ long strips from your stash;

• Sashing Triangles & Binding – choose two coordinating fabrics that match or compliment your strips – these fabrics make up the “sashing triangles” – the black and white striped triangles you see on the pattern cover. You’ll need a 1-yard cut of each fabric. Keep in mind that one of these fabrics will also be your binding.

• A Speciality 90 Degree Ruler for Cutting the Triangles – the Creative Grids Quarter Square Triangle Ruler CGRT90. I really like the Creative Grids brand of rulers – first, they have a non-slip surface so it won’t slip while cutting and secondly, the measurements are clear and exact on the ruler to assist you in lining up your strips seams straight and true while cutting the triangles. We have these available for purchase in our Colourwerx shop and again, if you use the discount code QAL at checkout you’ll save 10% – double yippee!
PURCHASE THE CREATIVE GRIDS TRIANGLE RULER HERE

• Optional for the QAL – Backing Fabric : 3-1/2 yards
WANT A FABRIC KIT INSTEAD??
Both Colourwerx and our good sewing pal, Christa Watson from Christa Quilts have put together a special fabric kit for the Paint Box Quilt Along! Both of these kits are offered at a discount for a limited time!

GORGEOUS JEWEL BOX BATIK KIT FROM COLOURWERX: If you love those jewelled toned batiks, then this Colourwerx Jewel Box batik fabric kit featuring Island Batik fabrics is the perfect kit for you.
PURCHASE COLOURWERX’S JEWEL BOX BATIK FABRIC KIT
START THINKING ABOUT COLOUR PLACEMENT–
While you’re gathering your fabrics, pattern and tools this week, it’s time to start thinking about color placement on the Paint Box pattern. Part of the fun of making the Paint Box pattern is that when it is finally assembled and finished, lots and lots of secondary designs pop up and its hard to figure out where the individual block starts and stop.
Here’s a quick slide show of the five Paint Box patterns I’ve made so far so you can see different colour combinations at work:
When I start a new Paint Box quilt – I first start thinking about dividing my (40) fabric strips into five colour groups which will contain eight (8) strips each.
One of the easiest ways to figure out colour placement is to actually colour in a black and white diagram of the quilt top. It may take a few passes but once you settle in on colour placement, the actual sorting and stitching together of your strips will go so much faster.
Here’s an example of how I planned out the Paint Box quilt you see on the pattern cover. This one uses Christa Watson’s of ChristaQuilts new fabric collection, Gridwork.

Now it’s your turn to start thinking about colours. Use this handy black and white diagram below to assist you in planning your colour placement for your Paint Box quilt. You can use crayons, colored pencils or markers – whatever works for you. I’ve shaded in the the sashing triangle fabric areas – these strips will be cut from your two complimenting 1-yard cuts of fabric.
DOWNLOAD AND PRINT THE PAINT BOX LINE ART HERE

That’s it for Week #1!! Next week – Week #2: we’ll be Sorting the Strips into Groups and Cutting – woohoo!
Until then, please be sure to email us at colourwerx@yahoo.com if you have any questions. Or feel free to post progress pictures on our Colourwerx QAL Facebook Group.
Until your next colour fix and next week’s QAL post ~ happy and bright quilting always! L&C xxoo

Every time you make another quilt it’s my new favorite! Keep up the awesome work!
LikeLiked by 1 person
Thank you Christa!!! Love your fabrics too!
LikeLike
I think it would be helpful to have a B&W diagram with the triangles all put together, instead of the quadrants and group 5’s broken apart.
LikeLiked by 1 person
Hi Jo: And thanks for your suggestion – I will definitely incorporate your suggestion into the next QAL – in te meantime, you could refer to the quilt top diagram in the pattern 🙂 Thanks so much!
LikeLike